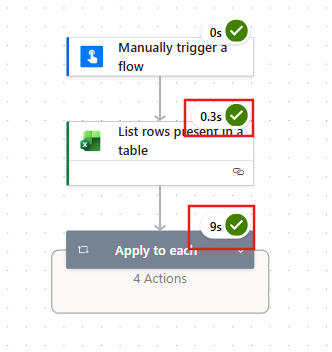
Generating multiple documents and distributing them to a large number of recipients can be a time-consuming and painful administrative task. With Power Automate, you can streamline this process and reduce its execution time from more than 10 minutes to less than 10 seconds:
In this blog, we will build an end-to-end document generation process using Power Automate, where multiple PDF documents are created from a Word template and populated with data extracted from an Excel table. These same PDF documents are emailed to the recipients whose addresses are stored in the same Excel table.
Solution overview
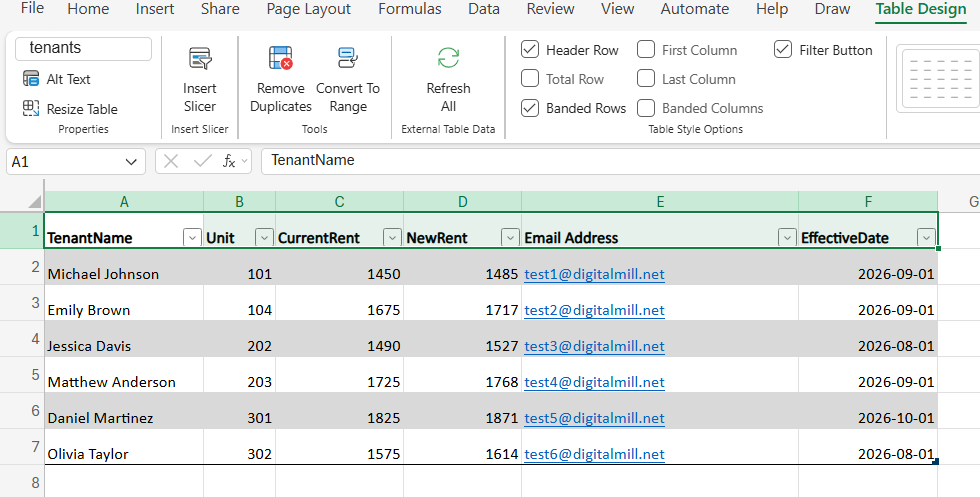
For the purpose of this blog, we will work with a scenario where a property manager needs to generate and distribute multiple rent increase notices to tenants in a residential building. To accomplish this, we will work with the following Excel file, where tenant information is formatted as table:
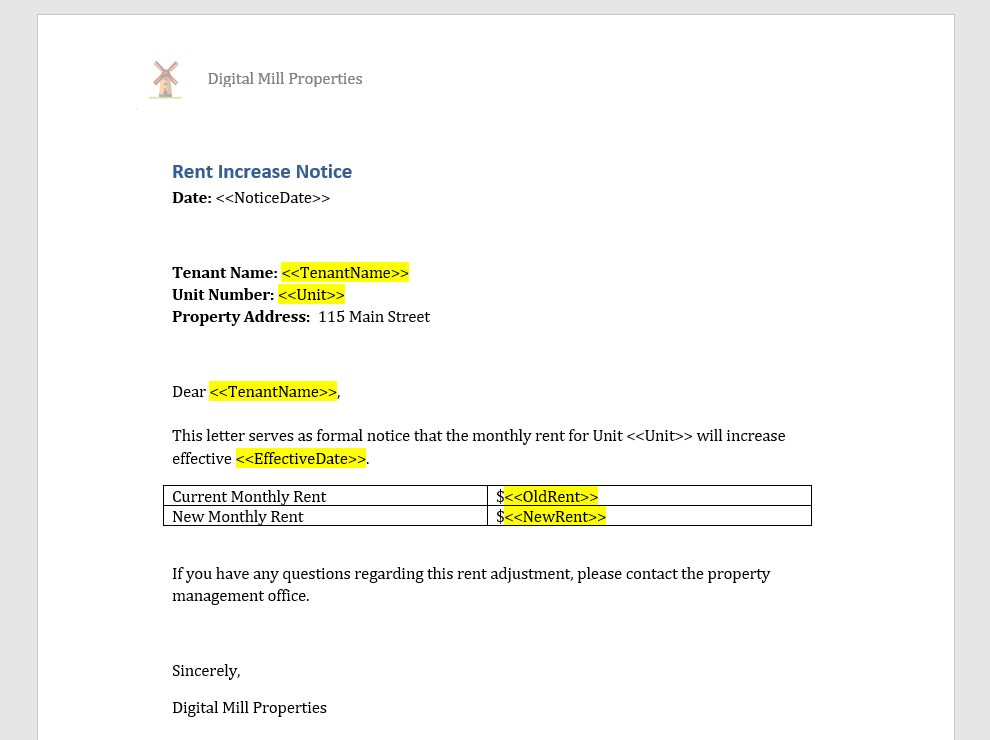
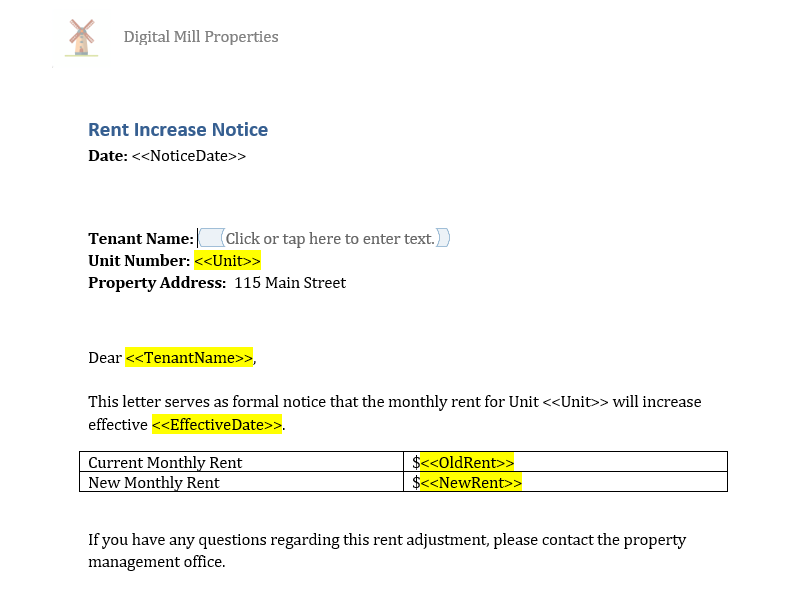
Each notice follows a standard template created with Microsoft Word, with only a few fields varying from one tenant to another:

The Power Automate flow will read each record from the Excel table, populate the corresponding fields in the Word template, generate a PDF version of the document, and send it to the appropriate tenant using the email address stored in the dataset:

Note: this solution relies on premium Power Automate connectors, so users with a Power Automate Free license may not be able to implement it completely.
Reading data from Excel table with Power Automate
The first step is to read the tenant data from the Excel table with the List rows present in a table action. Configure it by selecting the appropriate workbook and table (refer to this blog or this video for further instructions):
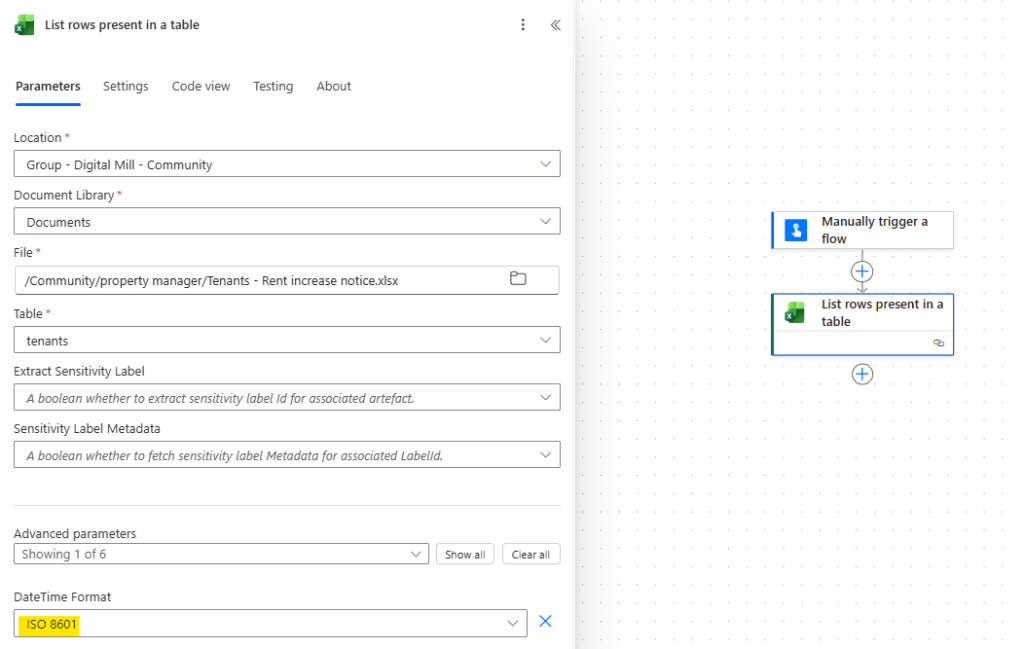
Make sure to set the DateTime Format parameter to ISO 8601, so we can ensure the dates from the table can be easily used in later Power Automate actions.
If your data lives in Excel but is not formatted as a table, you can use Office Scripts to read it directly from worksheet ranges.
Setting up the Word template for Power Automate use
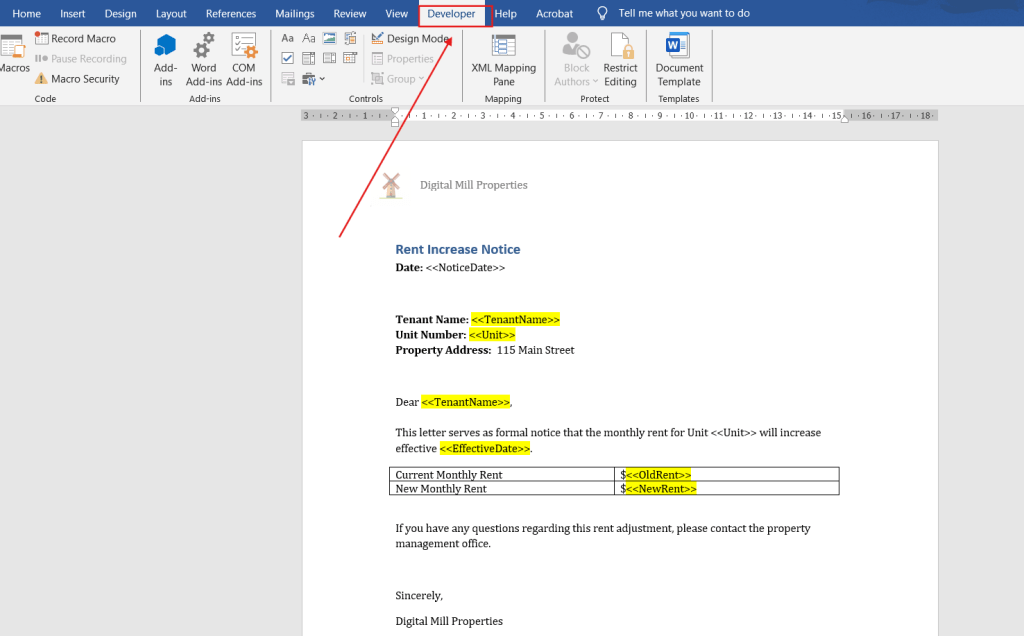
After retrieving the Excel data, the next step is to configure the Microsoft Word document to transform it into a template usable in Power Automate. In this example, we will work with the following rent increase notice, where all fields highlighted in yellow must be dynamically populated with the data from the Excel table:
Right now, the content highlighted in yellow is simply formatted text. To make these fields available to Power Automate, they must be converted into content controls. Open the Desktop version of Microsoft Word and navigate to the Developer tab (highlighted in red):
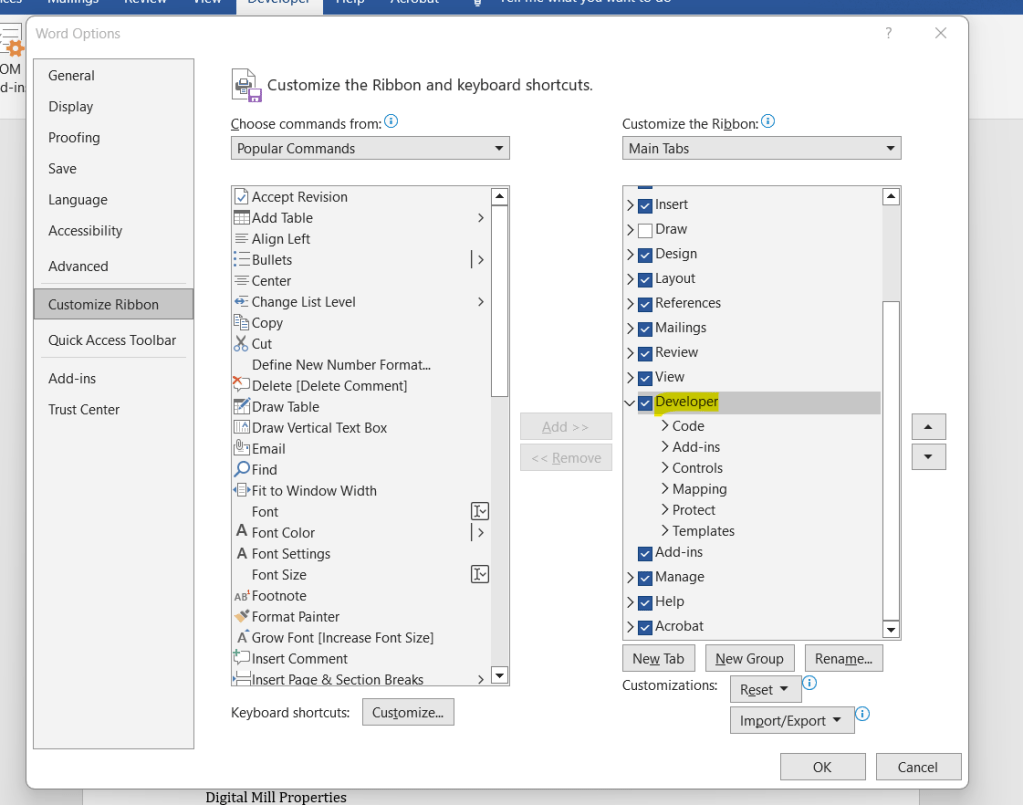
If you cannot find the Developer tab, go to the Word options and customize the ribbon to display it. The exact steps may vary depending on you version of Microsoft Word:
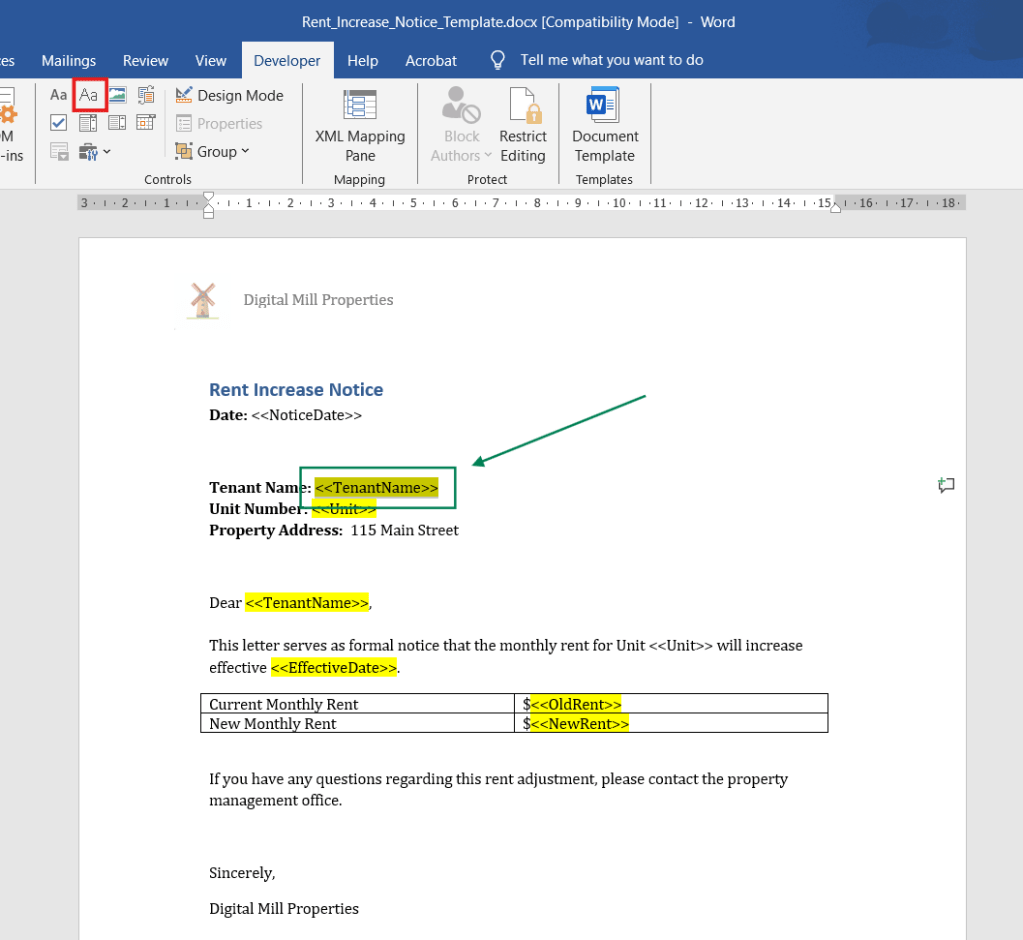
Once you the Developer tab is visible, select the text that should be dynamically populated (highlighted in green below) and click the Plain Text Control (highlighted in red):
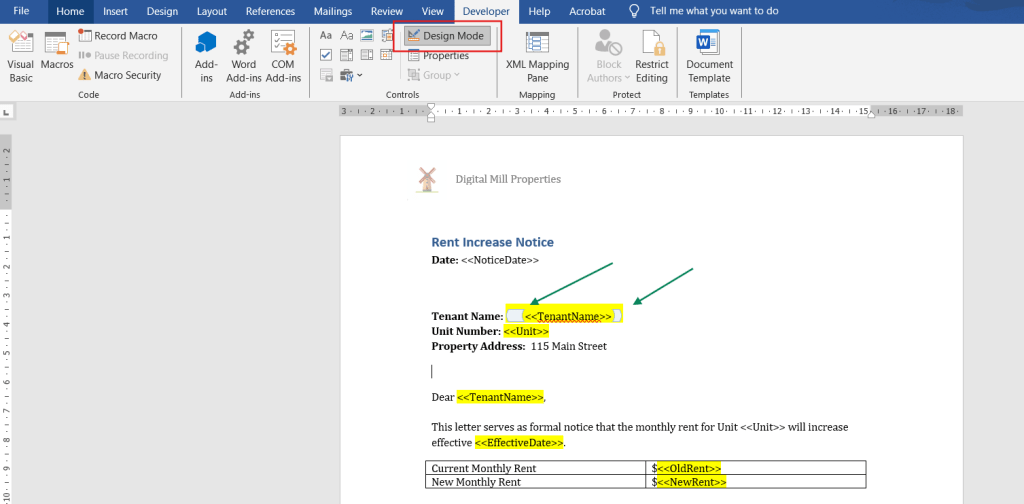
Additionally, make sure to enable the Design Mode (highlighted in red), so you can make the controls easier to identify while designing the template. This will display visible markers around each control (highlighted in green):
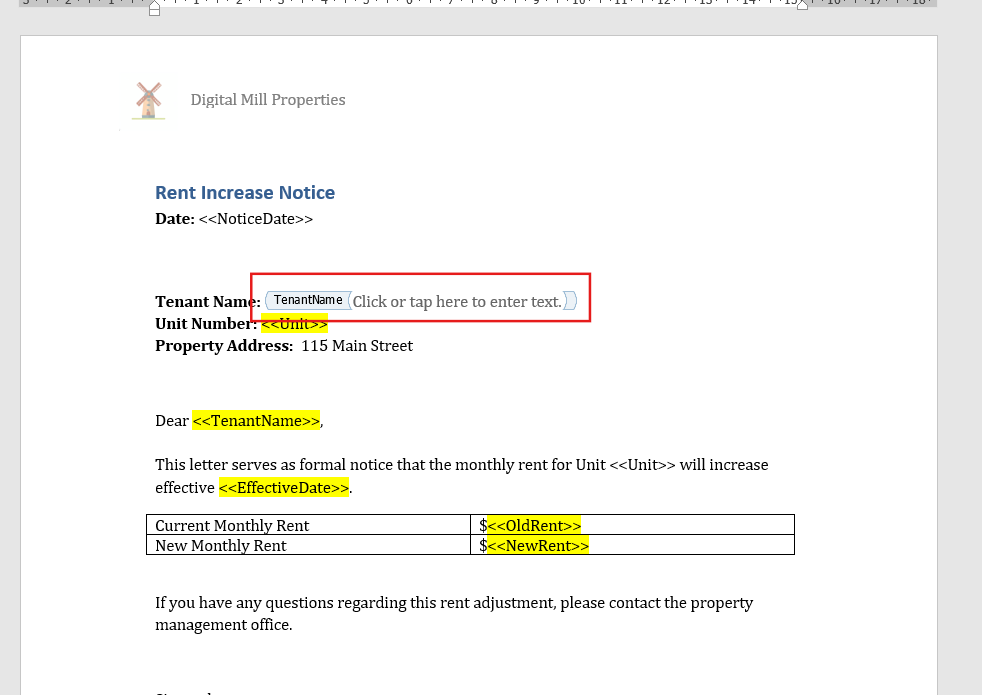
At this point, you can remove the yellow highlight and the placeholder from the control (<<TenantName>>), since its value will be populated by Power Automate, using the data from the Excel file. The default Click or tap here to enter text message will then be displayed:
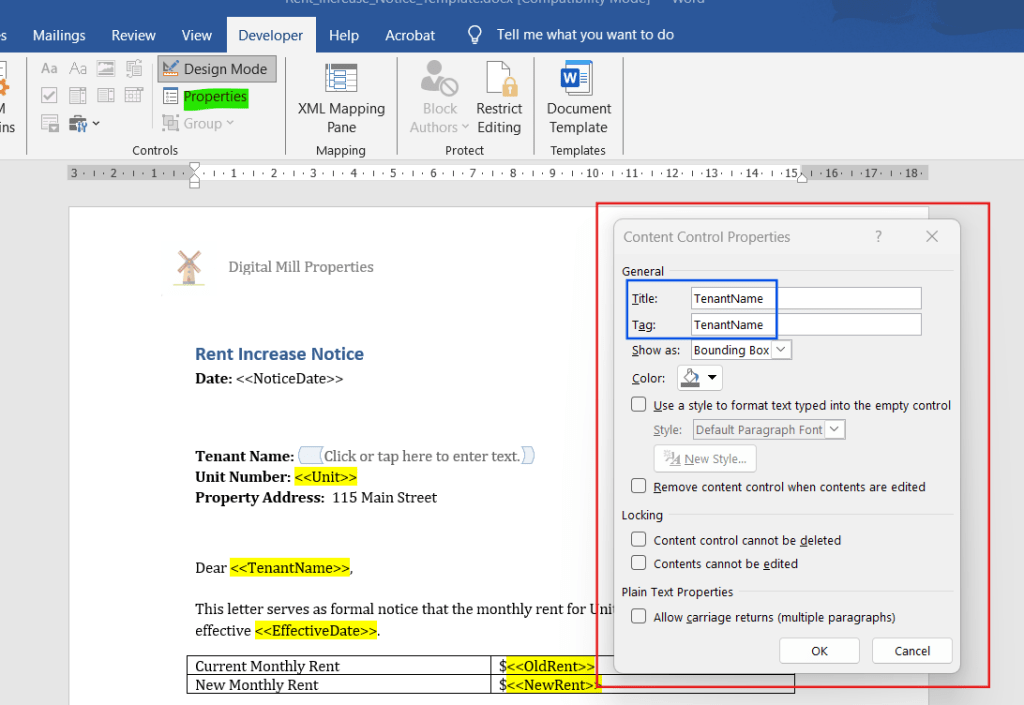
Next, select the control and click Properties (highlighted in green) in the Developer tab. In the properties window (highlighted in red), enter a name for both Title and Tag fields (highlighted in blue). These names will later be used by Power Automate to identify and populate the corresponding fields in the document:
After saving the changes, the control will display the name defined in its properties:
Repeat this process to each one of the other fields that need be dynamically populated:
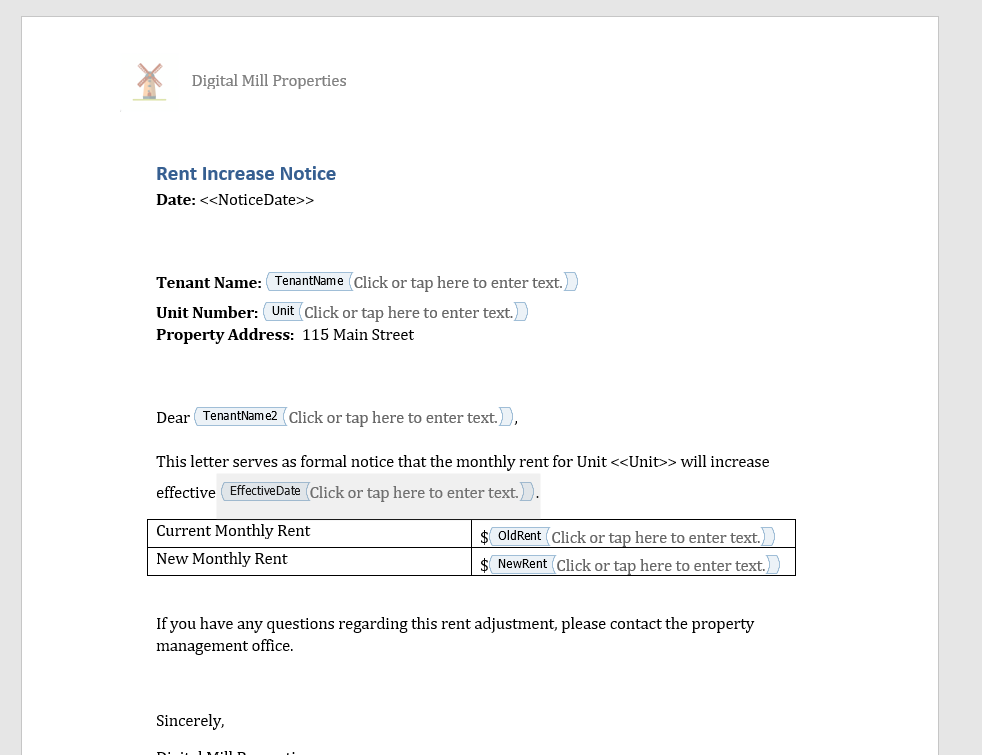
Note: Word allows multiple controls to share the same name (TenantName). However, using unique names is considered a best practice because it makes the Power Automate configuration easier to understand and maintain. If the same value must appear multiple times in the document, consider using names such as TenantName1, TenantName2, and so on.
Once all controls have been configured, save the template to SharePoint or OneDrive, so it can be accessed by Power Automate.
Populating word template document in Power Automate
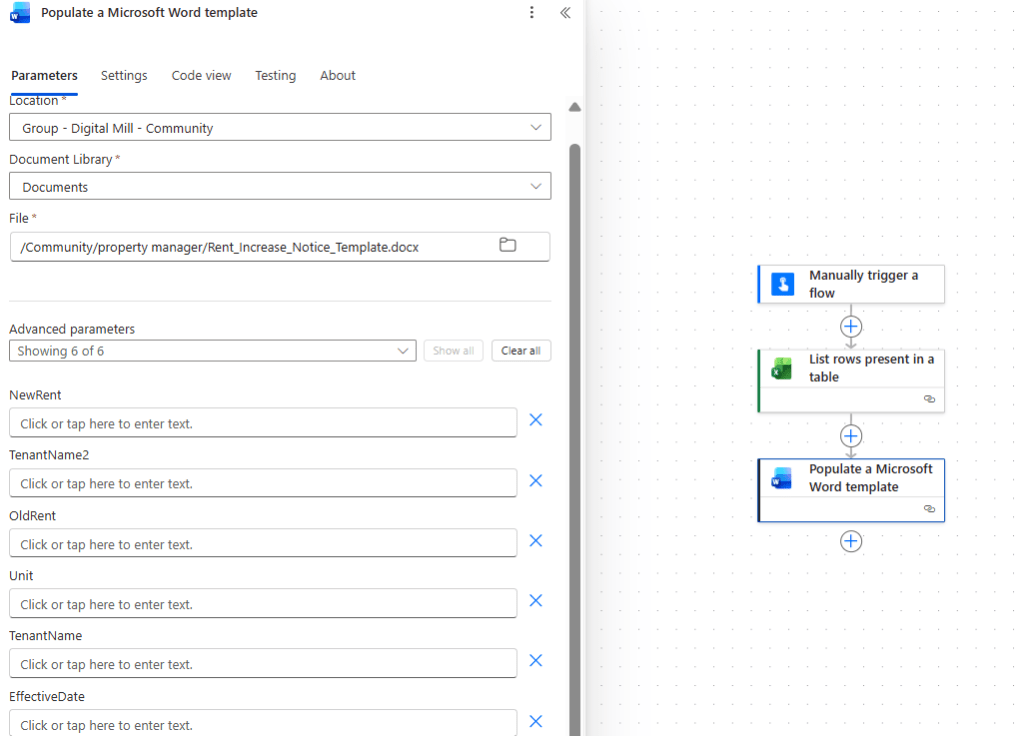
Back to Power Automate, add a Populate a Microsoft Word template action, selecting the file location of the template. Once the file is selected, all dynamic fields configured with the controls will become available under the Advanced parameters:
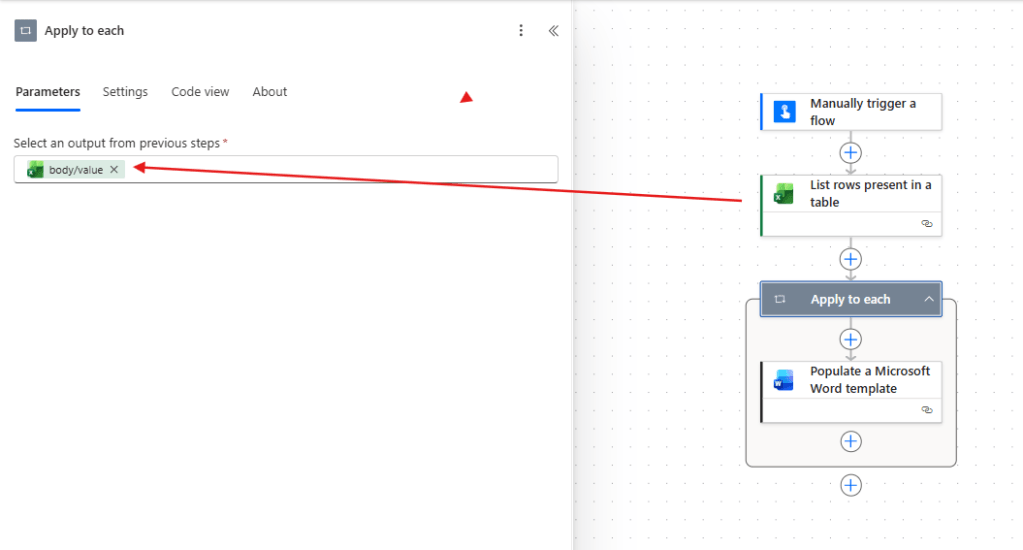
Since the action needs to be executed for each record from the Excel table, let’s add a loop to iterate the dataset. Insert an Apply to each, using the body/value property from the List rows present in a table as input, and move the Populate a Microsoft Word template action inside the loop:
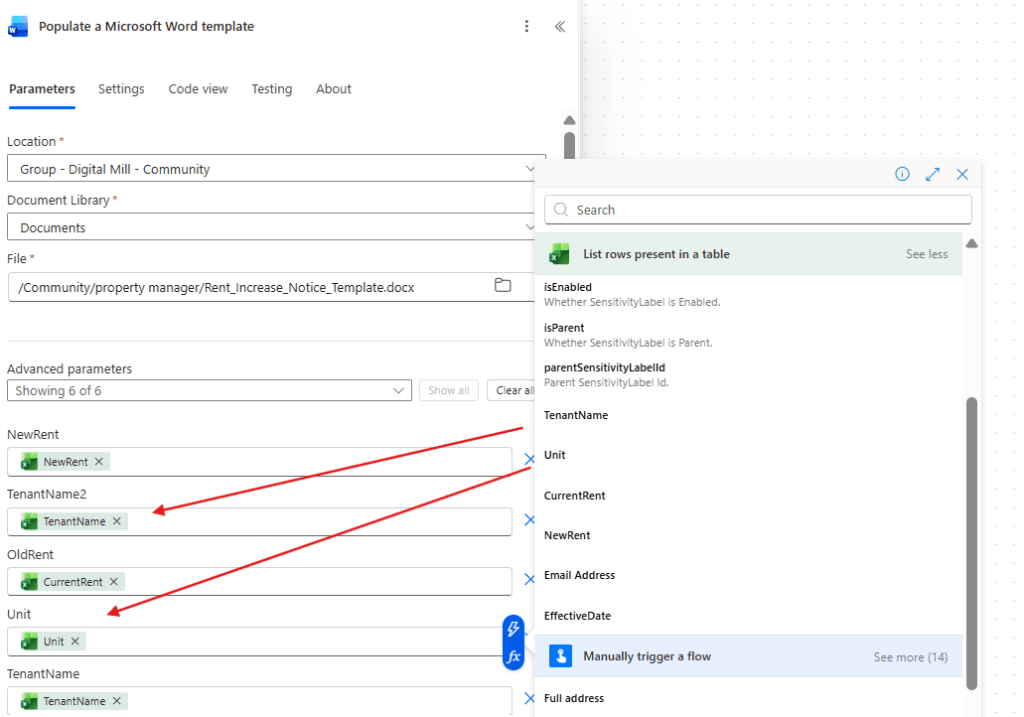
Next, fill each template field using the dynamic content of the corresponding Excel table column, except for the EffectiveDate:
After populating all other inputs, insert an expression in the EffectiveDate field. The idea is to format the date retrieved by Excel into a more friendly format for tenants to read – instead of 2026-08-01, the notice will display “Aug 01, 2026”. To achieve it, we can use the following date format expression:
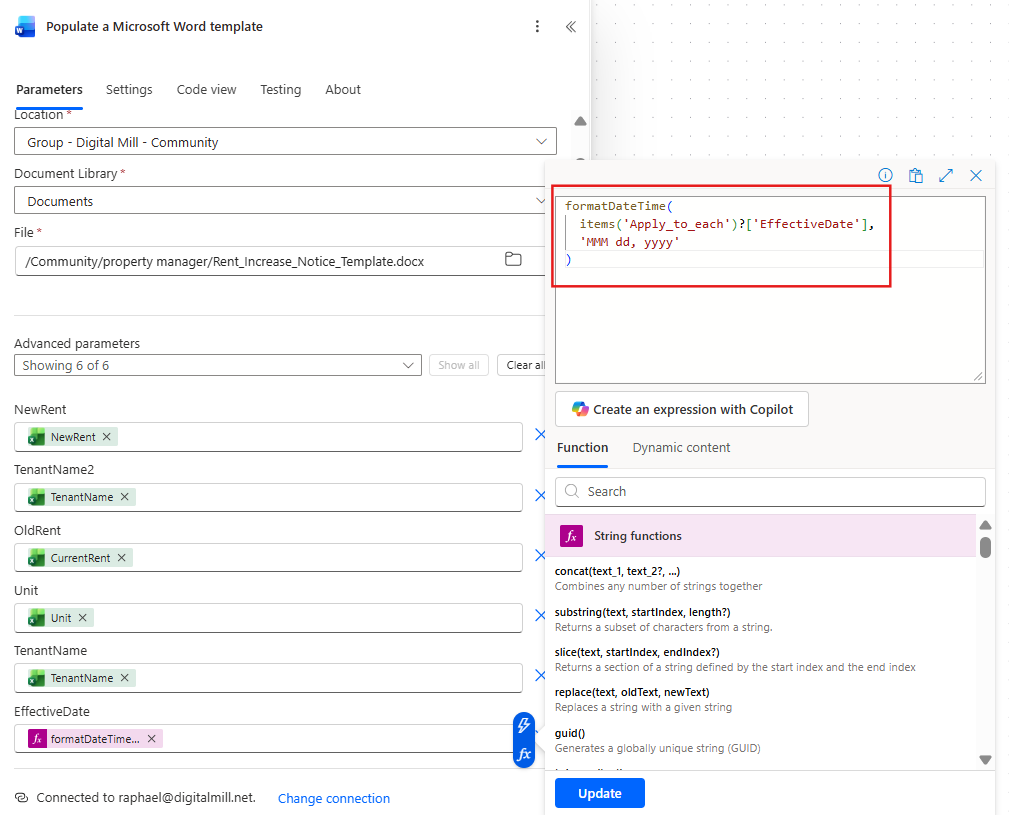
Entire expression:
formatDateTime( items('Apply_to_each')?['EffectiveDate'], 'MMM dd, yyyy')
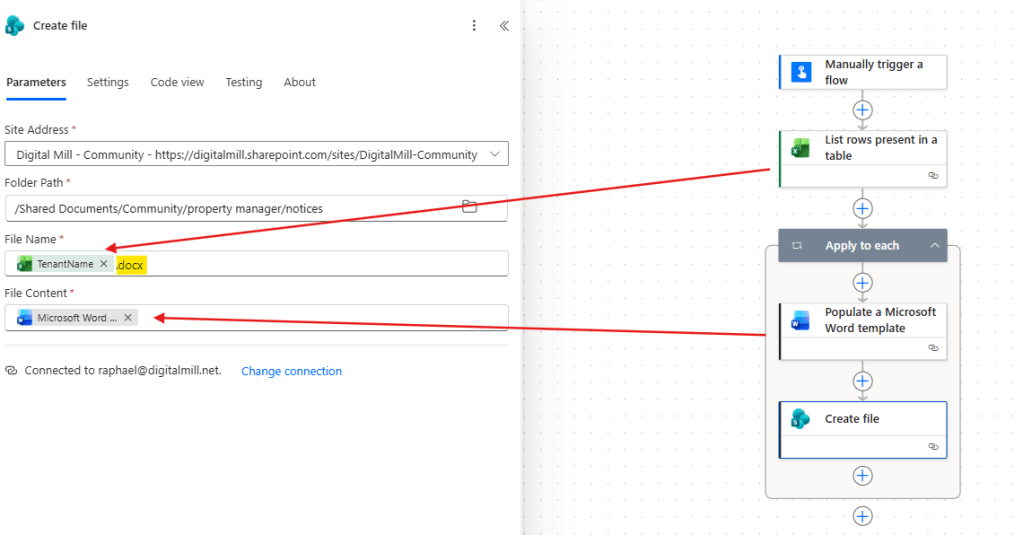
The templates are already being populated for each table record, but it’s still not stored anywhere. To preserve each notice, let’s save it to SharePoint by adding a Create file action and using the dynamic contents of TenantName as File Name and of the Populate a Microsoft Word template action outputs as File Content. Make sure to also include the .docx extension in the file name (highlighted in yellow):
Send PDFs by email in Power Automate
The next step is to convert the populated Word templates to PDF format and distribute them to the corresponding tenants via email. Insert a Convert Word Document to PDF action, and for the File input, use a replace expression to remove the Shared Documents/ portion from the Path property returned by the Create file action (highlighted in yellow):
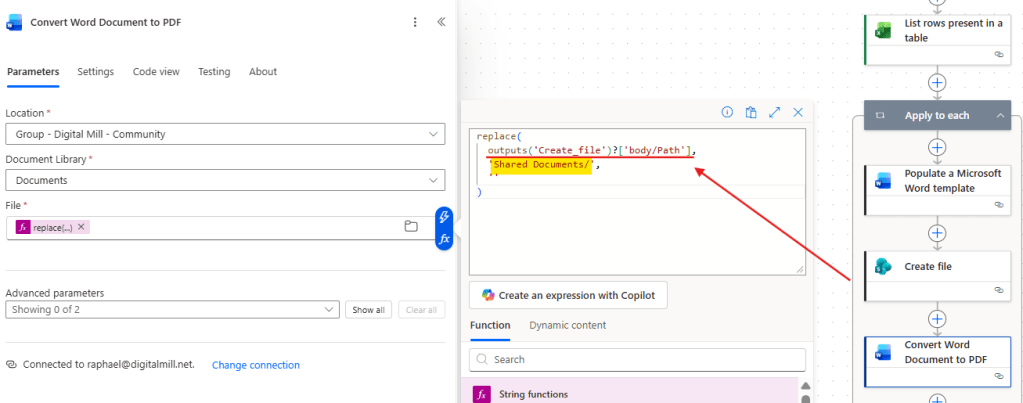
The expression is necessary because the Document Library (Shared Documents) is already specified separately in the conversion action, and needs to be removed from the file path.
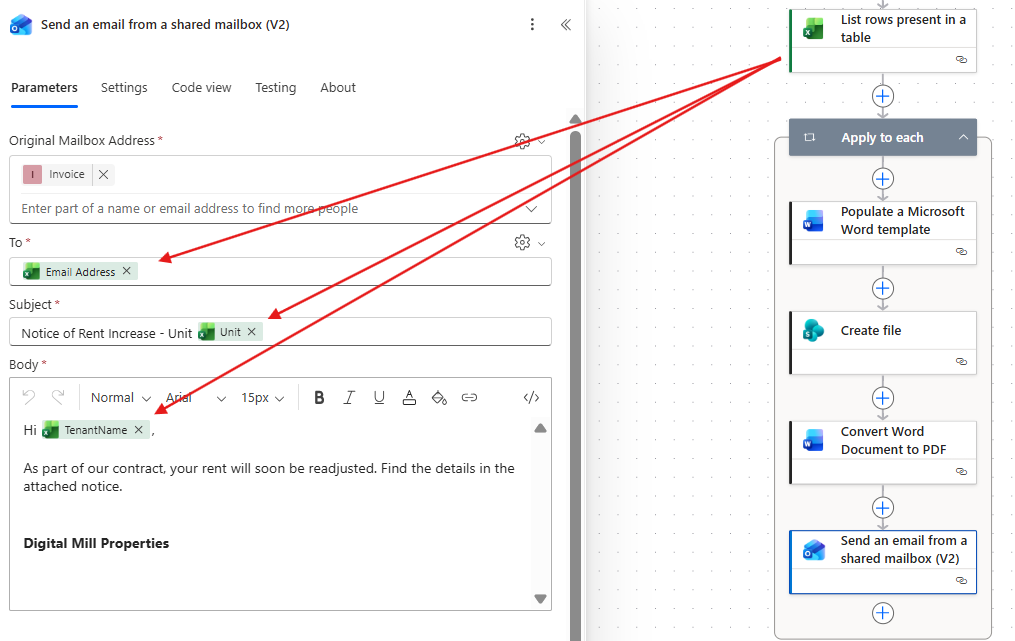
Now it’s time to send it via email via Outlook. Add either a Send an email or a Send an email from a shared mailbox action inside the Apply to each loop. For the To field, use the dynamic content of the Email Address column in the Excel table. You can also use dynamic content from other properties to compose your email template, such as tenant’s name or unit:
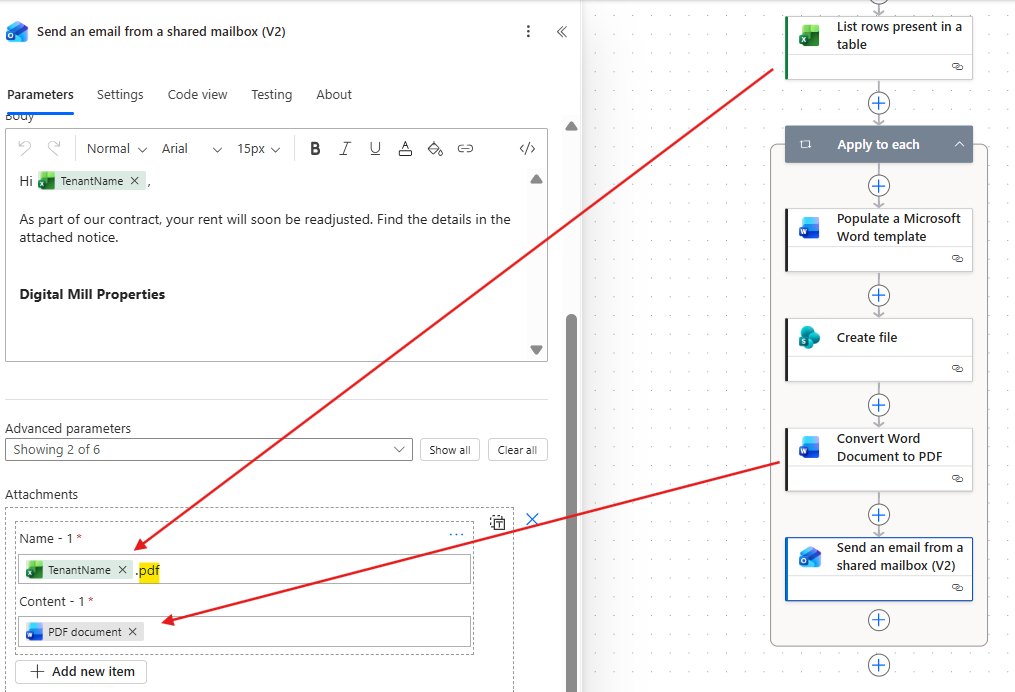
Under Advanced parameters, you will find the Attachments section, where you can add one or more attachments. Add a single attachment and inform the file name (Tenant name, in the example below), including the .pdf extension (highlighted in yellow). For the Content, use the body output from the Convert Word Document to PDF action:
Testing the solution
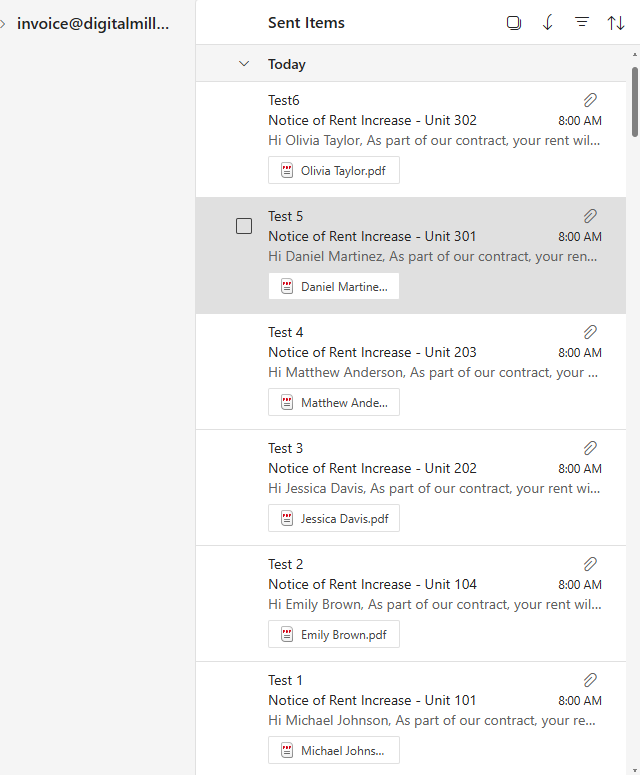
The automation is now ready for testing. After running it, an email is automatically sent to each address listed in the Excel table. The subject line, email body, and attachment are all populated with the corresponding tenant information:
When opening any of these messages, we can see the PDF attachment generated from the Word template. The document contains the data retrieved from the corresponding Excel record, resulting in a personalized rent increase notice for each tenant:

With just a single flow execution, multiple notices can be generated, converted to PDF, stored in SharePoint, and distributed by email automatically.
Conclusion
In this blog, we saw how to populate Microsoft Word template documents, populate it from Excel tables and send it as PDFs via email using Power Automate. Let us know what do you think about this blog in the comment section, and don’t forget to check our website, our YouTube Channel or connect on LinkedIn!
