When working with Excel in Power Automate, adding or updating rows in a table is usually straightforward, as long as the table already exists. However, things become more complex when the table is created dynamically during the flow run, or when the Excel action references a dynamic file.
In these scenarios, the table schema is not available in advance and standard actions like Add a row into a table can behave differently than usual. In this article, you will learn how to properly handle Excel tables that are created dynamically inside a flow, or when the Excel file is dynamically set.
Creating an Excel table during Power Automate flow run
For the purposes for this article, we will work with a streamlined scenario where an automation in manually triggered (to learn more about the different types of flow, check this blog). The object is to create a table inside an empty Excel file and insert records based on an array of objects stored in a Compose action containing support tickets. The flow design looks like this:
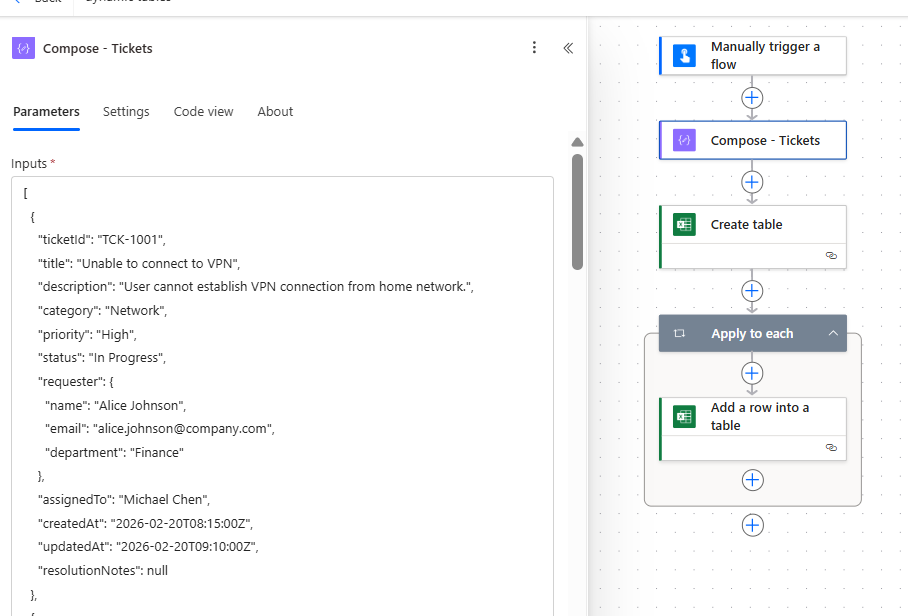
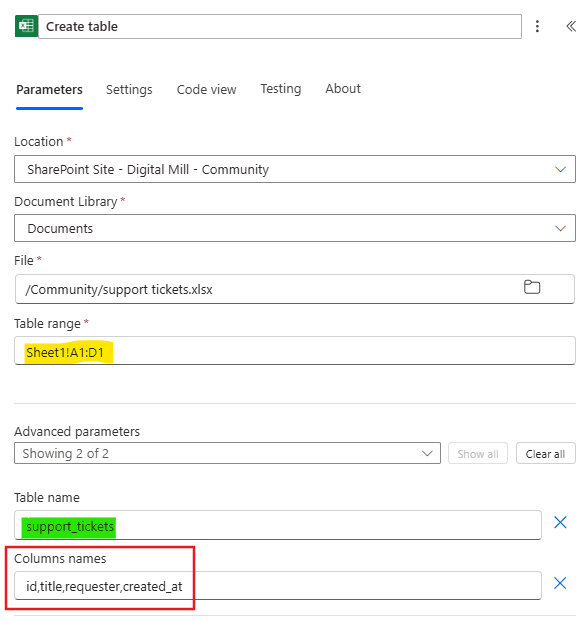
Since the Excel file is currently empty, we first need to initialize a table using the Create table action. This step expects the file location and the range where the table will be created, following the A1 notation in this format: [worksheet]![start_range]:[end_range].
For this example, we will create a table with four columns and allocate it in the worksheet Sheet1, at the range A1:D1, so we must use Sheet1!A1:D1 as input (highlighted in yellow). As optional parameters, it is also possible to assign a name to the table (in green), and define the column names, separated by commas (in red):
If your Excel file already contains tabular data, it is also possible to convert it to table by using this action: you just need to select the existing data range and there is no need to inform column names.
If you would like to explore Excel automation in more depth, including practical scenarios involving Excel, SharePoint, and other Microsoft services, this topic is covered in detail in our complete Power Automate course at Udemy.
Dynamically referencing an Excel table in Power Automate flow
After creating the table, the next step is to add the support ticket data into it. Insert an Apply to each action to iterate through all elements of the tickets array and include an Add a row into a table action inside:
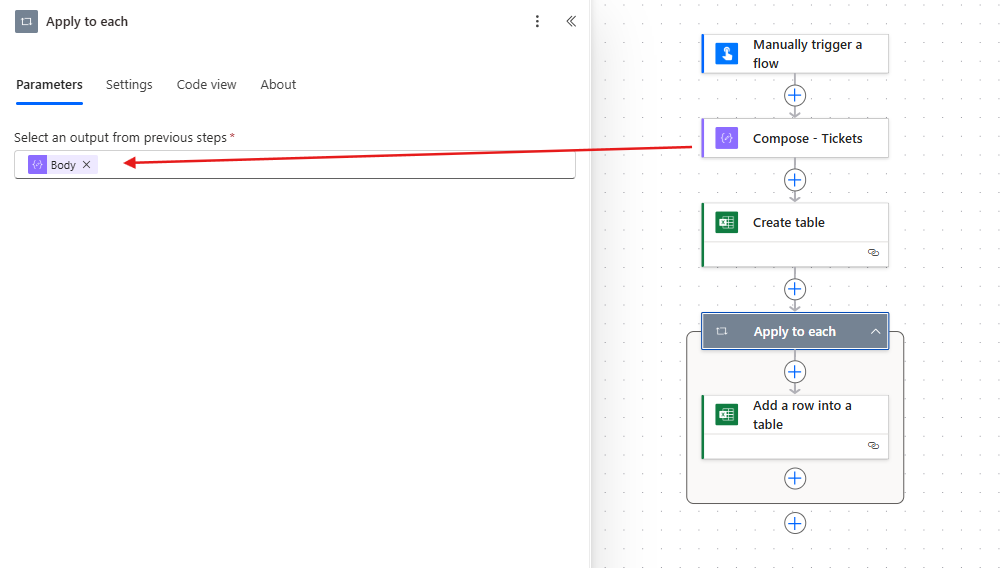
First, provide the file details where the table was created. In the Table field, instead of selecting a static table name, use the dynamic content of the body/name property from Create table action.
Next, a new field called Row will appear. Unlike the standard version of this action (where columns are displayed individually), this field expects a JSON object. Each key in the JSON must correspond exactly to a column name in the Excel table. For this reason, the keys must match the column names defined earlier in the Create table action.
For the purposes of this example, the keys match the same names of the columns defined in the Create table action and the values are populated using the dynamic content from the Compose action (current item of the loop):

Testing the flow
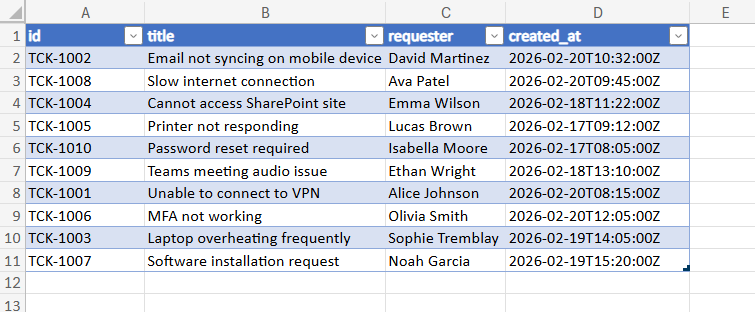
After saving the flow and running it, the table was created in the Excel file and all records from Compose were included:
Updating rows from existing table in dynamic file with Power Automate
Let’s now adapt the previous scenario to cover a similar and very common use case: updating records from the same support tickets Excel table, but defining the file path dynamically in Power Automate. To keep this article focused, our goal is to update the created_at property of each table record, setting its date to 30 days after the current date stored in the table.
After creating a new flow, we store the Excel file path in a Compose (highlighted in yellow), so we can ensure it will be dynamically referenced by the Excel actions. The next step is to read the data from the Excel table. In the File field, provide the dynamic content of the Compose (in red). Even if the Excel file contains a valid table, Power Automate will not be able to detect it (in blue), because the file reference is dynamic and the table schema cannot be resolved at design time:

If you know the name of the table, it is possible to manually enter it in the input after clicking Enter custom value:
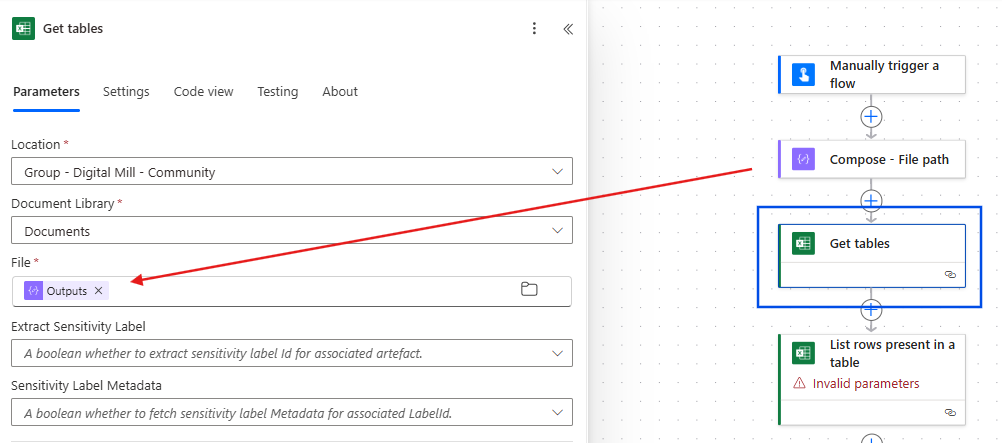
However, in many real- world use cases you may not know the name of the table when designing the flow. To overcome this limitation, we can use a Get tables action, so we can identify all tables that currently exist in an Excel file. Add the action before the List rows present in a table (in blue) and use the Compose outputs as dynamic content for the File field (in red):
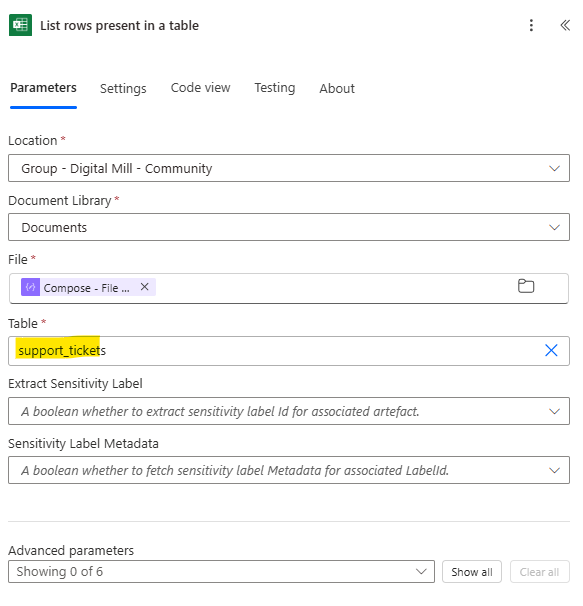
The Get tables action retrieves an array of objects containing each table in the Excel file. For the purposes of this example, we have only a single table in the file, so we can reference the name of the first element of the array in the Table field of the List rows present in a table action:
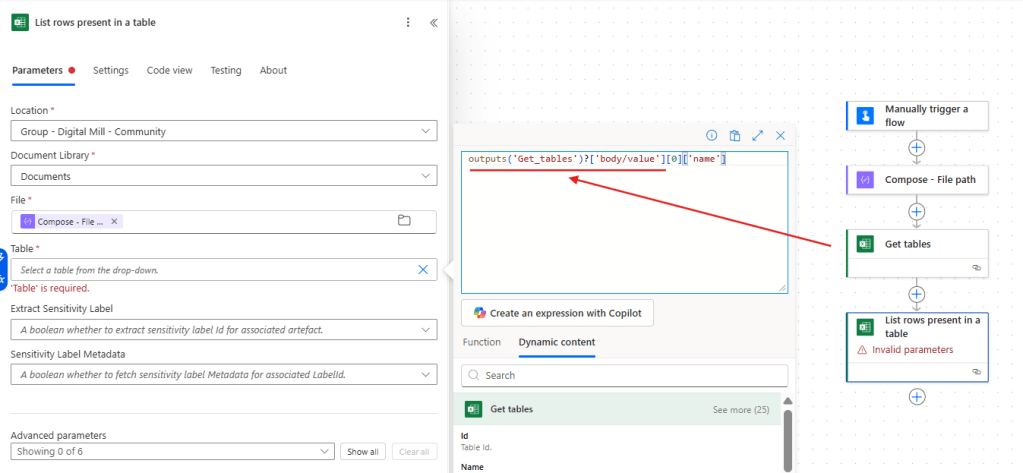
The expression used here is: outputs(‘Get_tables’)?[‘body/value’][0][‘name’]. If the file contains multiple tables, you may need to use a Filter array to identify the correct one before referencing the name.
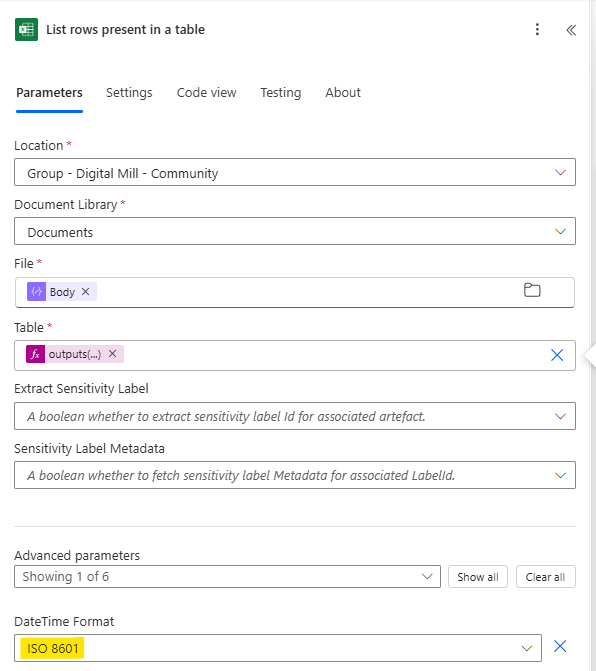
As a last step for the List rows present in a table, set the DateTime Format advanced parameter to ISO 8601, so the dates will be retrieved as values that can be used by Power Automate (learn more in this blog):
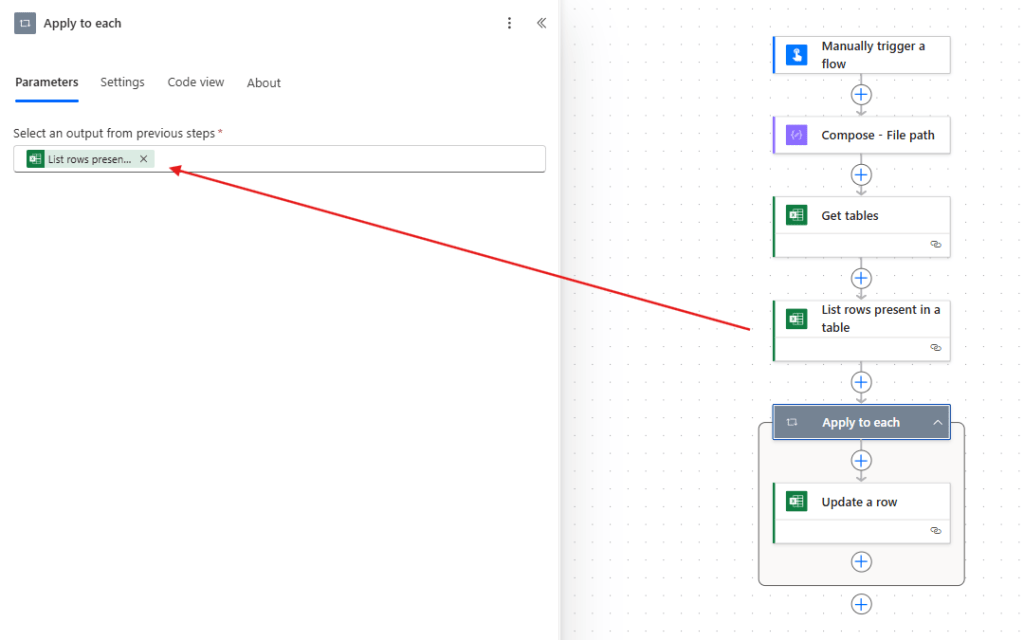
Now it’s time to update each table record. Add an Apply to each using the body/value property from List rows present in a table, so we can iterate through all the rows:
Inside the loop, add an Update a row action, providing the same dynamic file reference from Compose and dynamic table reference from Get tables, just like you already did for List rows present in a table. This action requires a Key column, which identifies the unique column used to match the record to be updated. Set it to id (in green) and for Key value, use the expression item()[‘id’] to identify the id of the currently iterated by the loop. For the row properties, you will need to provide a JSON object, similar to what was done when adding rows. However, when updating a record, you only need to include the columns that should be modified:
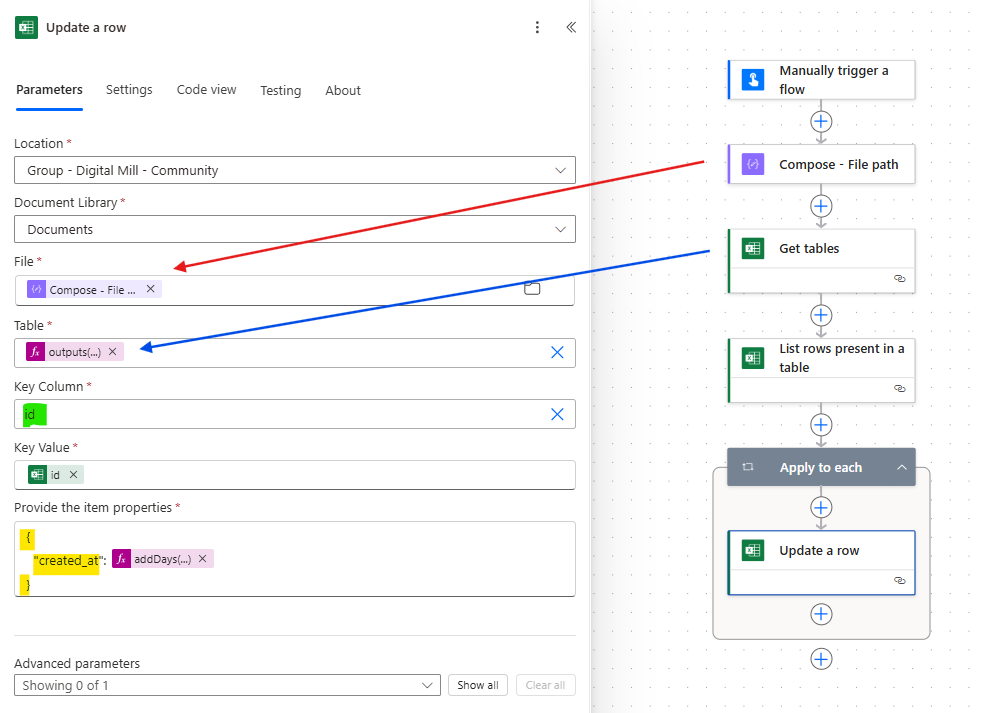
For this example, we’re just modifying the created_at column (in yellow) and setting its value to 30 days after the existing date using the following expression: addDays(item()[‘created_at’], 30).
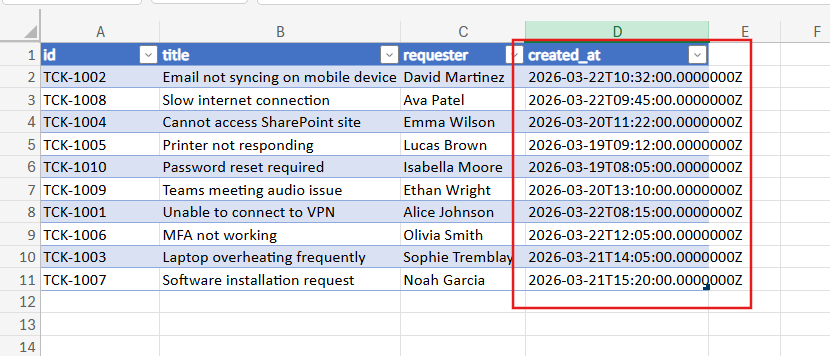
The flow is now ready. After running it, all dates from the created_at column will be updated to 30 days later the original:
Conclusion
In this blog, we saw how to add or modify records in Excel tables dynamically set in Power Automate. Let us know what do you think about this blog in the comment section, and don’t forget to check our website, our YouTube Channel or connect on LinkedIn!
