Microsoft Forms is one of the best tools to collect information quickly and easily, requiring very little effort to set up a simple Form. It also integrates with Power Automate, enabling users to automatically save form responses to Excel files or SharePoint tables upon submission.
While processing text-based responses From Microsoft Forms questions is pretty straightforward, handling file uploads can be a challenging task. In this blog, you’ll learn how to use Power Automate to save attachment files from Microsoft Forms directly into SharePoint, creating a scalable solution for handling form-based file submissions across your organization.
Solution overview
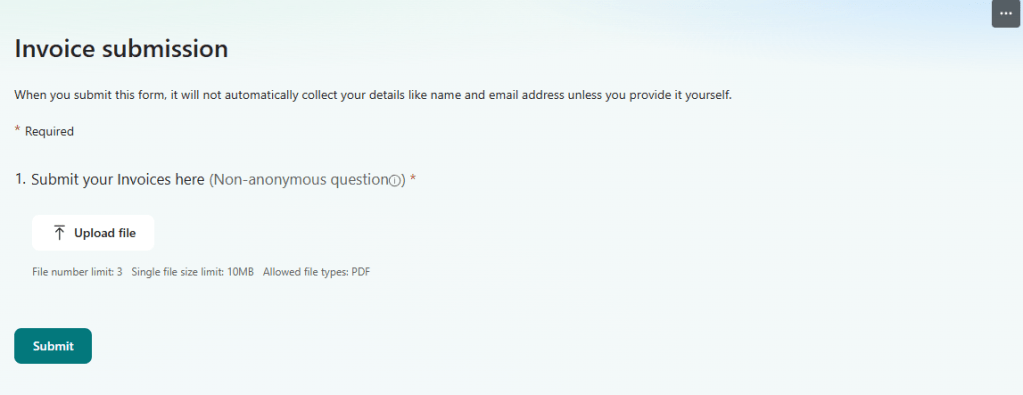
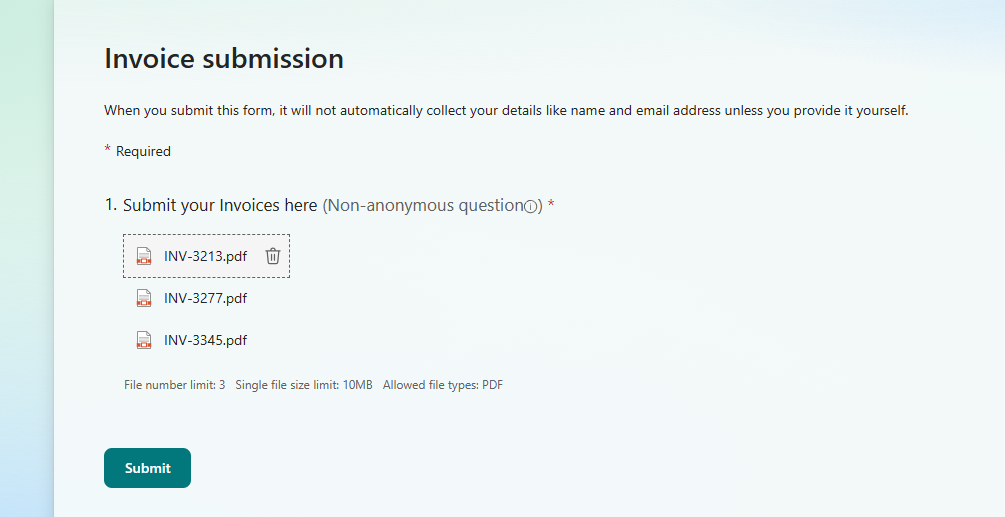
For the purposes of this blog, we will work with a MS Form that has only a single question, where users can submit invoice files in PDF format:
After the user submits the Form, Power Automate will access these files and automatically save it to a predetermined SharePoint folder:

Monitoring MS Form submissions in Power Automate
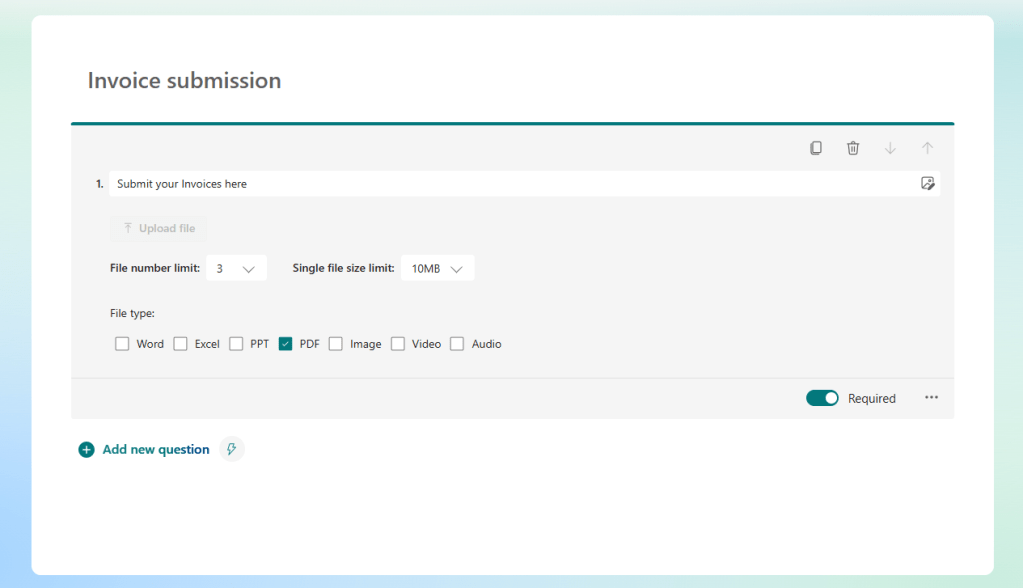
Let’s start by creating a Microsoft Form to receive incoming invoices. You just need to add a question with an Upload File type, and configure it according to your needs. For this example, we’re limiting the input to 3 files maximum, accepting PDF documents only, and with a maximum size of 10MB each:
To keep things simple, we will work with a single question, but it is also possible to include other questions of different types if you prefer to. You can learn about how to handle Microsoft Forms submissions and many other automation strategies in our complete Power Automate Course at Udemy.
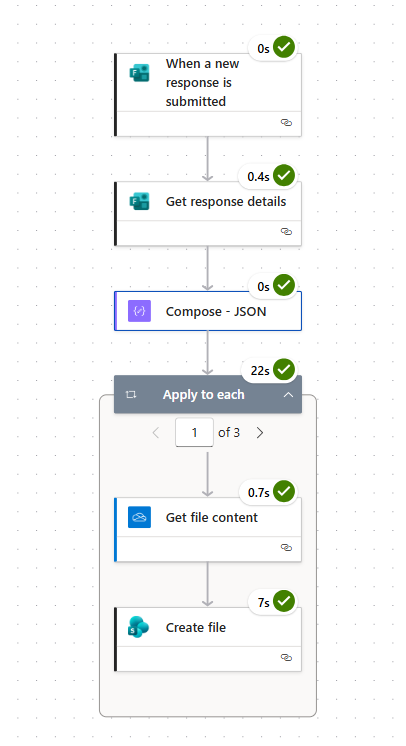
After setting up the form, you can create a new automated flow, using the When a new response is submitted trigger, from the MS Forms connector. Select your Form from the dropdown in the trigger and add a Get response details action, informing the same Form and passing the trigger’s Response Id as dynamic content (marked in red):
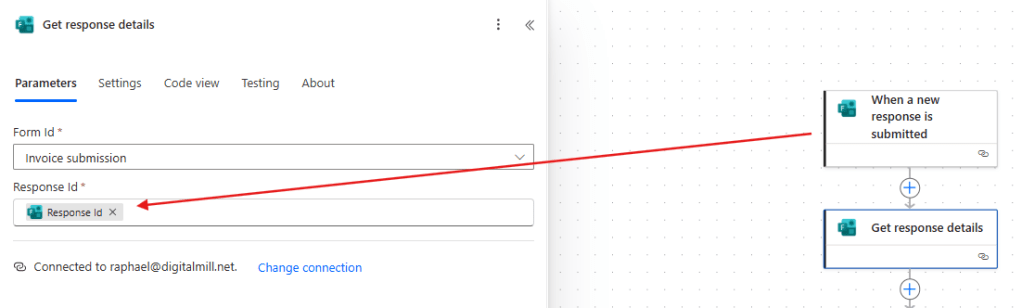
The trigger is used to monitor any upcoming submissions for the selected Form, while the Get response details will access all data provided by the user.
Accessing Form attachments question with Power Automate
Now we need to access the files uploaded to the Form. By default, the information related to the attachments will be retrieved as a JSON array formatted as string (text), which requires us to convert it to an array data type before processing (you can learn more about data types in Power Automate here). To better organize our flow, we will store the array in a Compose step (highlighted in red below).
To perform this conversion, we will need to use an expression: the json() function (highlighted in yellow), using the dynamic content of the file type question as input, as marked in blue:
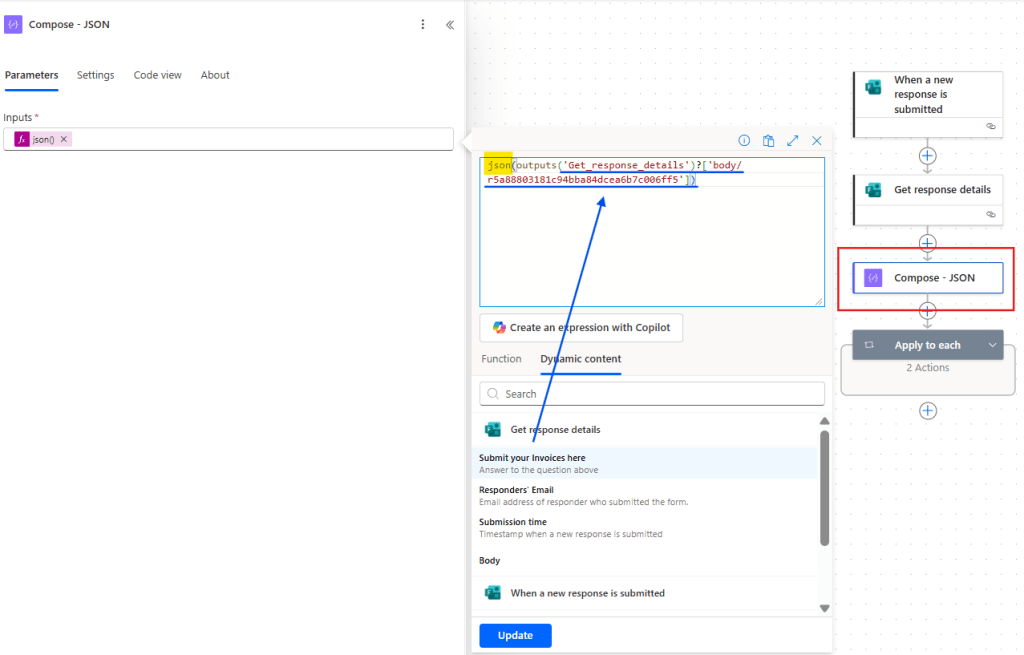
Don’t worry if your expression doesn’t contain any direct reference to the question’s display name: in Power Automate, MS Form questions are represented by the question’s internal id. From our side for example, the full expression looks like this: json(outputs(‘Get_response_details’)?[‘body/r5a88803181c94bba84dcea6b7c006ff5’]), where the value after body/ corresponds to the id of the “Submit your invoices here” Form question.
Saving attachments to SharePoint with Power Automate
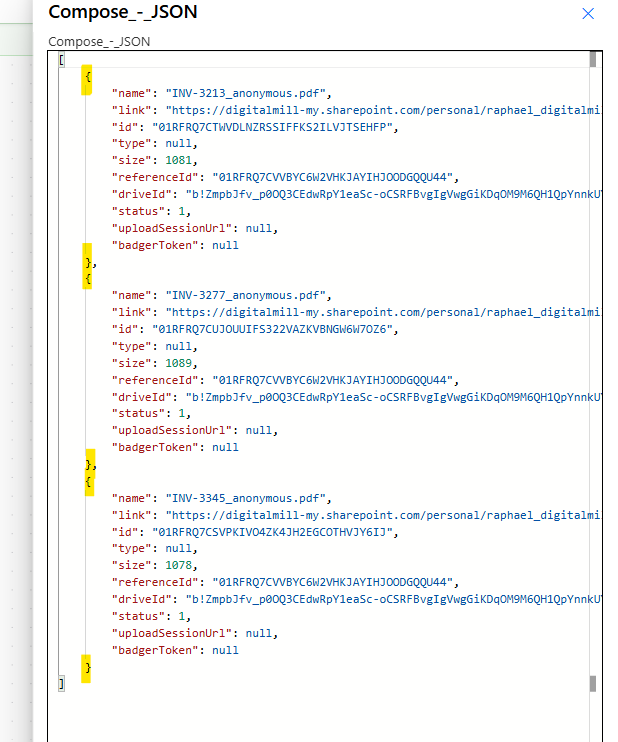
At this point, the outputs of the Compose step contains an array of objects, where each element corresponds to a file uploaded by the user, as you can see from the action’s raw outputs (in yellow, you can see the curly brackets delimiting each object):
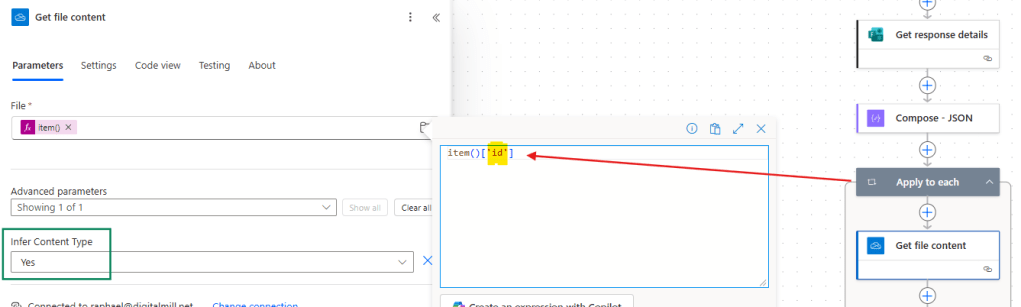
We now need to iterate trhough this array, saving each file to a SharePoint folder. For that, add an Apply to each loop, using the dynamic content of the Compose outputs as input (in red):

Inside the loop, include a Get file content action from the OneDrive for Business connector. As input for File, use the expression item()[‘id’] to reference the id property of the currently iterated array element (in red). Lastly, make sure to leave the Infer Content Type property dropdown set to Yes (in green):
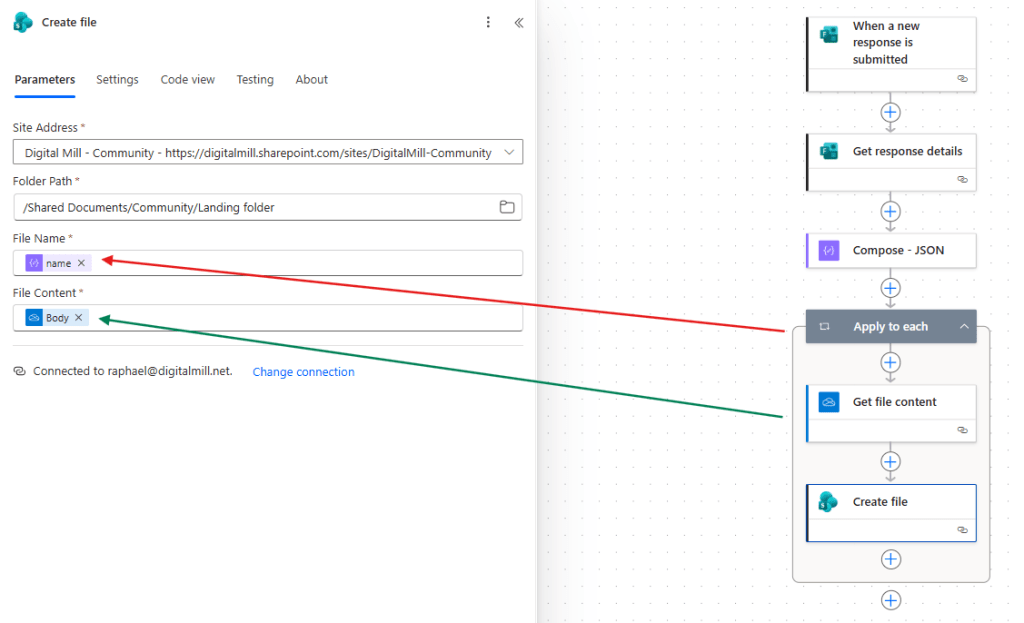
As a final step, add a Create file action, from SharePoint connector, and select the Site and the folder where you want to save the files. For the File Name, you can leverage the same names of the files uploaded by the Form responder, by using the expression item()[‘name’], as marked in red (by default, this approach will combine the file name and the submitter’s name). For the File Content, reference the Body outputs of Get file content action (marked in green):
If you prefer to, you can also use other expressions to generate a name for the file, like using the answer from another Form question, or by capturing the Form submitter’s name. In this case, make sure to include the file extension in the File Name input when creating the file.
Testing the flow
Let’s now test the flow by uploading 3 PDF files:
After submitting the Form, the flow will run:
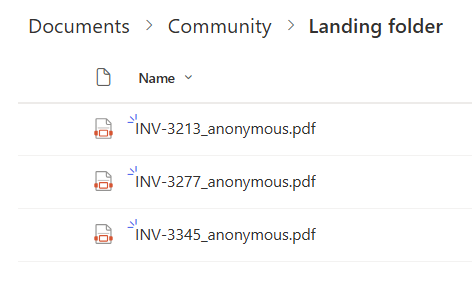
And the files will be saved in the respective folder, combining the uploaded file name and the submitter’s name by default:
Conclusion
In this blog, we saw how to automatically save files attached to a Microsoft Form to SharePoint with Power Automate. Let us know what do you think about this blog in the comment section, and don’t forget to check our website, our YouTube Channel or connect on LinkedIn!
