Building complex automations in Power Automate often leads to long, hard-to-maintain flows that become difficult to troubleshoot or scale. As your processes grow, a single workflow can quickly turn into a performance bottleneck, with repeated logic, duplicated actions, and increased risk of errors. That’s where child flows come in. They allow you to isolate parts of your large automations into smaller and reusable components, resulting in solutions that are both clean and efficient.
In this article, we’ll explore how child flows in Power Automate can help you simplify your automations, reduce maintenance efforts, and improve performance across your workflows with a real-life scenario.
Use cases for a Child Flow in Power Automate
In general, child flows are helpful to isolate the logic of any subprocesses that must be repeated into a single or multiple automations. Instead of duplicating actions in different flows or repeating a similar logic inside a single automation, you can centralize the logic in a child flow and call it whenever needed.
Another use case for child flows is handling complex tasks that would otherwise make your main flow difficult to manage. By breaking down the logic into different sub-flows, a process becomes more readable and easier to maintain.
For example, the following scenarios could be allocated into child flows in Power Automate:
- Log errors in a dataset, such as a SharePoint List or a Dataverse table
- Send notifications via Teams, email, or other channels
- Evaluate validation rules
- Perform complex calculations
- Convert data formats, (e.g.: CSV to JSON)
How to create Child Flows in Power Automate?
There are two main requirements for creating a child flow in Power Automate:
- It’s manually triggered flow (check this article to learn more about the types of flows in Power Automate)
- The flow must be part of the same Power Platform Solution as the parent flow.
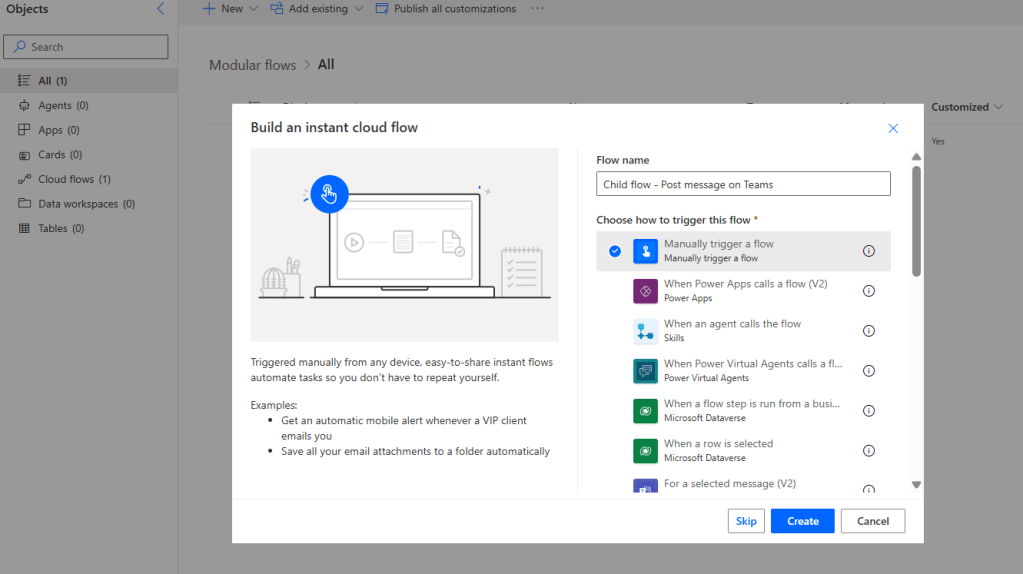
To create a flow in the context of an unmanaged Solution, open the Solution page and go to New > Automation > Cloud flow > Instant (highlighted in yellow):

You can then just name your flow and select the trigger (Manual), and click Create:
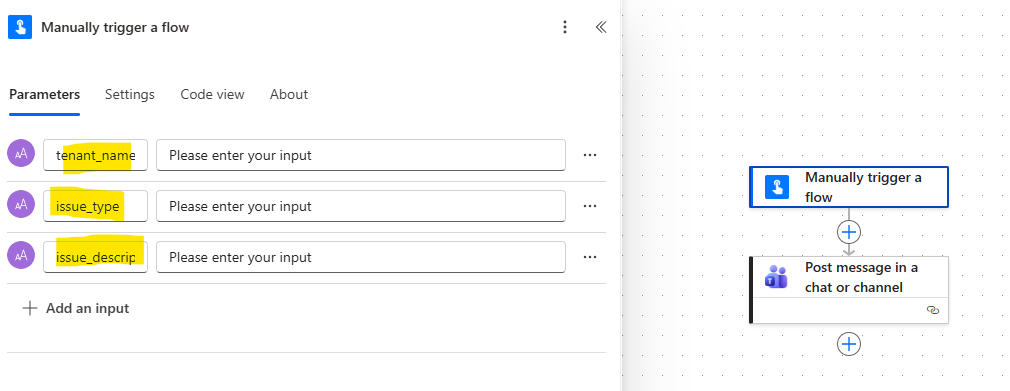
You can now start to build your flow. For this case, we will simply post messages in a Teams conversation using the Flow bot. The message will be based on parameters received from the parent flow, and for that, we only need to configure the trigger inputs (in yellow):
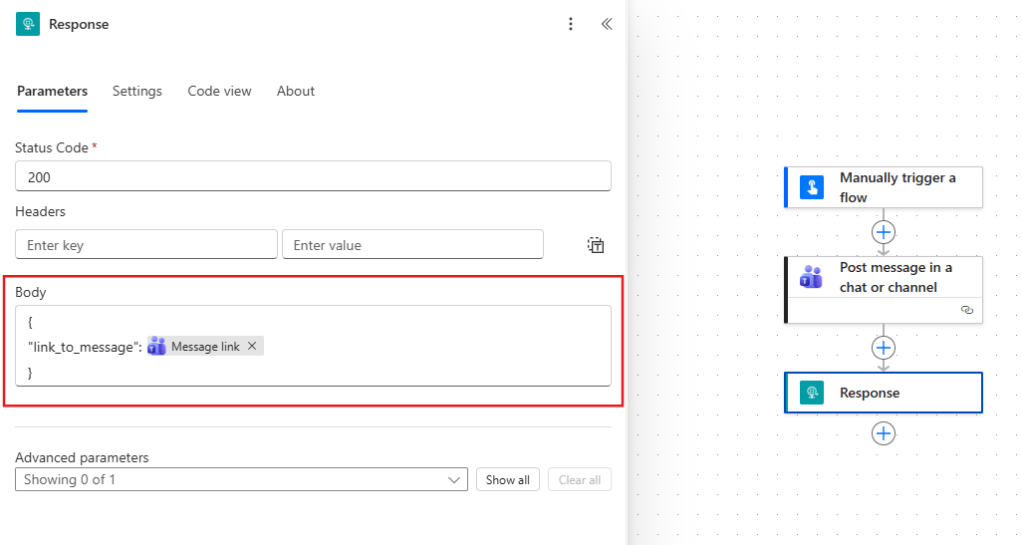
Next, in a Post message in a chat or channel action, from the Microsoft Teams connector, we can configure a template message to be posted. Since parts of this template will vary according to the values passed from the parent flow to the child flow, we can reference the trigger inputs via dynamic contents to compose the final message:

As a last step, you need to include a Response action, so the parent flow can be notified about the completion of the child flow. At this point, you can optionally retrieve some data to the parent flow, via the Body property. While you can pass a response via plain text, it is a common practice to transfer the data in a JSON format, so the body can be read as an object. For this example, we’re retrieving a JSON object containing a key named link_to_message with the Message link dynamic content from the Teams action as value (in red):
Run-only user settings in Power Automate
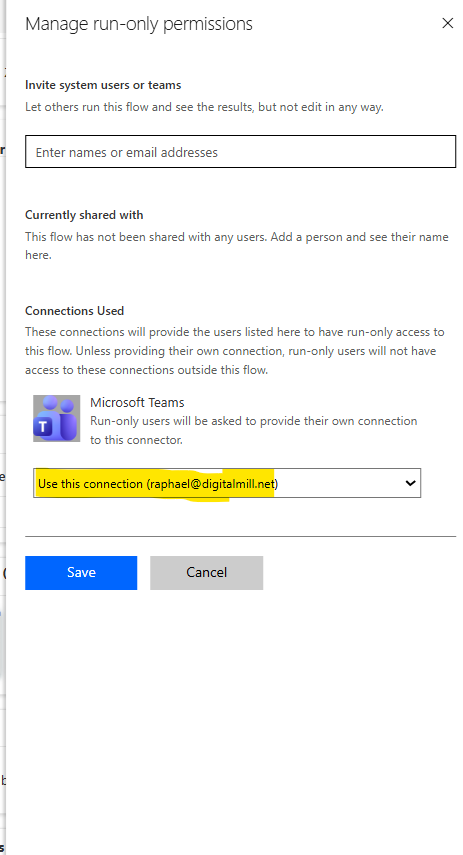
Next, the flow and go to the Flow Details page. On the right side of the screen, find the Run-only user settings (in red) and click Edit (in yellow):
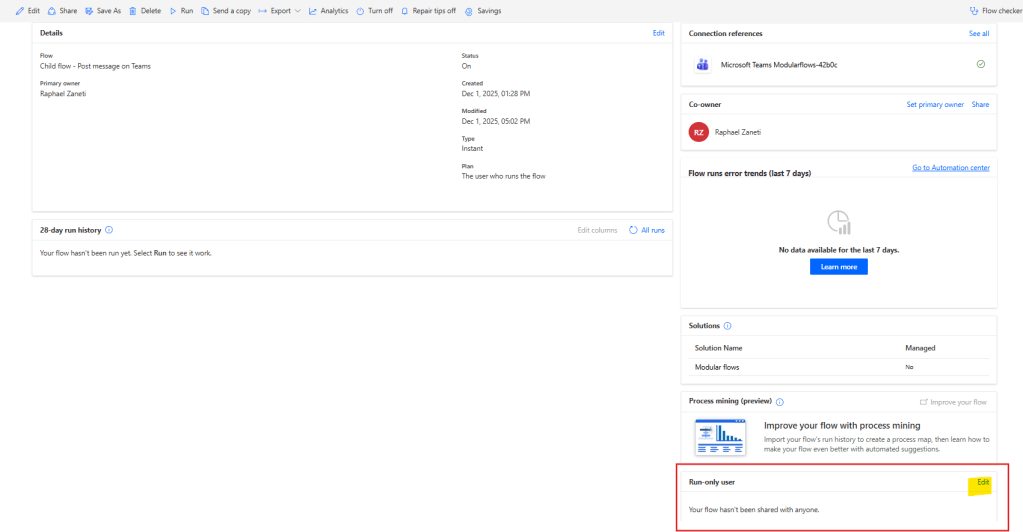
Make sure to select a specific connection to all your connectors (in yellow). Do not leave the “provided by run-only user” option, since it will prevent the flow from being called by a parent automation:
Now all is set for the child flow.
Calling child flow from parent flow in Power Automate
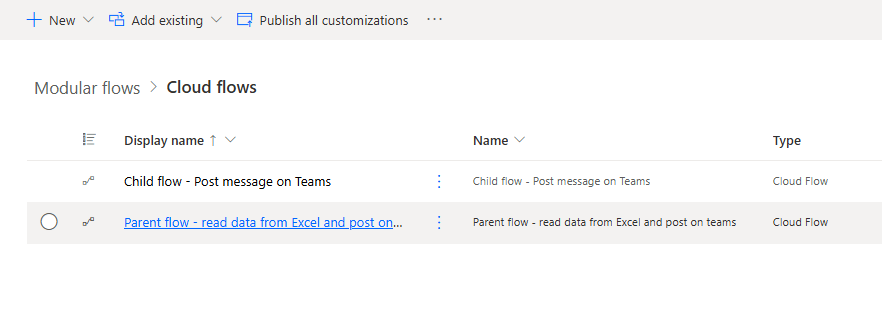
To add a flow as a child to another automation, make sure that both flows are part of a Solution. Technically, you can call child flows located in a Solution different from parent’s, but for this example, we are organizing both flows within the same Solution:
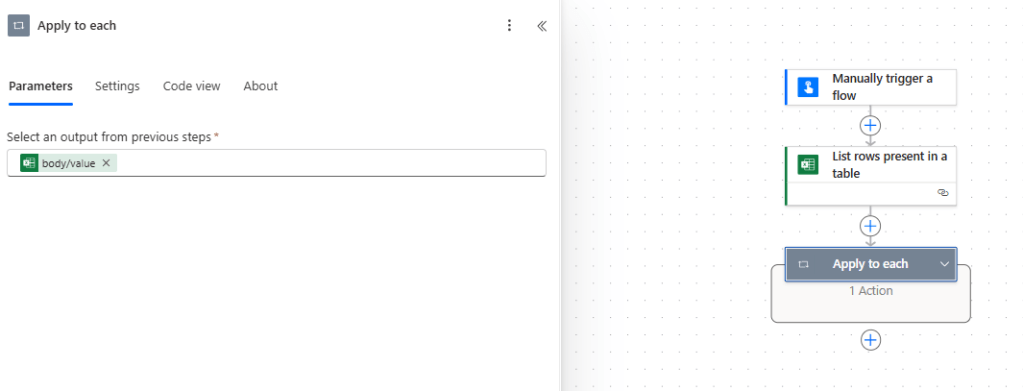
In the parent flow, we’re simply reading the records from an Excel table containing data related to issues reported by the tenants of a building, and looping through each of these rows with an Apply to each:
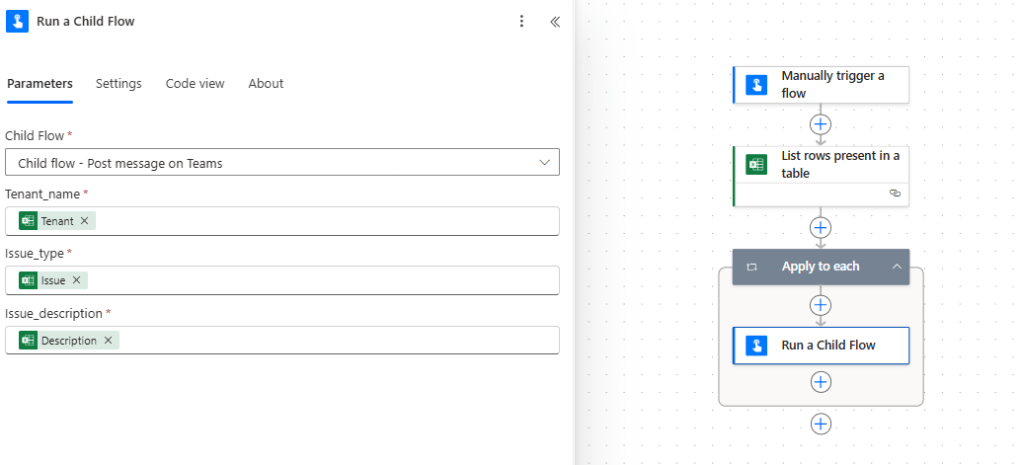
Inside the loop, add the Run a Child Flow action and select the flow to be executed from the dropdown. If the child flow has any parameters, they will appear after its selection. For our example, we’re populating all flow inputs with the dynamic content of the data read from the Excel table:
This is the Excel table that from where we’re reading the content sent to the Child flow and later posted in the Microsoft Teams conversation:

As a last step in the parent flow, we can add a Compose to print the value of the link_to_message property, retrieved by the Run a Child Flow action. We can access this property by using an expression that references it from the child flow’s body (body(‘Run_a_Child_Flow’)[‘link_to_message’]):

Now we can save the parent flow and run it, which will result in many notifications being sent via Teams:
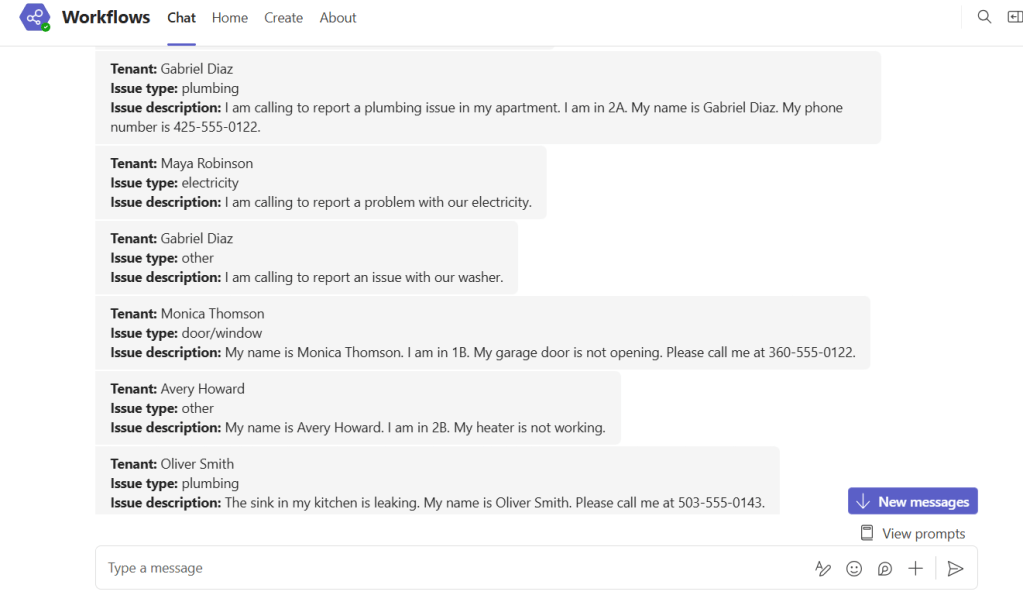
Each message was sent in the context of an individual execution of the Child flow:
While in the parent flow’s Compose, we can find the link to each message sent by the Flow bot:

Conclusion
In this blog, you saw how to integrate child processes in your Power Automate flows. Let us know what do you think about this blog in the comment section, and don’t forget to check our website, our YouTube Channel or connect on LinkedIn!
