When working with Power Platform tools, it’s usually a bad idea to hardcode values that might change over time, or that are used repeatedly within the same solution or across different components.
If you’re working with a single flow, app or agent, you have the ability to configure variables that can be referenced within that asset, but when managing projects that combine different Power Platform tools, you can rely on environment variables. These are helpful not only for migrating Power Platform solutions across different environments, but also to centralize data shared among related automations, applications or chatbots.
Environment variables: solution context
Different from the variables created inside flows (check this article to learn how to work with variables in Power Automate), apps, or agents, environment variables exist within a solution context. This design allows users to work with the same environment variable in different assets from different Power Platform tools, as long as they’re part of the same solution.
There are many use cases for environment variables in Power Platform, including the centralized management of items such as an email address, folder path, API key or data source connection that are shared across different components. They also play an important role in Application Lifecycle Management, where you can control the credentials and references used in the different stages of the solution deployment.
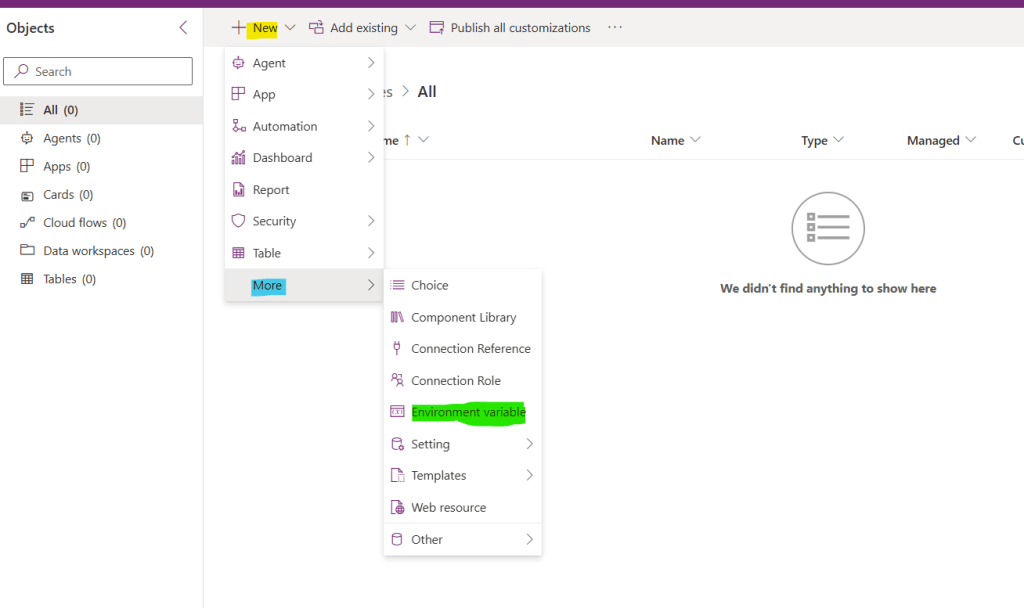
Because of this relationship between the variables and the solutions, you first need to set up a Power Platform solution and then create your environment variable. Once you have the solution configured, click New (in yellow), expand the More submenu (in blue) and select Environment variable (in green):
After selecting it, you can configure the variable’s name and data type. The fist thing to do is to assign a display name, which is the user-friendly label for the environment variable, and a unique name, which is the logical reference to this element within your solution (in blue). The unique name will always include the publisher’s prefix (in the example below, dm) and does not support spaces. After naming the variable, you can provide a description about its purpose, and inform a data type (in red):

For this example, we’re naming this variable support_email, assigning its unique name as dm_support_email, providing a brief description and selecting Text as data type (in green). After choosing a data type, you can assign a default or a current value to the variable, so it can be used in your solution (in yellow):

After clicking Save, you will see the environment variable listed under the solution’s objects, and you can start to use it with the different components of the same solution:

Once the environment variable is created, you can edit its values. In this example, we’re setting a different email address from the default value as a current value (in yellow):

In this case, the current value overwrites the default one, and will be used across this Solution.
Using environment variables in Power Automate flows
After creating the environment variable, you can start to use it within your Power Automate flows that belong to the same solution. The reference to the environment variable can be found in the dynamic content list, under the Parameters group:

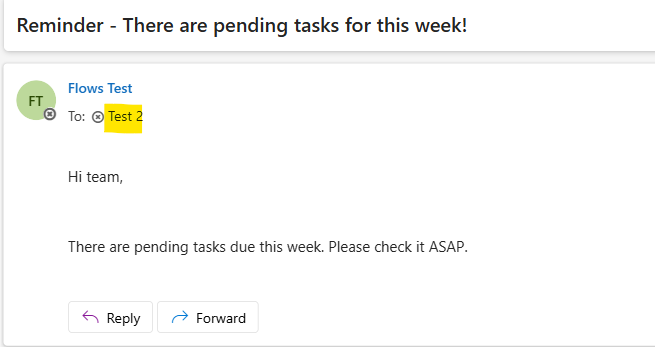
In this case, we’re using the environment variable as the email address that should receive a reminder. When the Power Automate flow runs, the email will be sent to the current value assigned to the environment variable:
Using environment variables in Copilot Studio Agents
Adding environment variables to Agents created with Copilot Studio works similarly to using dynamic contents in Power Automate. For this example, we will include the variable as part of a message sent to the user, but the same logic can be applied to other tasks, such as including it in the instructions for a Generative answer, or using it as an input for an Action.
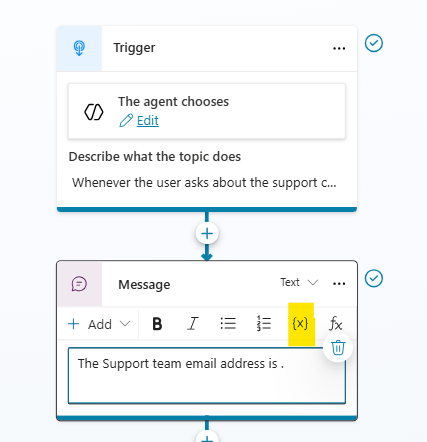
Inside a Send message node of a topic, you can simply select the variable icon (in yellow):
A new pane will appear, containing different tabs to organize the custom variables available for this Topic and for the entire Agent, as well as the system variables and the environment variables (in green):

Once you select the Environment group, you will see all the variables available in your solution, plus a few default ones specific to Copilot Studio Agents. Select the environment variable that we created, and it will be added in the message template (in red):

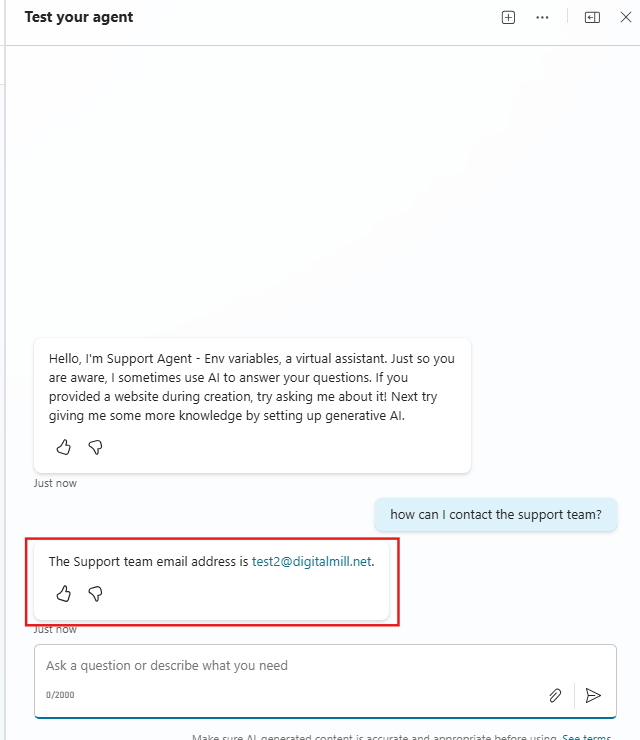
After saving the topic, we can test the Copilot Studio Agent by invoking the topic. As expected, the email defined in the environment variable is included in the message:
Using environment variables in Power Apps
Since environment variables are available for all solution components, we can leverage them inside a Canvas App. The process is for using it is not as straightforward as in Power Automate or Copilot Studio, and it requires a Premium license because it interacts with the Dataverse connector.
The first step is to add Dataverse as a data source, referencing the Environment Variables Values table:

The Environment Variables Values table stores the current value of each variable, which can be identified using the variable’s unique name (column Schema Name):

To reference the environment variable’s value, you will need to use a Lookup Power Fx formula that searches for the variable’s name through the Dataverse table:
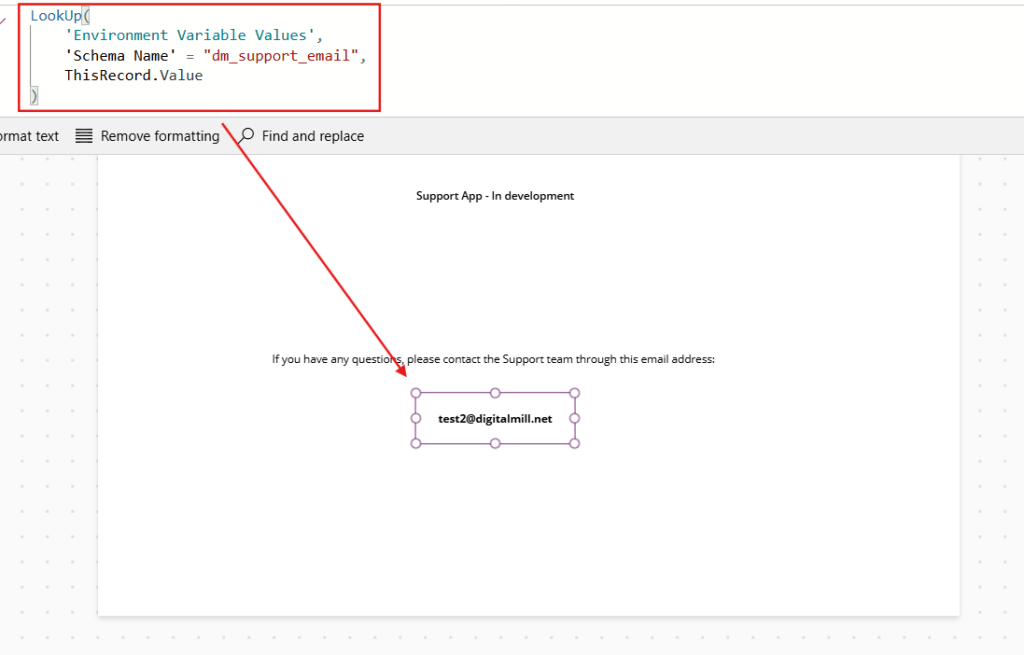
The formula above (in red) works similarly to a VLOOKUP in Excel. In the first parameter, we select the data source to read. As second parameter, we set a condition to filter the Schema Name column from this table by the unique name of the environment variable. Finally, in the third parameter we select the result, it means, the property from the data source that you want to retrieve – in this case, the Value property, which can be accessed with ThisRecord.Value or simply Value.
Conclusion
In this blog, you learnt more about the environment variables in Power Platform, and how to integrate them within your flows, apps or agents. Let us know what do you think about this blog in the comment section, and don’t forget to check our website, our YouTube Channel or connect on LinkedIn!
