If you’re building agent experiences with Copilot Studio, there may come a time when you need to handle file uploads from users, such as documents, images, or forms, and store those in SharePoint, OneDrive, or any other system.
In this blog, you will learn how to send files uploaded by the user from Copilot Studio to Power Automate so they can be processed, stored or integrated to other services.
Note: This solution was tested in March 2026. Keep in mind that Microsoft frequently updates Copilot Studio features, so the approach described in this article may change or stop working in the future.
You can also check this step-by-step in a video format:
Solution overview
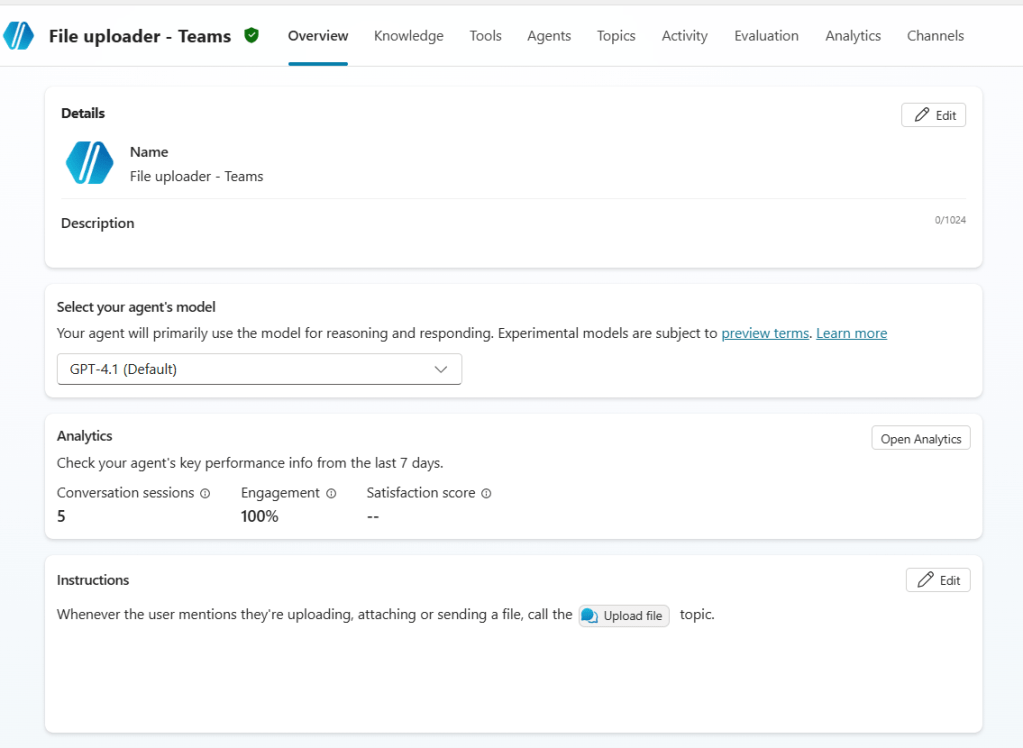
For the purposes of this blog, we’re working with a Copilot Studio Agent configured with a simple instruction to direct the conversation to the Upload file topic whenever the user indicates they want to upload, attach or send a file:
Within this topic, the agent reads all attachments sent by the user during the conversation:

These files are then passed to an Agent flow, which processes the attachments and saves them to a SharePoint folder:

If you are not familiar with Copilot Studio, you can refer to this article to learn more about how agents and topics work.
Creating an Agent flow in Copilot Studio
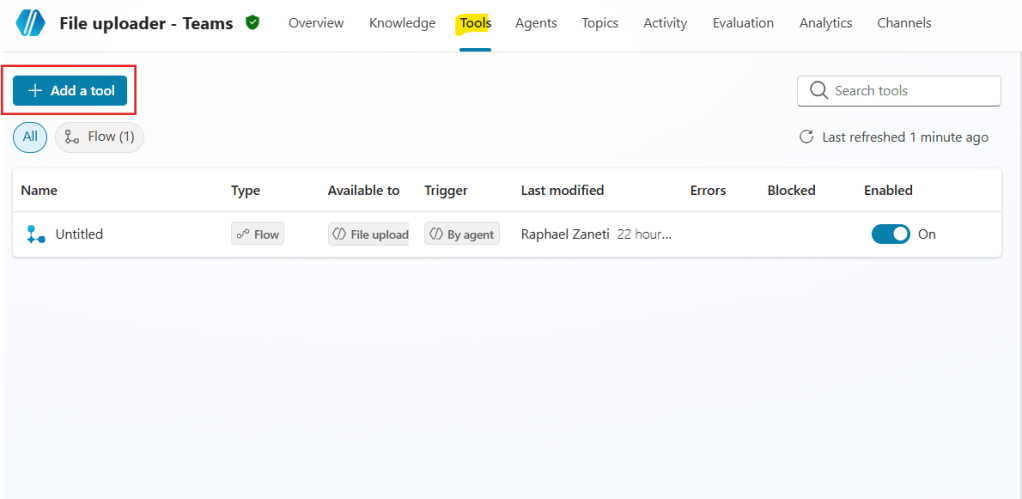
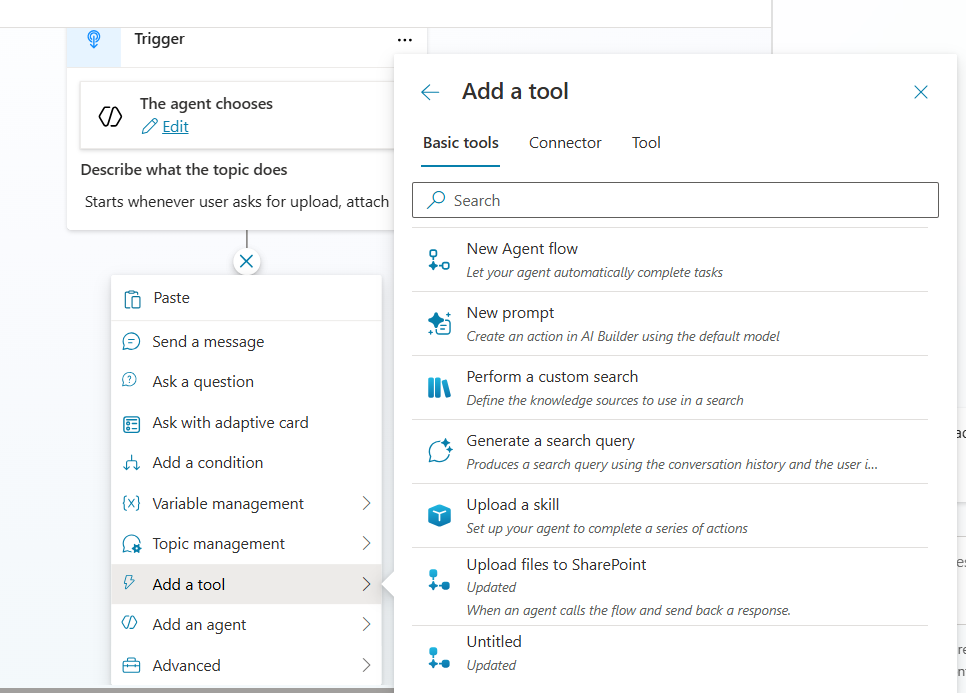
The first step is to create an Agent flow. In Copilot Studio, navigate to the Tools tab (highlighted in yellow) and click Add a tool (in red):
Under the Create new section, select Agent flow (highlighted in yellow):

The Agent flow is essentially a Power Automate cloud flow that is scoped for Copilot Studio. It uses the same engine and actions available in Power Automate, but it runs in the context of a Copilot Studio Agent.
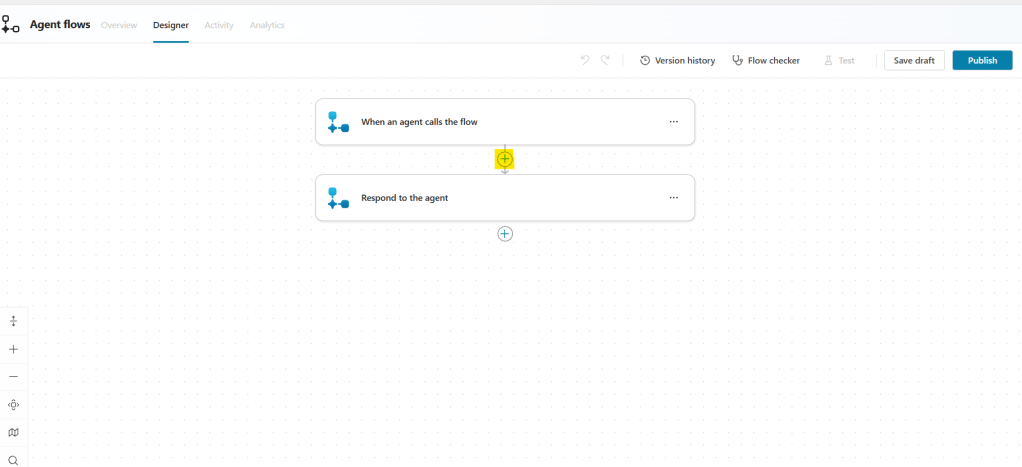
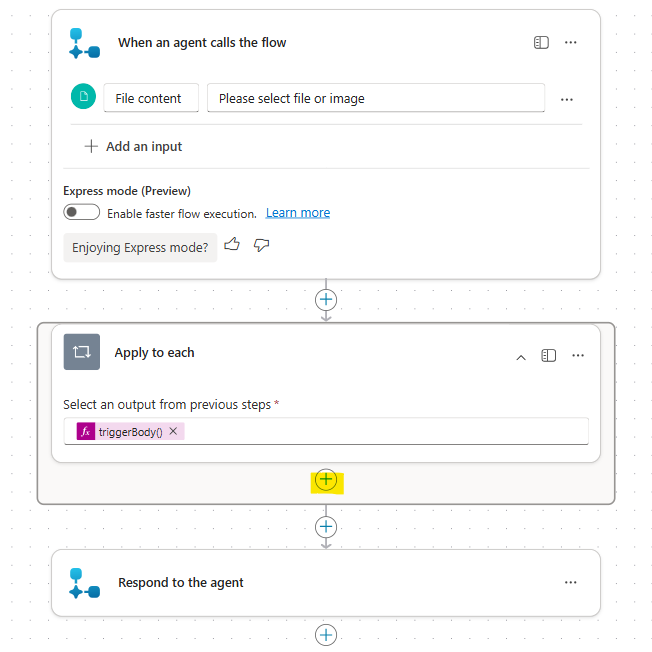
When designing an Agent flow, the entire logic should ideally be placed between the trigger (When an agent calls the flow) and the Respond to the agent action:
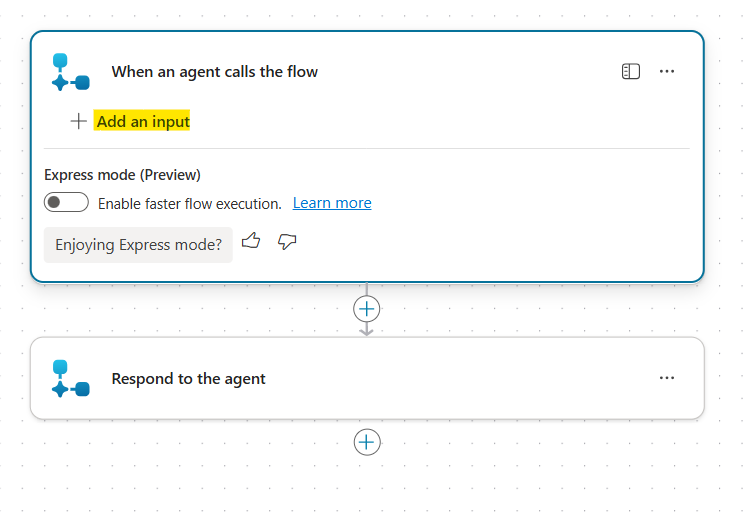
Before adding logic to the flow, expand the When an agent calls the flow step and click Add an input:
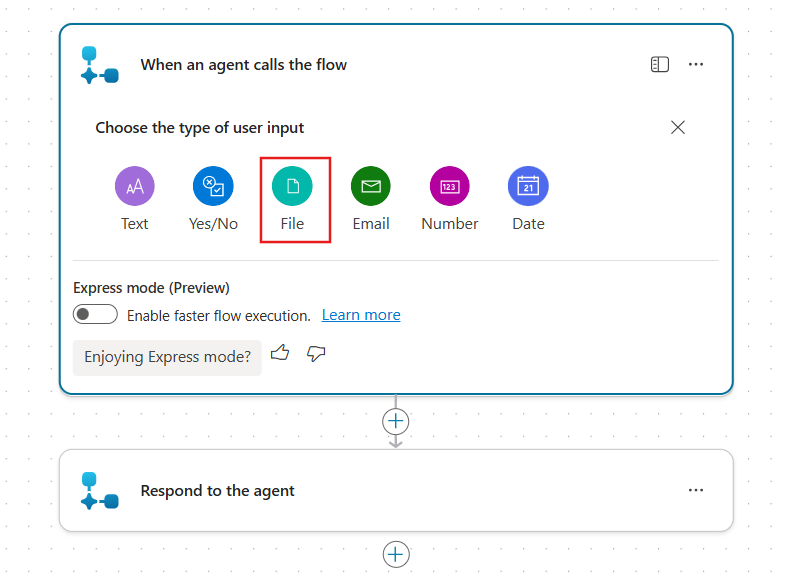
This is where you define the data that will be passed from the Copilot Studio Agent to the flow. To create an input parameter, select the type of data that the agent will provide. In this scenario, choose File (highlighted in red):
Using loops in Agent flows
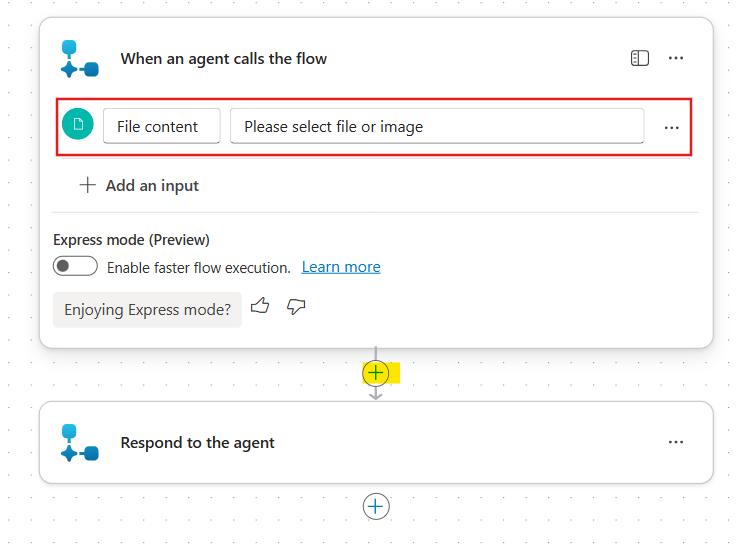
After creating the input, it is possible to change the input name and description (highlighted in red). For this example, only one input field is enough, so we can now add a new action to the flow by clicking the plus icon (in yellow):
Although we selected a File input type, the language used by the flow interface is misleading, since there is no file data type in Power Automate. Instead, the flow expects a JSON object from the Agent, which will contain all attachments sent by the user, rather than a single file.
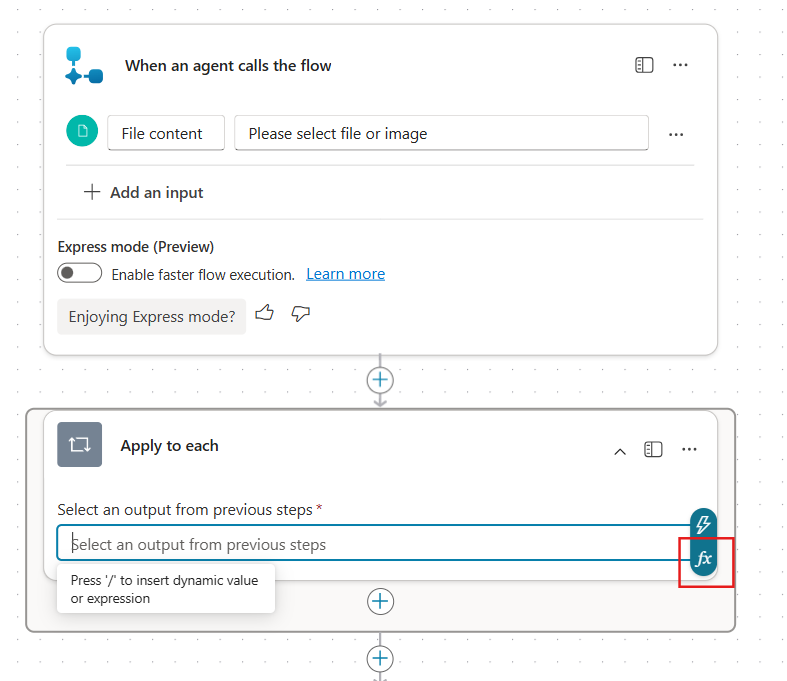
This list of attachments is organized as an array of objects (a list of JSON elements), and to iterate through a list in Power Automate, we need to use a loop. When adding the action, search for Apply to each, select it and on its input bar, click the Fx button (highlighted in red):
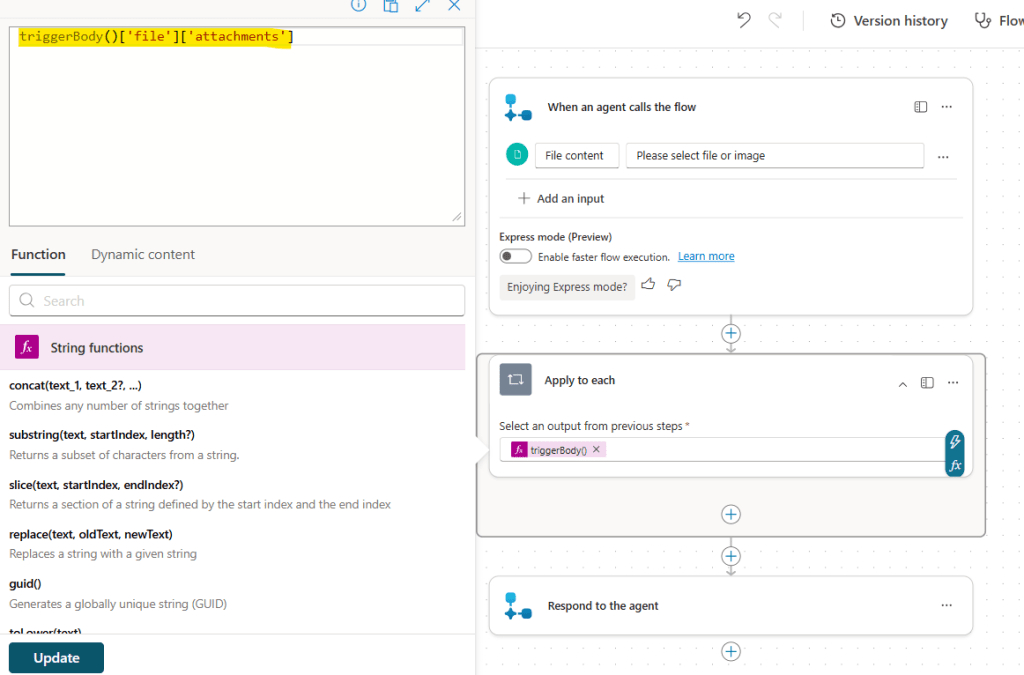
A new pane will appear, where you can enter an expression. Enter the value triggerBody()[‘file’][‘attachments’] (highlighted in yellow) and click Add. This expression will access the attachments property under the File input, which we will define when adding the flow to a topic in Copilot Studio:
Saving attachments to SharePoint
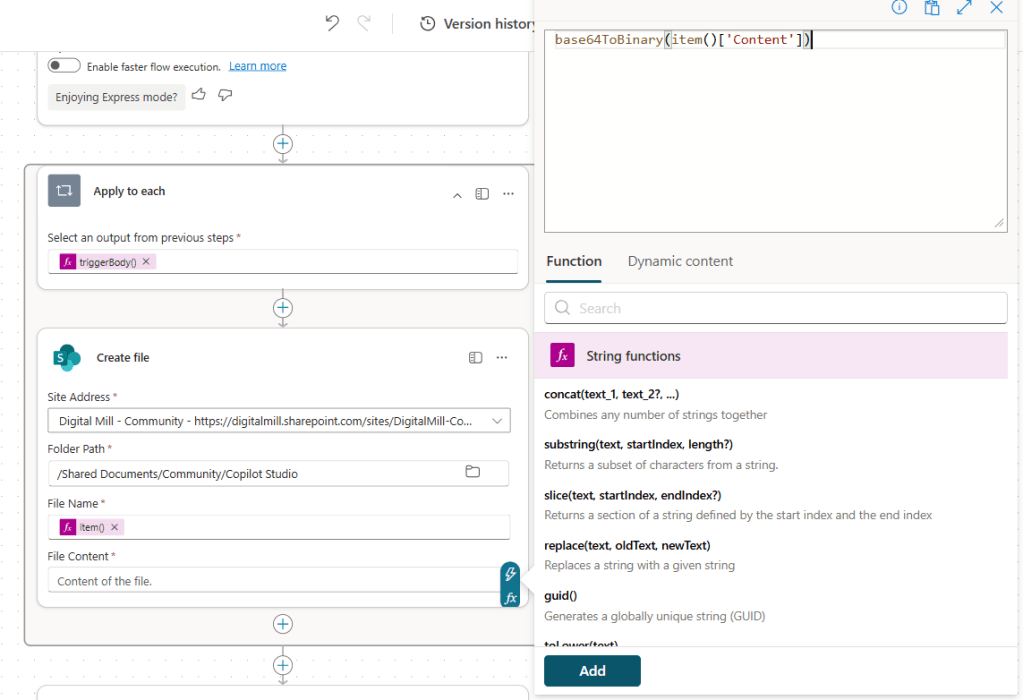
The next step is to create a file in SharePoint for each attachment processed by the loop. Inside the Apply to each block, click the plus icon to add a new action (highlighted in yellow) and search for Create file, from SharePoint connector:
Enter the Site Address and Folder Path inputs to identify where the attachments should be stored. For the File Name field, use the expression item()[‘Name’], which dynamically retrieves the name of the attachment currently being processed in the loop. For the File Content field, use the base64ToBinary(item()[‘Content’]) expression, which converts the Base64-encoded file content received from the agent into a binary format that SharePoint can store correctly:
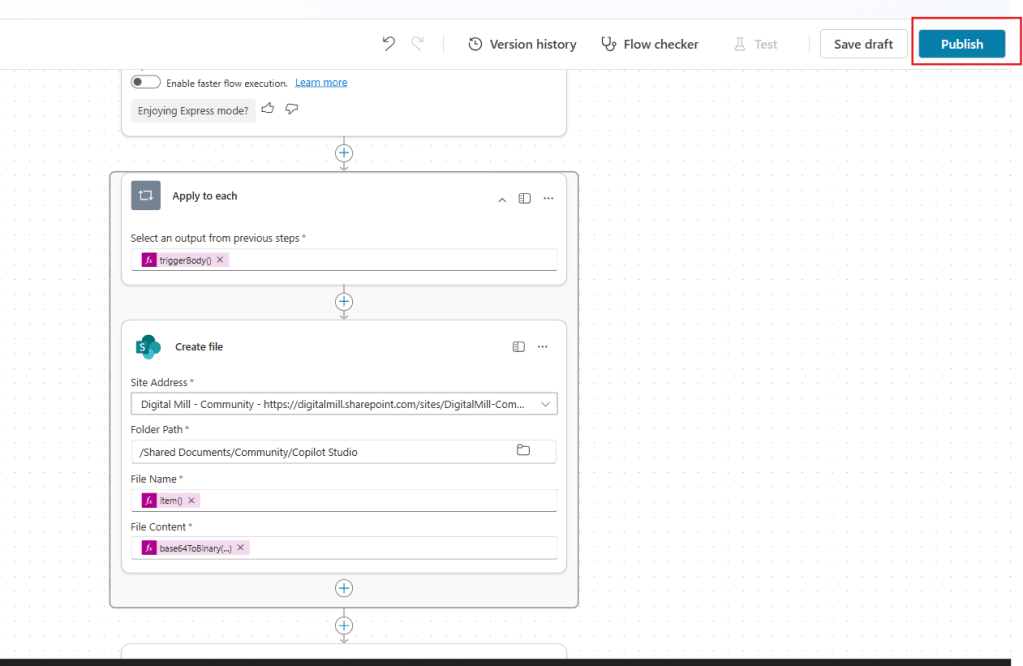
At this point, the Agent flow configuration is complete, and you can click Publish to make the flow available to your Copilot Studio Agent:
Use maker’s credentials in flow with run-only settings
As mentioned earlier, Agent flows are built on top of Power Automate flows, so you can access and edit these them directly from the flows list in Power Automate.
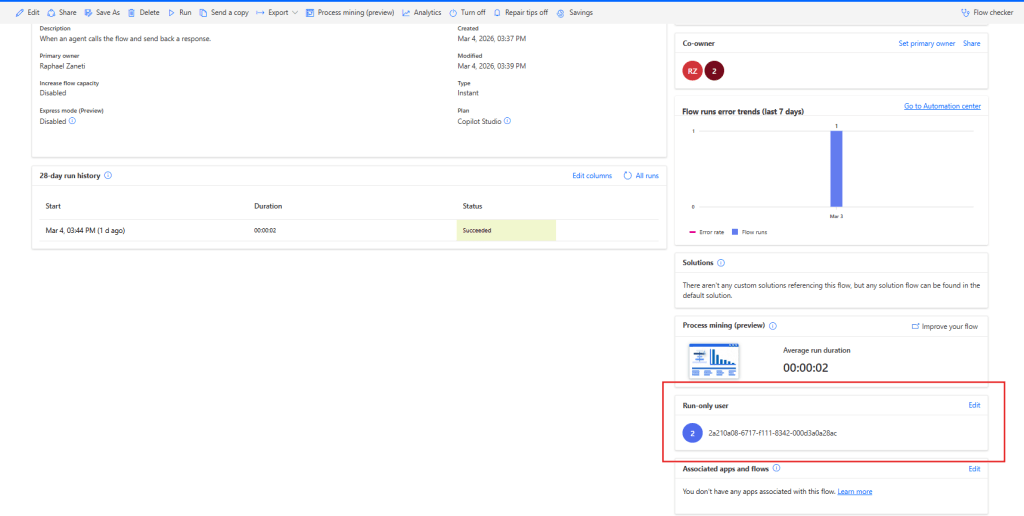
Some configuration options are only available within the Power Automate interface. One of these features is Run-only settings, which allows you to control which connections are used when the flow runs.
By configuring the flow to use the maker’s credentials, the Copilot Studio agent will not prompt the user to authenticate when the flow is executed during a conversation.
To configure this setting, open the flow details page, scroll down to Run-only users (highlighted in red), and click Edit:
Next, set the SharePoint connection dropdown to Use this connection ([maker’s_email]), and click Save:
This is the last step required on the Power Automate/Agent flow side.
Formatting the Copilot Studio attachments as a JSON object inside a Custom Topic
Back to Copilot Studio, create a custom topic to handle the attachments and add instructions so the Agent can rote the conversation to this topic whenever the user indicates they are uploading a file. For example, an instruction such as “Whenever the user mentions they are uploading, attaching, or sending a file, call the Upload file topic” should be sufficient.
Inside the topic, add the Agent flow created earlier as a tool:
For the flow input, enter a formula that provides a JSON object where attachments is the key and the variable System.Activity.Attachments as value (highlighted in yellow). Make sure the Type is set to Record (highlighted in red) to prevent validation errors when saving the Topic:
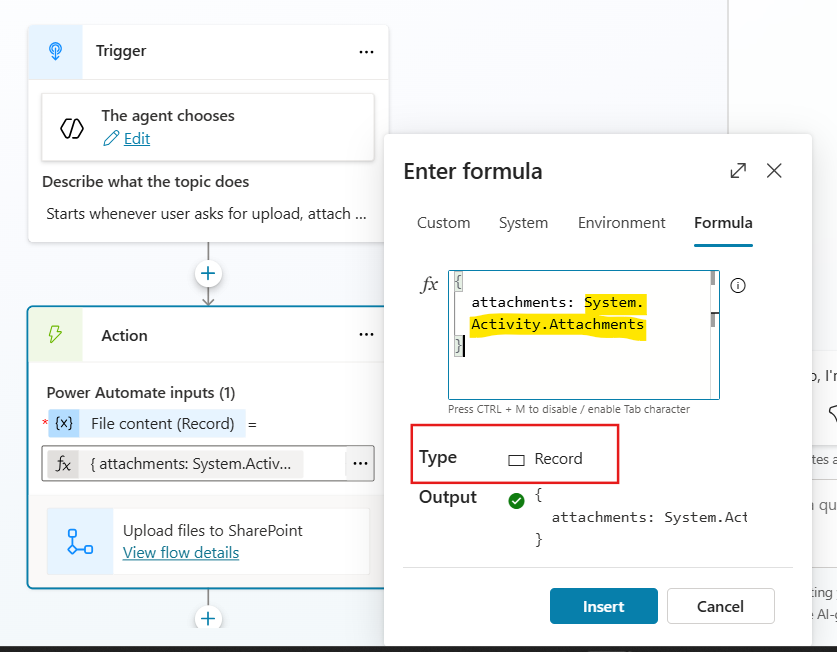
Your formula should look like this, including the enclosing curly brackets:
{ attachments: System.Activity.Attachments}
Finally, click Insert, save the topic and publish the Agent.
Testing the solution
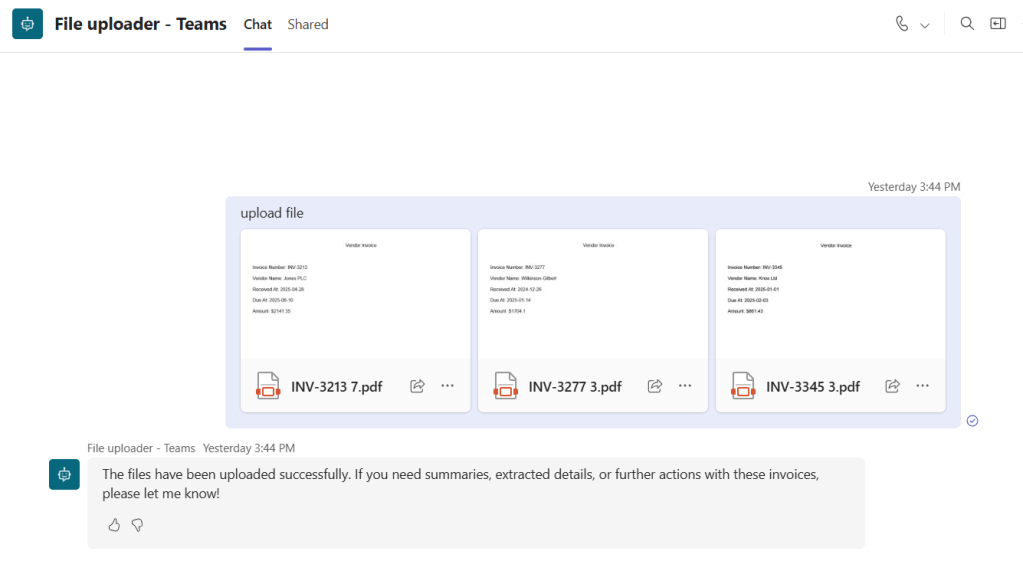
Now it’s time to test the solution. For this example, the agent was deployed to Microsoft Teams, but the same logic can also be used with a Chatbot embedded on a website. Other deployment scenarios have not yet been tested. To test the workflow, attach one or more files to a message and include a sentence indicating that you want to upload or send a file:
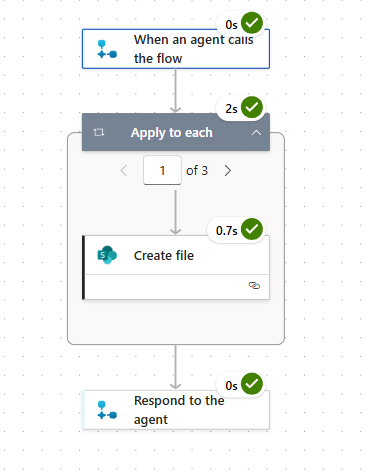
Once the message is sent, the automation will run. In Power Automate, you can open the flow run details page to review the execution of each step in the flow:
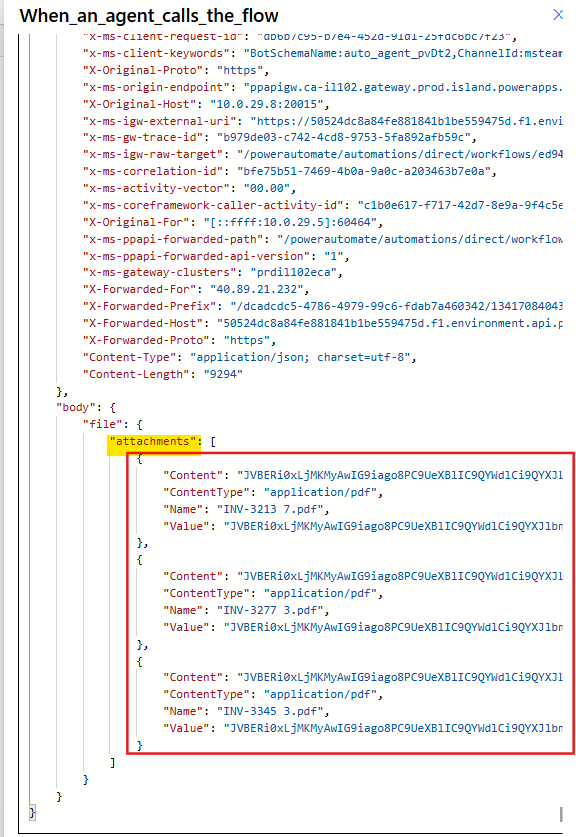
On the same page, you can inspect the trigger raw outputs, where you will find one JSON object for each uploaded file (highlighted in red), organized as an array under the attachments property (highlighted in yellow). This is the same property we defined when passing the JSON object from the Topic to the Agent flow:
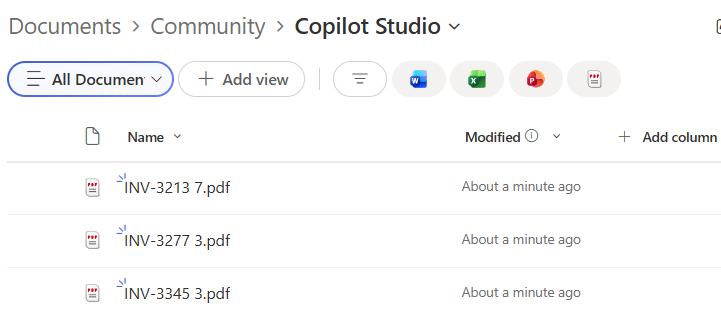
Finally, each attachment will be saved to the SharePoint folder defined in the Create file action:
Conclusion
In this blog, we saw how to save attachments sent by the users in chats with a Copilot Studio Agent, using Power Automate. Let us know what do you think about this blog in the comment section, and don’t forget to check our website, our YouTube Channel or connect on LinkedIn!
