One of the most popular uses for Power Automate is to track changes in SharePoint List Items. While there is a dedicated trigger for it, there are no built-in controls for selecting which columns from the List must be monitored.
For example, let’s say that we want to track only the changes made to the Status column in this SharePoint List:

Although we can use trigger conditions to restrict the flow to run only when specific values are found in certain columns, it’s still not possible to specify which column should be monitored for changes. For example, a condition to capture only the values with statuses “Assigned” or Published” would still trigger the flow if a change is made to the Description column, as long as the Status value matches the condition.
In this blog, we will see how to limit the flows to track only the changes in the Status column.
Capturing SharePoint List item change with Power Automate
Power Automate supports two different triggers for tracking changes in SharePoint List items: the When an item or a file is modified and When an item is created or modified. The key difference between them is that the first captures only the change event in the items, while the second monitors any upsert events (update or insert):

For this blog, we will work with the When an item or a file is modified.
Identify SharePoint column that has changed
Although flows are always started by a change in a SharePoint List, it is possible to identify which column was modified by using the Get changes for an item or a file (properties only) action:
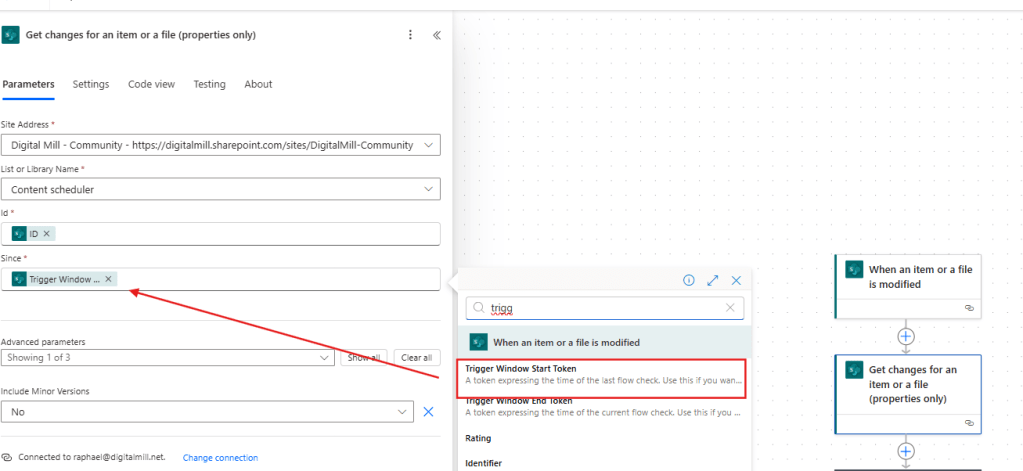
This action requires the details about the SharePoint List and item to be monitored, and the start time for tracking changes, which can be dynamically set to the Trigger Window Start Token dynamic content extracted from the trigger (in red). By using this dynamic property, Power Automate will capture all changes made since the last item update and return a ColumnHasChanged property, which indicates with true or false values whether each column in the List was modified.
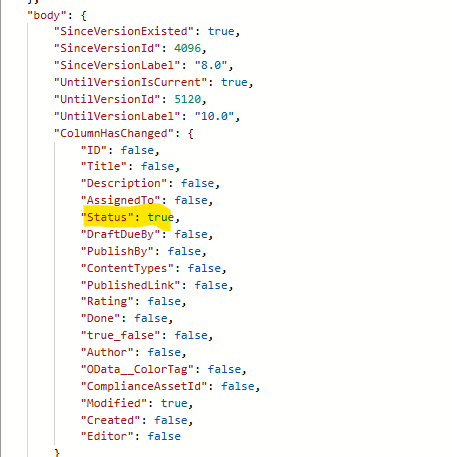
As you can see from the raw outputs of this action after a modification in the Status column, the respective property is retrieved as true, while all other keys of this object are false (except for Modified, which indicates the change date):
Now that you have a list of the columns that were modified since the flow was triggered, you can add a Condition to check if the Status column was changed or not. If it wasn’t, you can stop the flow by adding a Terminate step in the False branch:
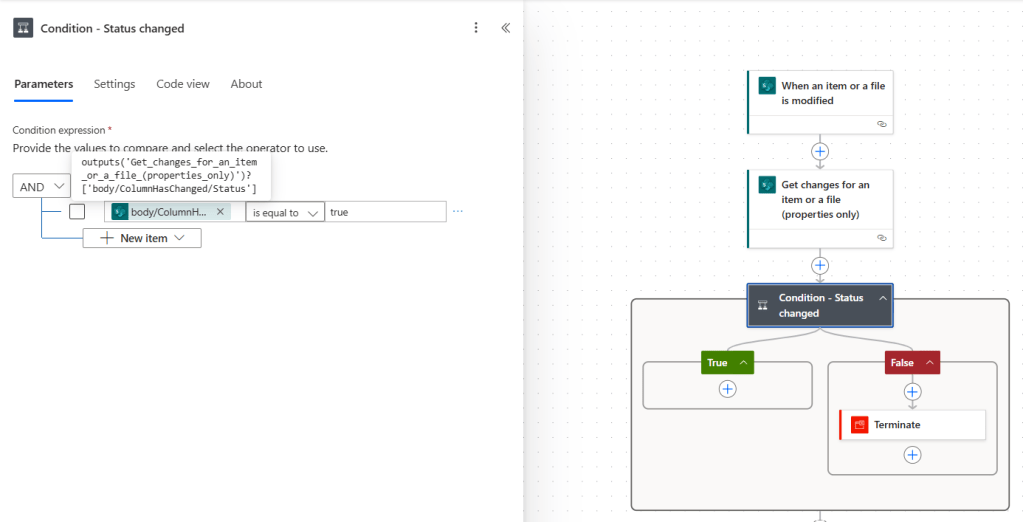
When configuring the Terminate step, you can define the status to be assigned to the flow run when it reaches this action. For this example, we are choosing the Cancelled status, so we can distinguish it from the successful runs (succeeded status) and from those that found some error (failed status):

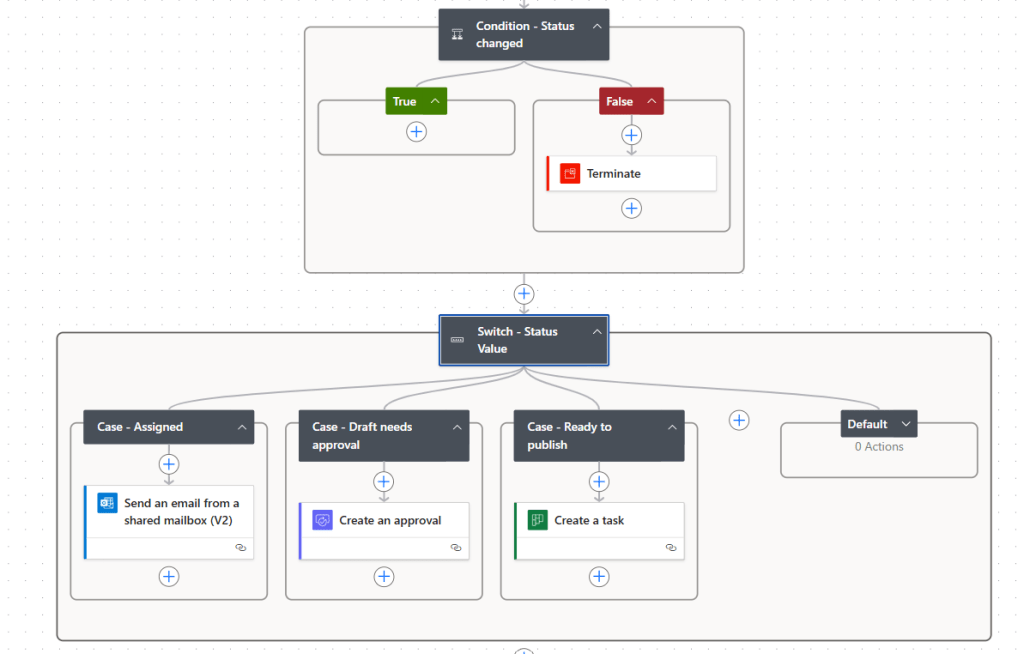
Lastly, you can handle the flow logic after the Condition, as it will only run if the Status column has actually changed – otherwise, the flow will be terminated. In this case, we’re using a Switch to execute different tasks depending on the status assigned to the List Item:
Alternative: run the logic in a child flow
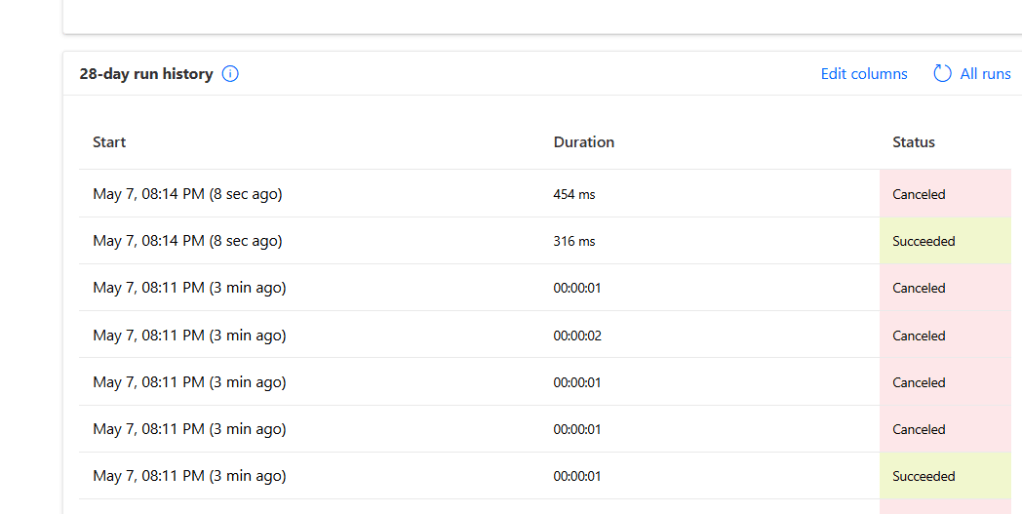
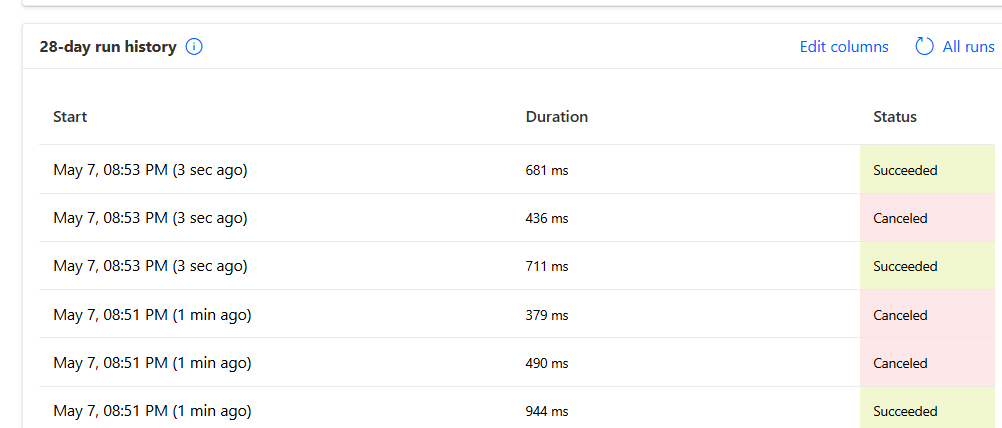
So far, our flow is functional, but tracking its health can be inconvenient if your SharePoint List is frequently updated. Since the flow is initiated by changes made to any column and stops if there is no status change, a history like this will become normal:
An alternative to clean up the flow run history is to move your logic into a child flow. For that, you will first need to create a Solution (step-by-step here):
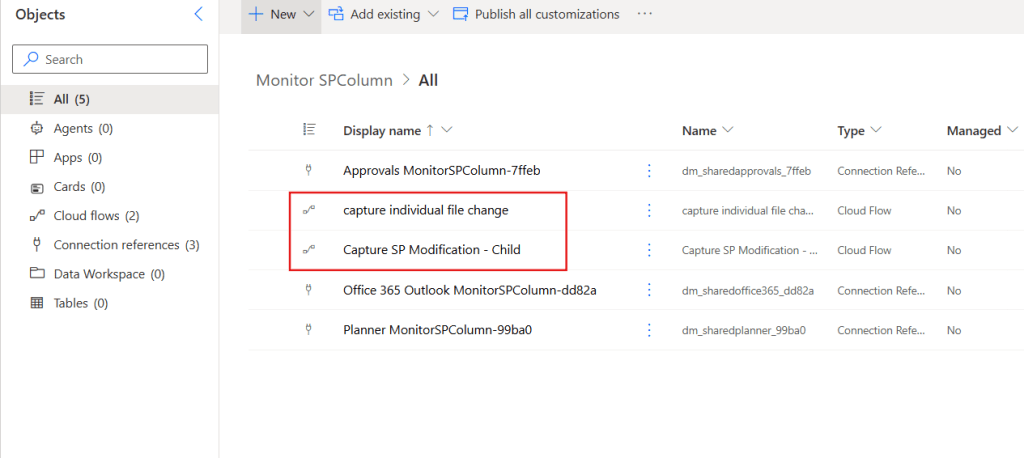
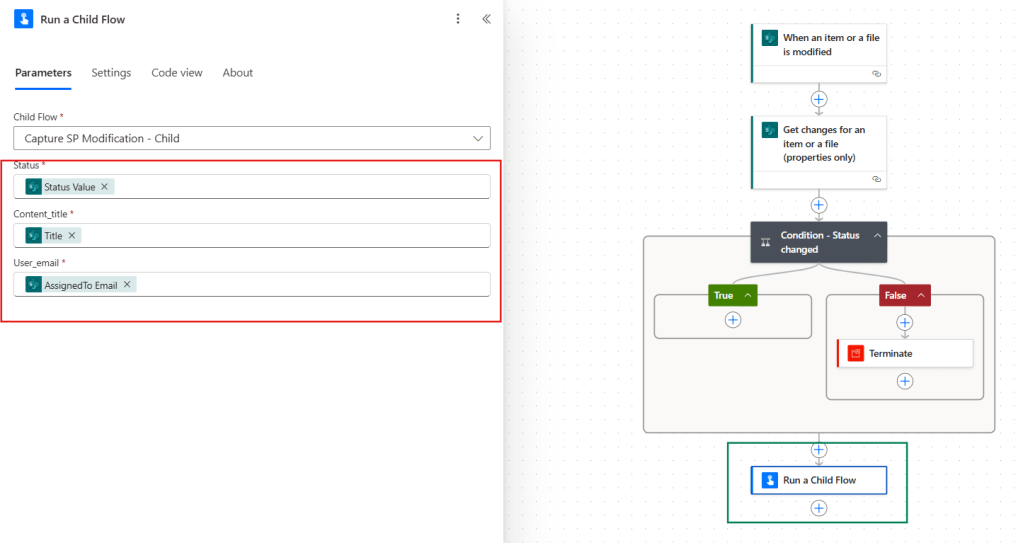
And reallocate all the logic that comes after the Condition to a new manually triggered flow:
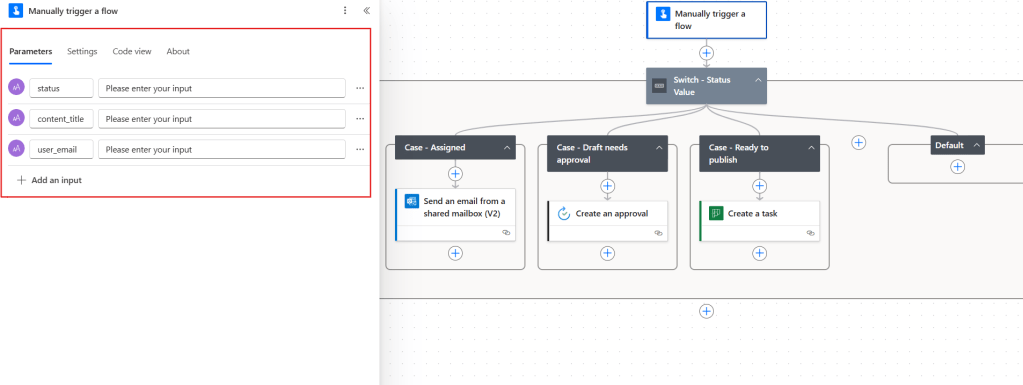
Eventually you will need to add a few parameters to the trigger (highlighted in red above), so you can send the relevant data related to the modified item from the parent flow to the child flow.
Another requirement for the child flow is to include at least one Response step. Although not mandatory, you can add more than one Responses, which can be used for error handling purposes. For this example, we are using two Responses, where the Error step has a run after setting to execute only if there if the Switch action fails, times out or is skipped:

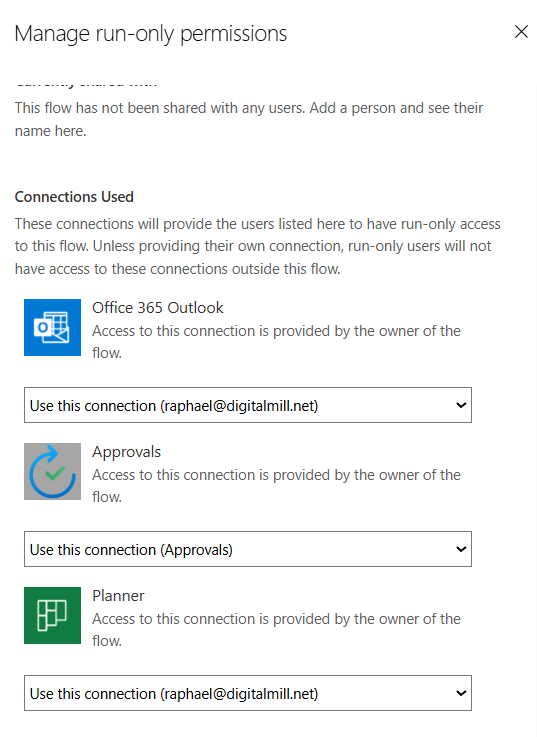
Depending on the actions used in the child flow, you may need to configure the Run-only permissions for the connections:
As a final step, simply add a Run a child flow action where your original flow logic was located (in green below). This new action may require a few inputs, depending on the data and operations defined within the child flow (in red):
After making updates to the SharePoint List, the parent flow will still be triggered multiple times for each change, regardless on the column:
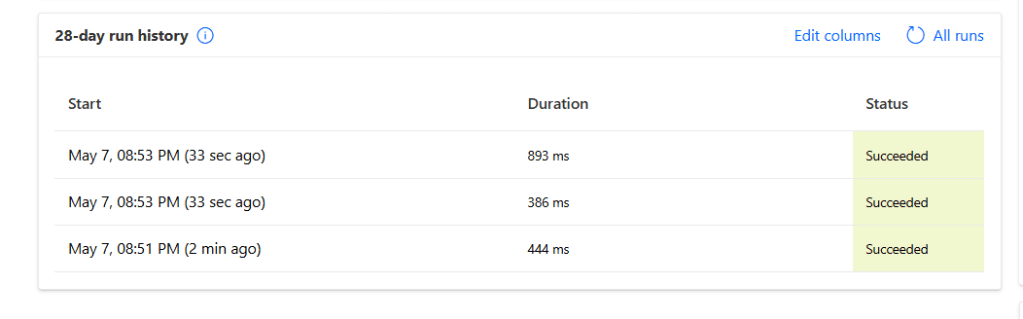
However, the child flow will run only when the change specifically affects the Status column. In this case, there were only 3 executions of the child flow in a 2-minute window, which matches the 3 non-cancelled runs from the parent flow:
Conclusion
In this blog, we saw how to use Power Automate to track the changes from an individual SharePoint column, ignoring the updates made to other properties. Let us know what do you think about this blog in the comment section, and don’t forget to check our website, our YouTube Channel or connect on LinkedIn!
