Since the rise of ChatGPT, chatbots that can process natural language and provide generative responses become a must-have for many organizations. As part of the Power Platform, Copilot Studio is a great starting point for those users who don’t have a strength software development background, but would like to create their own chatbots.
A key feature from Copilot Studio is its ability to integrate with Power Automate flows, which enables the Agent to perform tasks across more than 1,000 different platforms. In this blog, we will explore this scenario, where a flow is started from an Agent iteration initiated by the user.
Use case overview
For this article, we will work with a scenario where a company manages the submission of new IT Support Tickets through a Virtual Agent that processes natural language. The user who opens the ticket must describe the problem they’re experiencing, and the Agent will automatically classify it into one of 3 categories: Software, Hardware or Accounts, based on the instructions provided during the bot’s configuration.
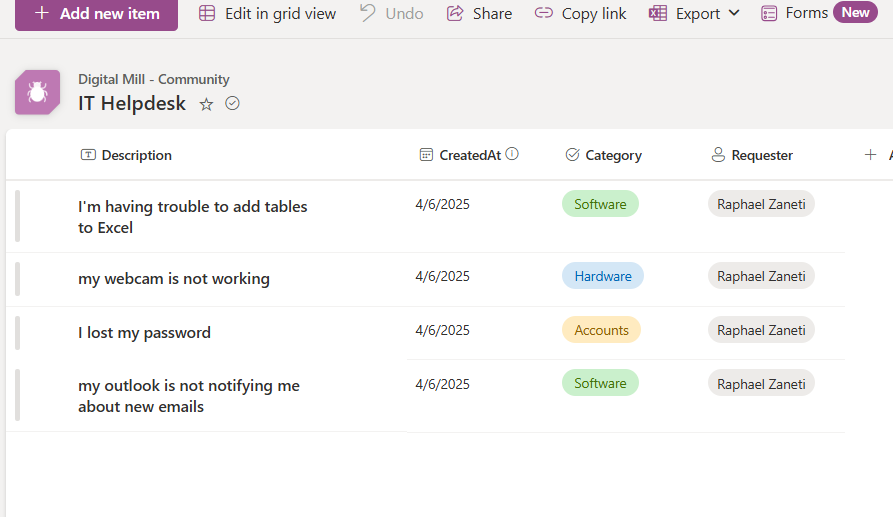
Right after that, the Agent must create a new item in a SharePoint List containing the ticket description, the user who opened the ticket, the creation date and the ticket’s category. The category column is a Choice type and is populated with the classification assigned by Copilot based on the issue. The requester column is a Person type and is automatically populated with the user who opened the ticket via the chatbot. The List looks like this:
Building an agent in Copilot Studio
To create a new agent, go to Copilot Studio page, select Agents from the navigation menu (in blue) and click on New agent (in red):

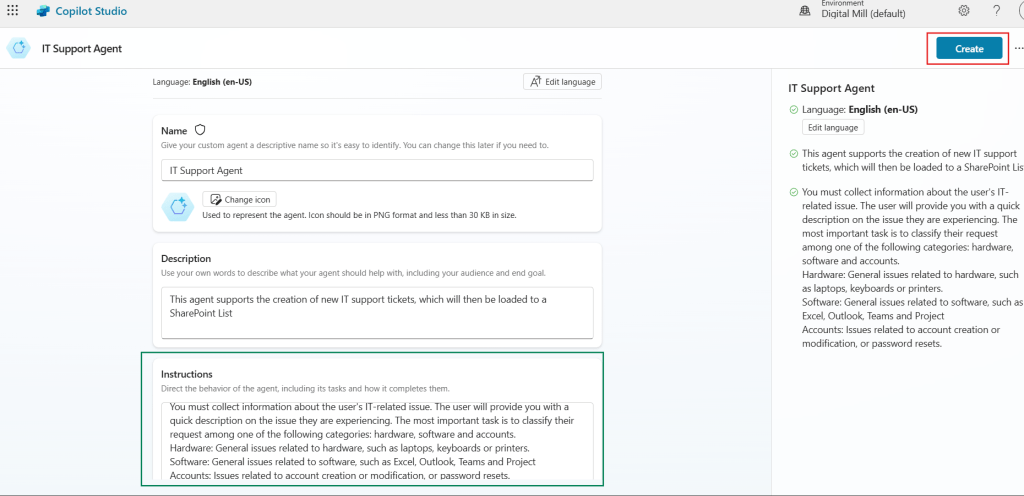
Then you need to name your Agent, add a quick description on what the agent does, and provide general instructions to guide the Agent’s behavior. In our case, we are giving clear instructions that specify what is expected from the Agent: classify an issue as either “Software”, “Hardware” or “Accounts”, along with a short description on of what each category represents. Once you are done, click Create (in red) to proceed:
Creating a topic in Copilot Studio
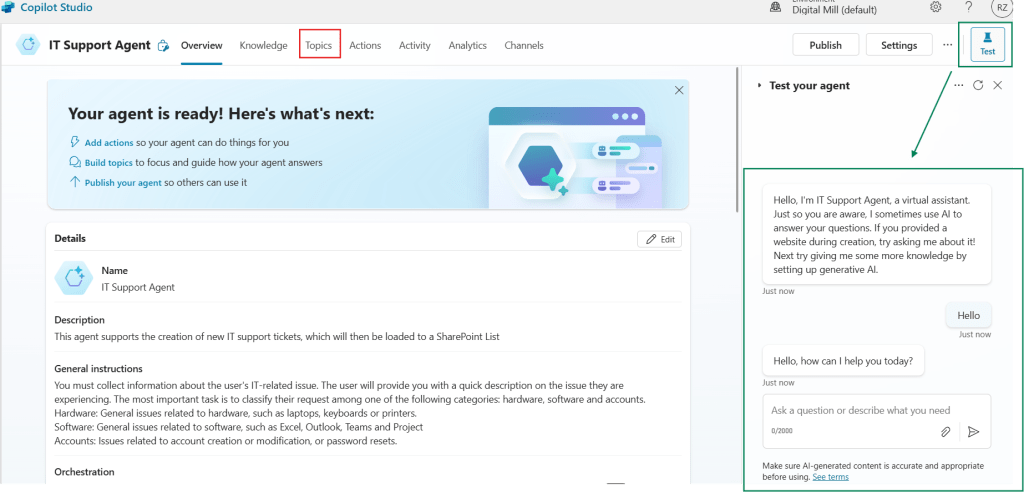
After creating the Agent, we will see a few tabs that allow you to navigate through different settings, including Knowledge Bases, Topics, Actions, and more. You can even test the Agent by chatting with it to simulate a real user experience (in green). For now, let’s configure the Topics by navigating to the respective tab (in red):
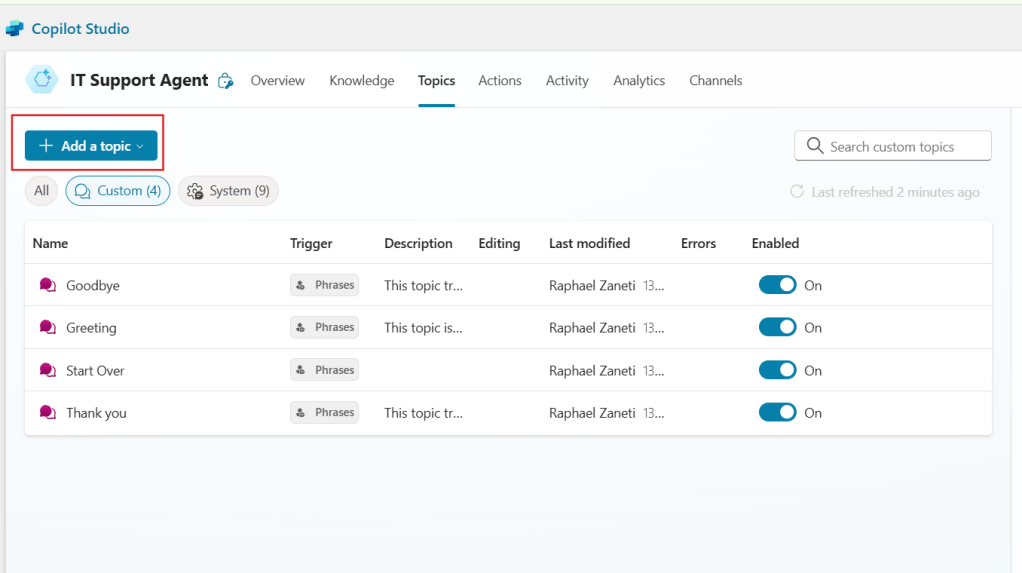
Topics represent the individual subjects or tasks that your Agent can handle. You can use a Topic to collect data, provide information to the user, or even start external actions, just like we will do later in this blog. By default, Copilot Studio provides you with a few Built-in topics to handle general chat interactions, such as greetings. You can also create your own custom topics by clicking Add a topic (in red):
If you are familiar with Power Automate, you may find the Copilot’s Topic design page very similar to a flow design. Just like a flow, the Topic begins with a trigger and can include multiple steps. Throughout this process, you can also manipulate variables and use dynamic contents, so the data from previous steps can be used in the later ones.
In the Topic edit view, you will first configure the trigger phrases for the topic. Those are the phrases that will guide the conversation between the user and the agent toward this specific topic. For setting them up, click Edit (in red) and the Add phrases pane will appear (in blue). You can then type the trigger phrases in the input (in green) and after pressing enter, the list of phrases will be displayed under the trigger (in yellow):
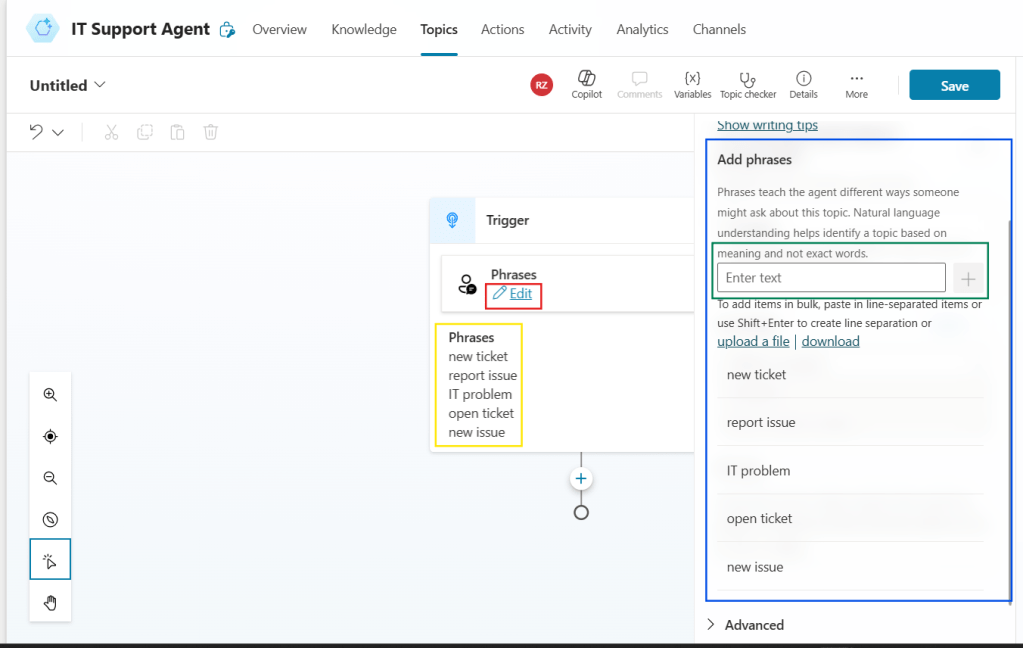
Ideally, each topic should include between 5 and 10 examples of trigger phrases. These are just examples to help the agent to understand to which topic route the user message. They don’t need to cover every possible variation, but should provide enough context for the Agent to accurately interpret what the user wants to do.
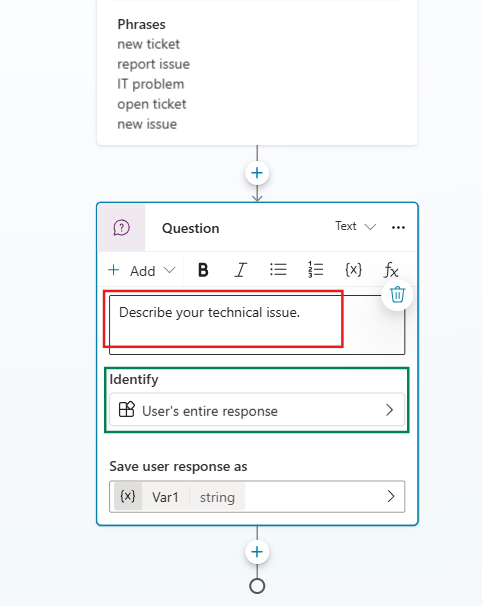
After setting up the trigger, you must add a new Question by clicking the plus sign. This step will ask any question defined by us (in red) and collect their response. You can choose to collect various types of input, such as multiple-choice answers, an email address, a date, and others. For our use case, we will collect the entire response provided by the user (in green):
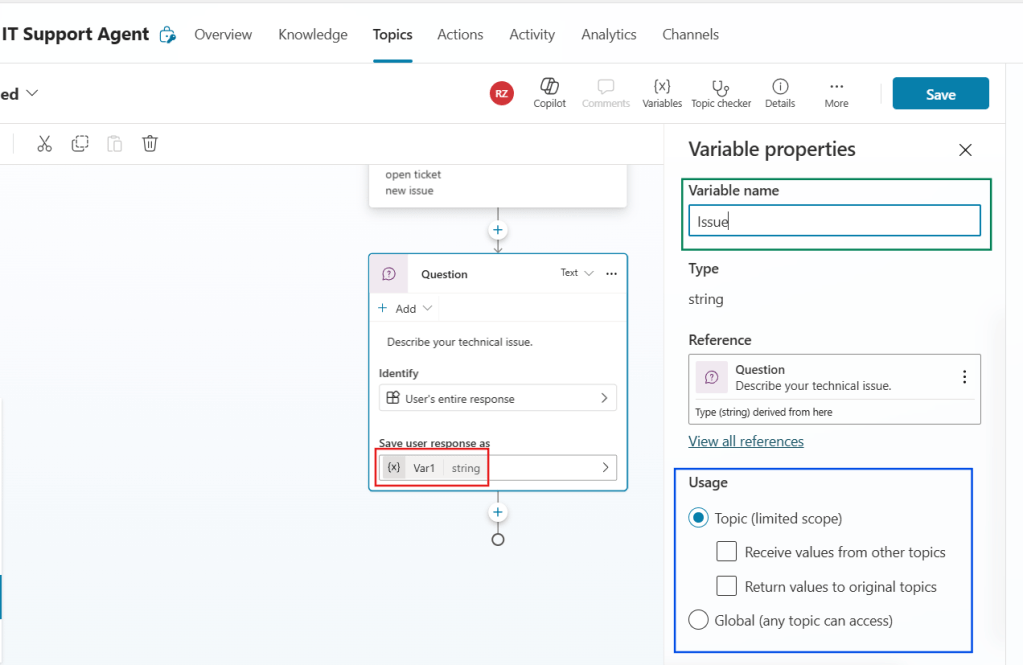
By default, Copilot Studio saves the user’s response into a new variable. You can then modify this variable’s settings by clicking on its name (highlighted in red). A variable properties pane will appear, where you can change its name to something more meaningful, such as “Issue” (in green). If needed, you could also change the scope of the variable, which would enable the agent to access it even from outside of the current Topic (highlighted in blue). For our use case, we can keep it restricted to the Topic:
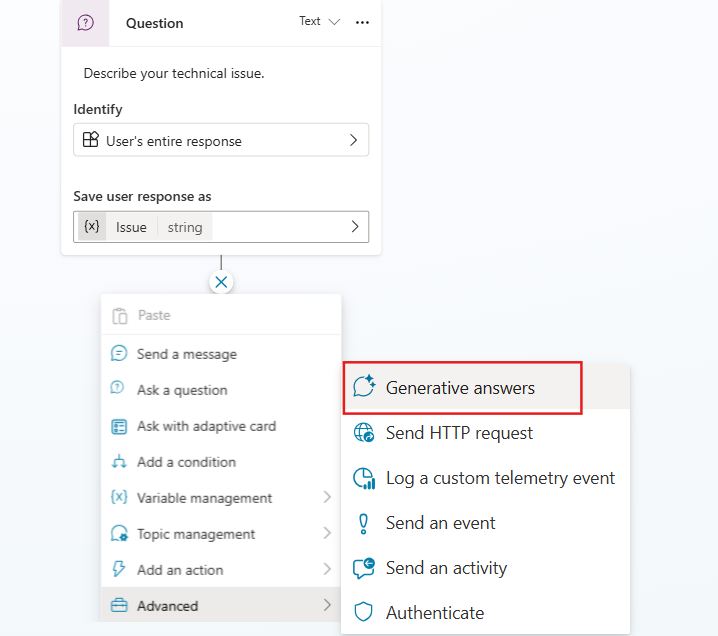
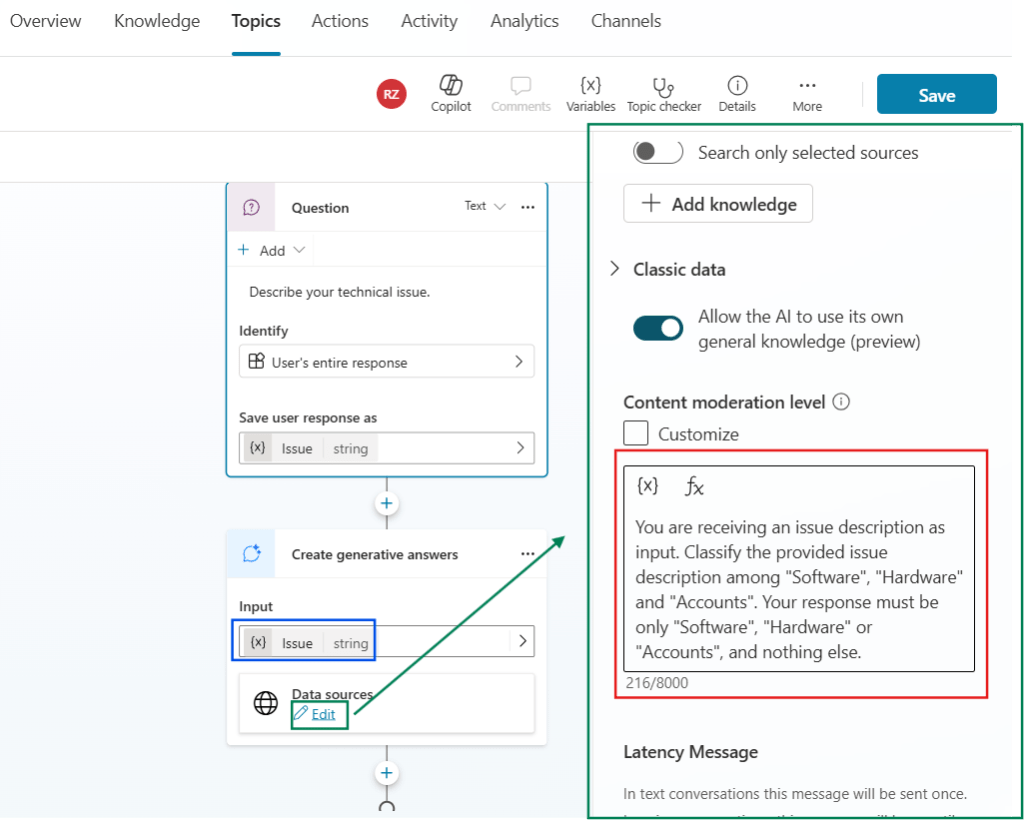
Now it’s time to classify the issue reported by the user. Let’s add a Create a generative answer step (highlighted in red), which can be found under Advanced option:
In this step, you should start by providing the Issue variable as input for the generative response to be created (highlighted in blue). Next, click Edit (in green), which will open the action’s properties pane. Here you can customize the prompt for the generative response. You can add a few additional instructions to the prompt (highlighted in red), and we are now clarifying to Copilot Studio that the generative answer must be limited to the category name only:
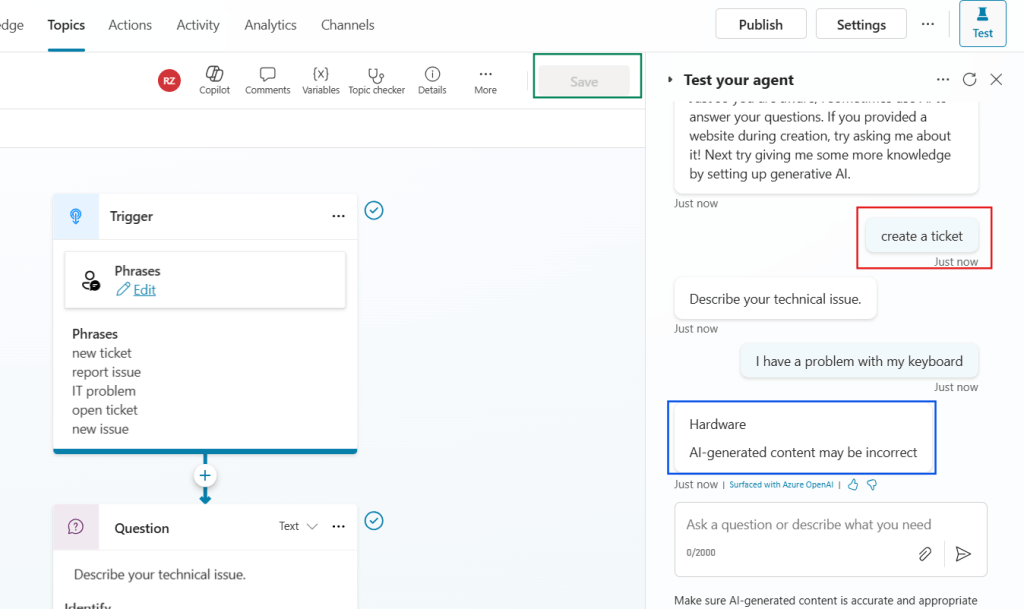
At this point, you can click Save (highlighted in green), and give the Topic a meaningful name. Then we can test the Agent by using natural language to interact with it. You can even try using a phrase that is similar but is not explicitly listed under the trigger, like “create a ticket” (highlighted in red). After describing the issue with natural language, the agent retrieves the category, including the disclaimer that AI-generated content may be incorrect (in blue), which is default when the Generative response is sent to the user in the chat (but removed when we simply use this response to be stored in a variable, as we’ll do later):
Creating a new Power Automate flow to be initialized from Copilot Studio
Now we can set up the flow that will be initialized from the agent. Navigate to the Actions tab (in red) and click Add an action (highlighted in green):

A few examples of actions will be displayed. Since we want to create a brand-new and custom automation, click New action (in blue) and then New Power Automate flow (in red):
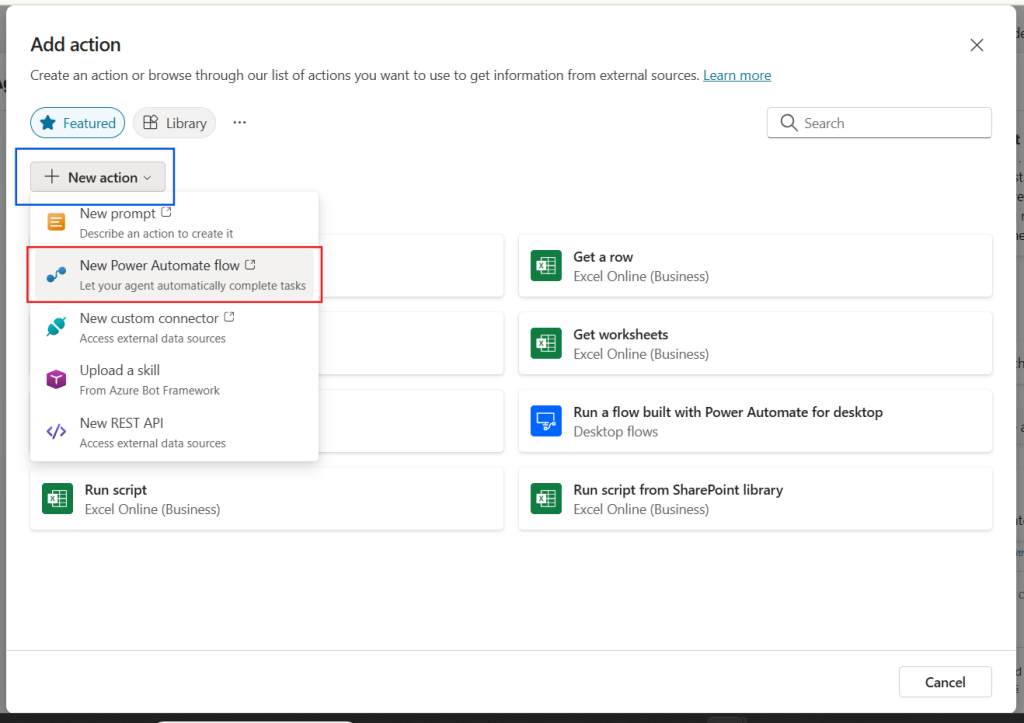
You will be directed to a Power Automate flow containing only a Run a flow from Copilot trigger and a Respond to Copilot action:

Add a record to a SharePoint List with Power Automate
Now we need to set up our Power Automate flow to populate the SharePoint List with the data collected from the Agent. To do this, we must add a few input fields into the trigger, corresponding to the ticket description, the user’s email address and the category of the ticket:

Next, we need to create a new item into the IT Helpdesk SharePoint List, matching the trigger outputs to each field, and setting the CreatedAt column to the current date by using a utcNow() expression (for learning more about how to handle date and time in Power Automate, refer to this blog):
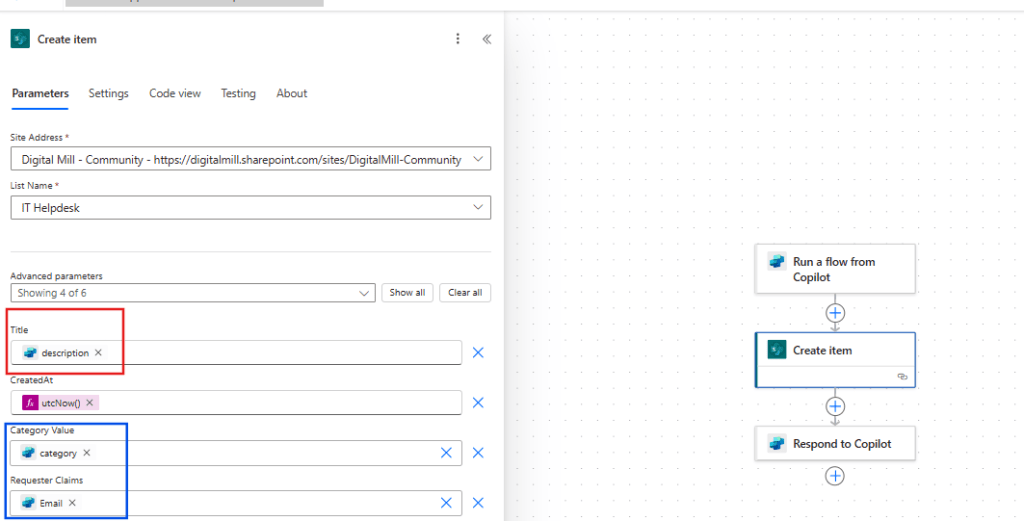
For the Description, since we’re leveraging the built-in Title column from the SharePoint List, so we can simply pass the dynamic content corresponding to the description property received from the Agent (highlighted in red).
For Category column, which has a Choice data type, we can simply pass the corresponding dynamic content as a string, since the category identified by the Agent must match exactly the label of one of the available choices in the SharePoint List (Hardware, Software or Accounts). For the Requester column, which has a Person data type, we can again use the data retrieved by the Agent, as it will match the email of the user who is currently interacting with the Chatbot.
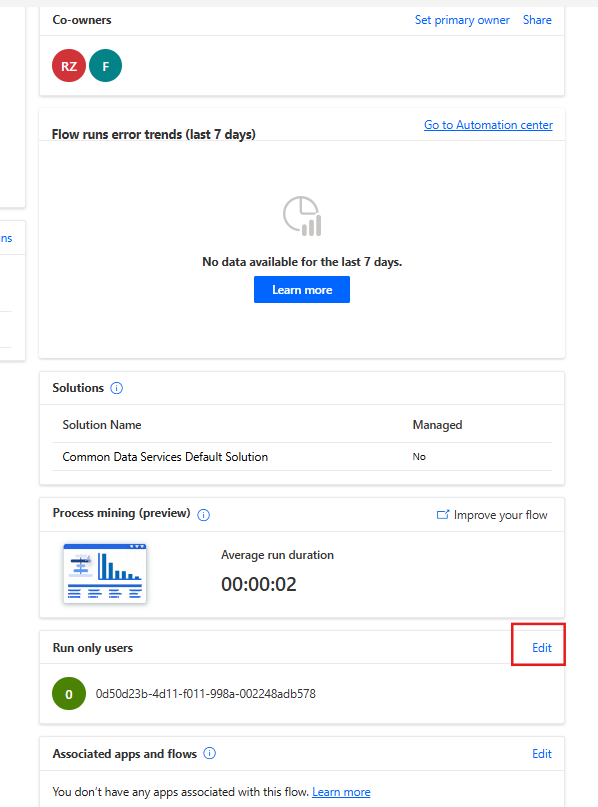
Now you can assign some meaningful name to your flow and save it. After saving, go back to the flow details page and edit the Run only users (highlighted in red):
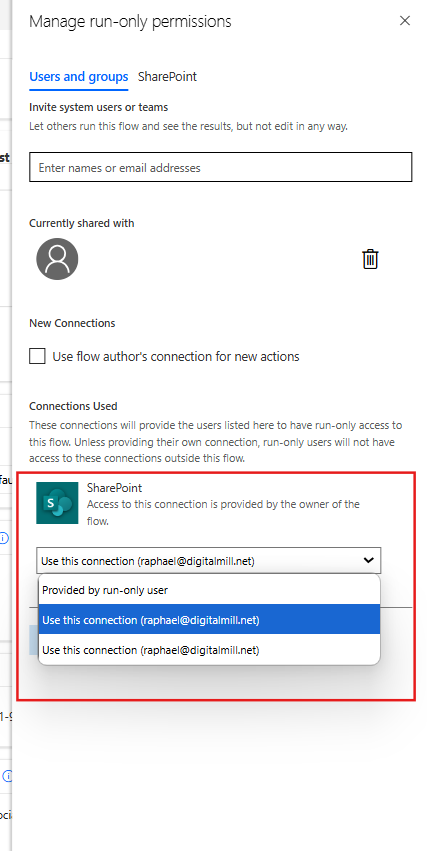
For the SharePoint connector, select the email that you would you like to use as the creator of the List items. This option sets a default connection for our flow, preventing the Agent from asking the users for their credentials when running this automation from Copilot Studio. As a consequence, the users will have a smoother experience and we will have a better access control over the SharePoint List:
Adding action to a topic in Copilot Studio
Back in Copilot Studio, navigate to our Topic and go to the Create generative answers properties by clicking in Edit (highlighted in green). Scroll down the properties pane, and under Advanced, uncheck the Send a message option (highlighted in blue), since we don’t want the Agent to post the issue category in the chat. Lastly, create a new variable under the Save bot response as (in red), so we can use the generated answer later in this Topic:

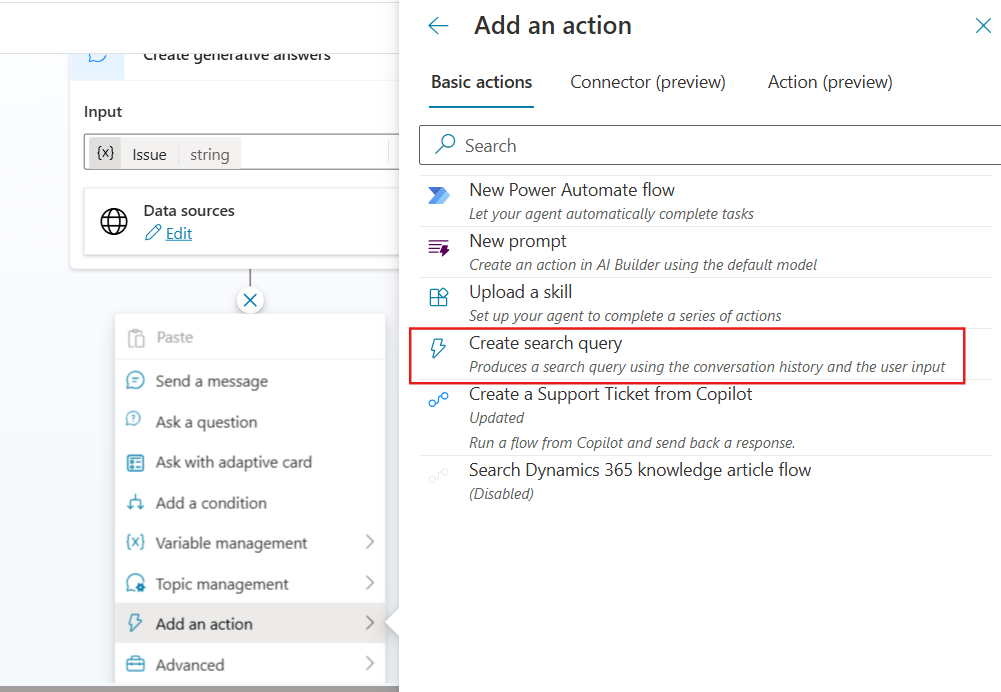
Let’s now create a new step to finally send the data to Power Automate. Select Add an action and then the flow that you created earlier (highlighted in red):
The step will be included to the Topic and will ask for the inputs that we created when configuring our flow’s trigger in Power Automate. For description and category, you can simply click in the right-side arrow (highlighted in red) to display all variables and select the respective ones for each input. For the email, instead of selecting a custom variable, navigate to the System tab (highlighted in blue) and select the User.Email property (in green):

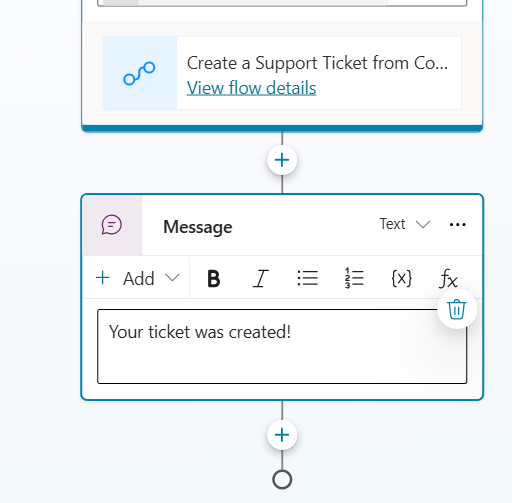
As a last step, let’s send a message to the user letting them know that a ticket has been created. You can achieve this by using the Send a message action:
Testing the Copilot Studio Agent
After saving the Topic, let’s test the process by describing a software-related issue. Instead of responding with the category name, the Agent will simply let us know that a new ticket was created:

The Category is generatively identified (Software), the Description corresponds to the issue described by the user, and the Requester matches the logged-in user who chatted with the Agent:

We can test it further by reporting different issues and the Agent will still be able to identify the proper category for each one. For each issue, Power Automate will then and create a new item in the SharePoint List:

Conclusion
In this blog, we saw how can we combine a Copilot Studio Agent with SharePoint, using Power Automate as a bridge. This integration takes the Chatbots to a next level, allowing them to perform complex tasks while interacting with the end-users in a natural language. Let us know what do you think about this blog in the comment section, and don’t forget to check our website, our YouTube Channel or connect on LinkedIn!
