Many business processes are initialized by a file change in a SharePoint Document Library. However, when it comes to streamline these processes with Power Automate, the available triggers retrieve all files from a specific folder (including its subfolders), without providing a clear option to limit the flow to capture only the changes made to a specific file.
One possible solution is to apply a condition within the trigger, so the flow will be initiated only under specific circumstances. In this blog, you will learn how to set up trigger conditions in Power Automate for capturing changes from individual files hosted in a SharePoint Document Library.
Use case overview
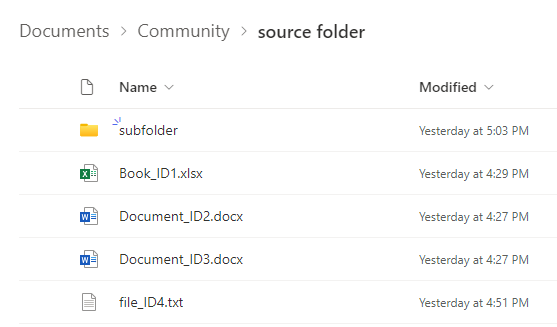
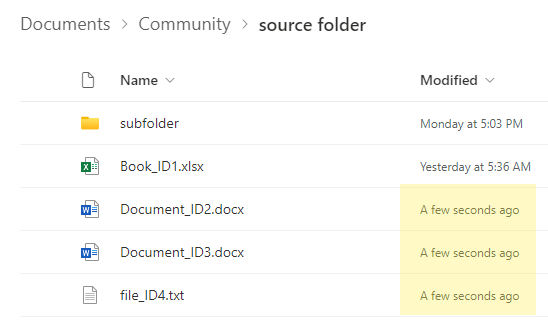
For the purpose of this article, let’s assume that a company needs to track a specific document (Document_ID2.docx), notifying a user via Microsoft Teams whenever the file is modified. The document is allocated within a folder containing different other files and a subfolder with other documents:
Power Automate can be very helpful for this scenario, since there is a built-in trigger to capture changes made to files or items located in SharePoint.
Capturing file change by file name in Power Automate with trigger conditions
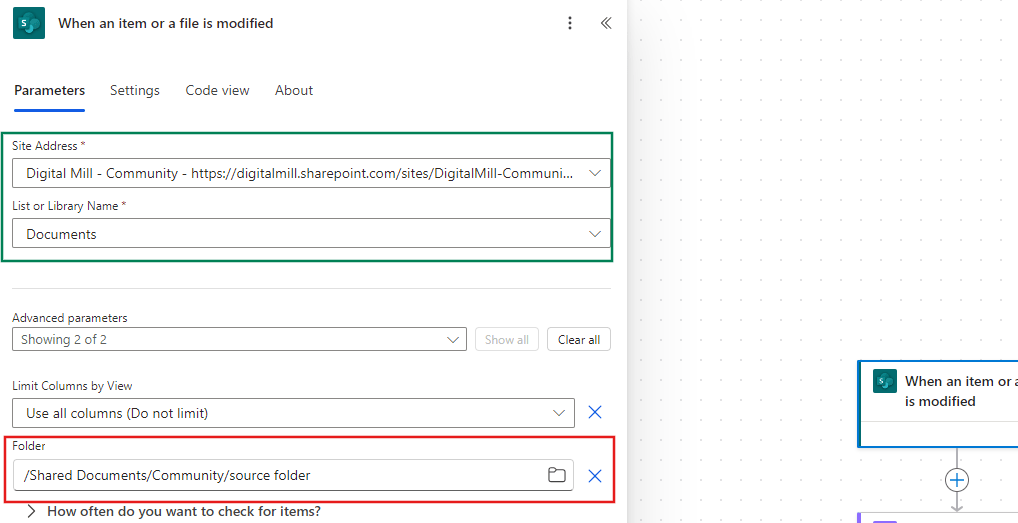
Let’s start by creating a new automated flow with a When an item or a file is modified trigger, which requires a Site Address and the Document Library to be monitored (highlighted in green). Although it allows you to limit the monitored files to a folder (highlighted in red), it is not possible to restrict the flow to capture the changes made to a specific file (at least not directly within the trigger parameters):
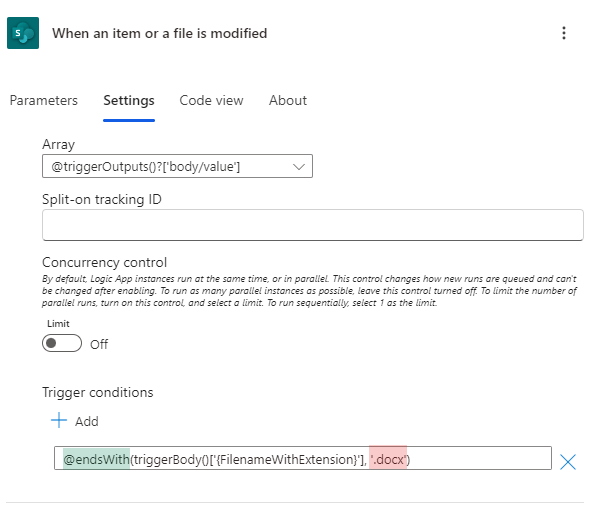
To restrict the flow to a specific file, we must configure a trigger condition. These conditions are found in the Settings tab of the trigger (highlighted below in blue), and you can create new conditions by clicking in Add (highlighted below in red).
The condition must begin with an “@” symbol and a comparison operator (highlighted in orange), such as @equals, @startsWith, @greaterThan, the logical operators (@and, @or) or the negation operator (@not). After the operator, the parameters must be passed between parenthesis, similarly to the Power Automate expressions syntax. The first parameter corresponds to the file property to filter (highlighted in green), while the second expects the filter criteria (highlighted in yellow):

Since we want to restrict the flow initialization to a file with a specific name (Document_ID2.docx), we set the first parameter as the respective property from the trigger that stores the file name ({FilenameWithExtension}) and the second one as the desired file name enclosed by single quotes. The full expression used for the trigger condition is: @equals(triggerBody()[‘{FilenameWithExtension}’], ‘Document_ID2.docx’). To find all properties retrieved by the trigger or any actions within your flow, you can access its raw outputs.
With the trigger already configured, let’s add a new action to notify the members from a Teams Channel whenever the flows run, informing the file that was modified:

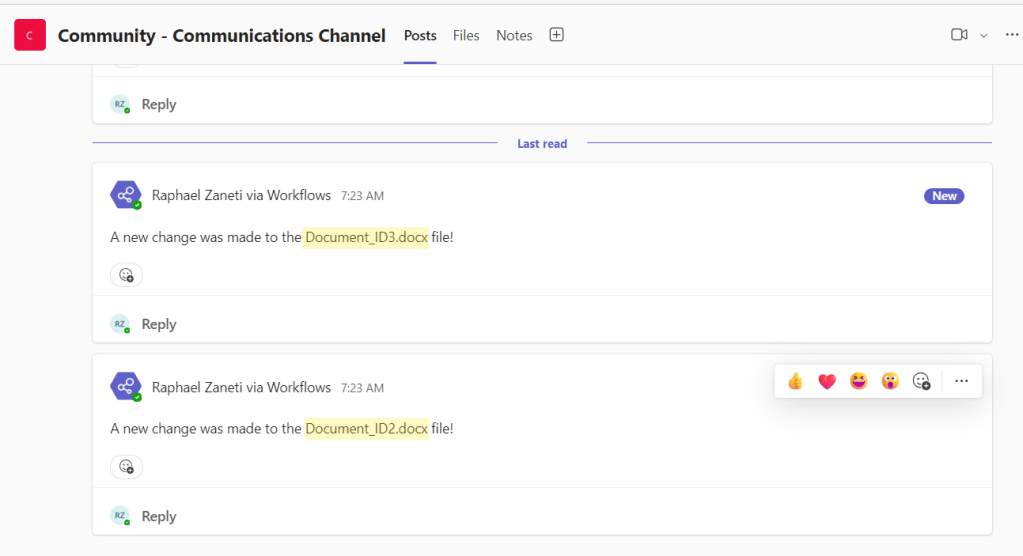
Then we test the flow by modifying two different files:
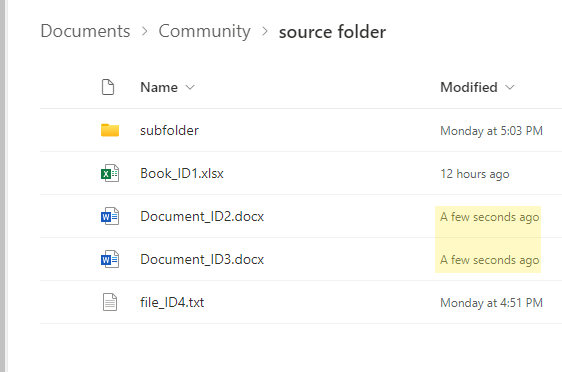
Although we’ve modified two files, only the Document_ID2.docx will trigger the flow because of the trigger condition we set up. As a result, only one message will be posted to the Teams Channel:

Capturing file change by file extension in Power Automate
It is also possible to capture the changes from a file based on a part of its name by using the @contains operator, so the flow is triggered only if the file name contains a specific keyword. In can be helpful when you are monitoring files that follow a default naming convention.
Another useful use case is to capture changes in files that has a common extension, such as .docx. For this scenario, from our existing trigger condition, we would simply need to change the operator to @endsWith, and set the second parameter to the file extension to be monitored.
Let’s implement this change into our trigger condition and save the flow. We are simply setting the comparison operator to @endsWith (highlighted in green) and the second parameter to .docx (highlighted in red). We don’t need to change the first parameter, since we are still applying the filter to the {FileNameWithExtension} property:
After making changes to three different files—two Word documents and one .txt file— the expectation is that only the changes to the Word documents will trigger the flow:
As expected, only the modifications to the files with the .docx extension triggered the flow, and no message was posted to the Teams Channel for the .txt file:
Conclusion
In this article, you learnt how to set up trigger conditions in Power Automate to track changes made to specific files within a SharePoint Document Library. By using conditions within the trigger, we were able to restrict the flow to run only when changes were made to specific files, based on its name or on its extension, which is a great solution for the lack of individual file filtering property in the When an item or a file is modified trigger.
