By default, Power BI allows you to set up a scheduled refresh for data sources stored online, which works great for many use cases. However, there are situations where we need to refresh a data source based on a specific event, rather than on a scheduled basis.
The good news is that you can set up these custom refreshes using Power Automate, where you will combine any trigger (the event that starts an automated flow) with an action to refresh the datasets.
Important: this strategy requires a premium Power Automate connector, meaning you will need a premium license to implement it.
Use case overview
For the purposes of this article, we will use the following Power BI Report, which is a very simple representation of data from an invoices dataset:

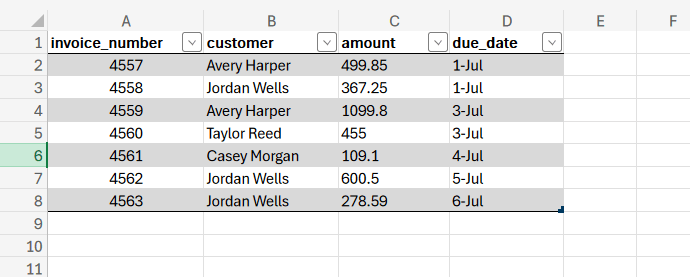
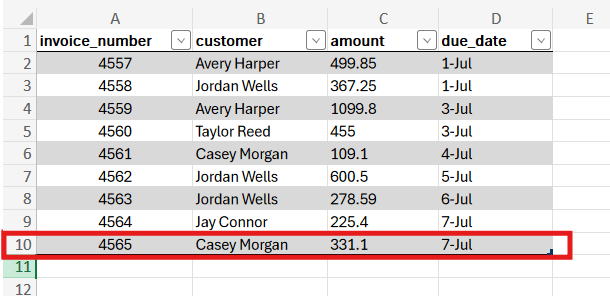
The data is sourced from the following Excel table, stored in a SharePoint Document Library:
In this article, we will simulate two scenarios: (1) a refresh triggered by clicking in a button directly from the Power BI report, and (2) a refresh triggered by the insertion of a new row into the Excel table. For the second scenario, we will capture the event of a modification in the Excel file, and assume that all interactions with the spreadsheets are automated and not performed by a human (like in the example of this post, where an automated flow captures data from emails to populate an Excel table).
You can also trigger a flow directly from a button click within the Excel file, as you can see in this blog, so you can combine these two strategies to update your Power BI data sources from Excel.
Scenario 1: Data source refresh triggered by button click in Power BI
As a first step, let’s create an instant cloud flow, selecting Power BI button clicked as trigger (highlighted in red):

If you’re new to Power Automate or want to learn more about the different types of flows and how to use them, check out this article.
After that, you won’t need to configure the trigger further. Add a new step to the flow, the Refresh a dataset action (highlighted in red), and populate the dropdowns with the desired workspace and dataset:

That’s all you need in Power Automate: you can now save the flow and you are done! Next, go to Power BI Desktop, select the Insert tab in the ribbon (highlighted in green) and click in Power Automate (highlighted in red), under Power Platform section:

A new visual will appear in your report, with instructions on how to create a flow. Make sure to select the correct environment (highlighted in orange), then click in the ellipsis (…) (highlighted in red) and in Edit (highlighted in yellow):

A new flows overview page will load after some seconds, and you can find the flow that you just created in Power Automate (highlighted in red). Select it and click Apply (highlighted in green):

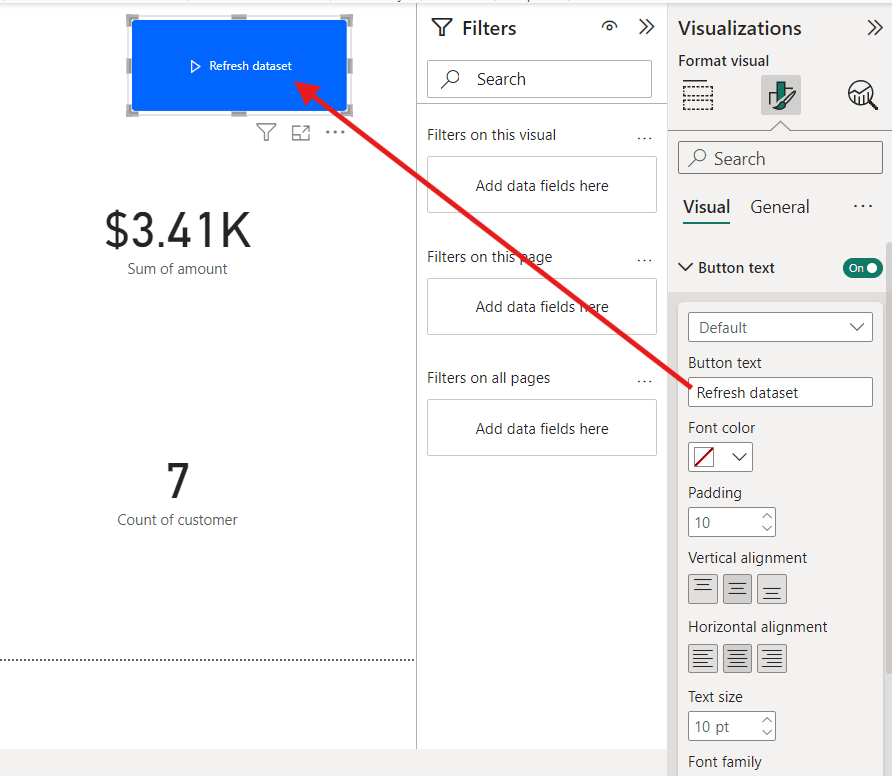
After that, you can click Back to report, and you will notice that the Power Automate visual changed to a Run flow button:

If you wish, you can change the button text in the Visualizations pane:
After that, publish your report to Power BI Service, and go to the semantic model settings. Navigate to Data source credentials and click Edit credentials:

The authentication process will vary depending on the data source used. For this example, since we are working with a file stored in a SharePoint Document Library, select OAuth2 as authentication method and click Sign in:

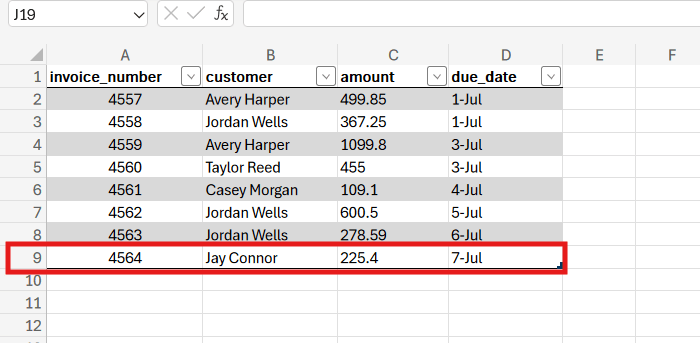
After signing in with your Microsoft credentials, everything is set for the refresh. Now, let’s test it by adding a new record to the Excel table:
Back in the Power BI report, click in the refresh button that you just added. The flow will run and update the data in Power BI Online:

Scenario 2: Data source refresh triggered by changes in Excel file
As mentioned earlier, for this second scenario we will start the automated flow by capturing any change in the Excel file that holds the invoice data. We are assuming that no users are interacting with the file in a regular basis and that any entries into the table are exclusively performed by an automated solution (to learn more about how to insert data in Excel tables with Power Automate, refer to this article).
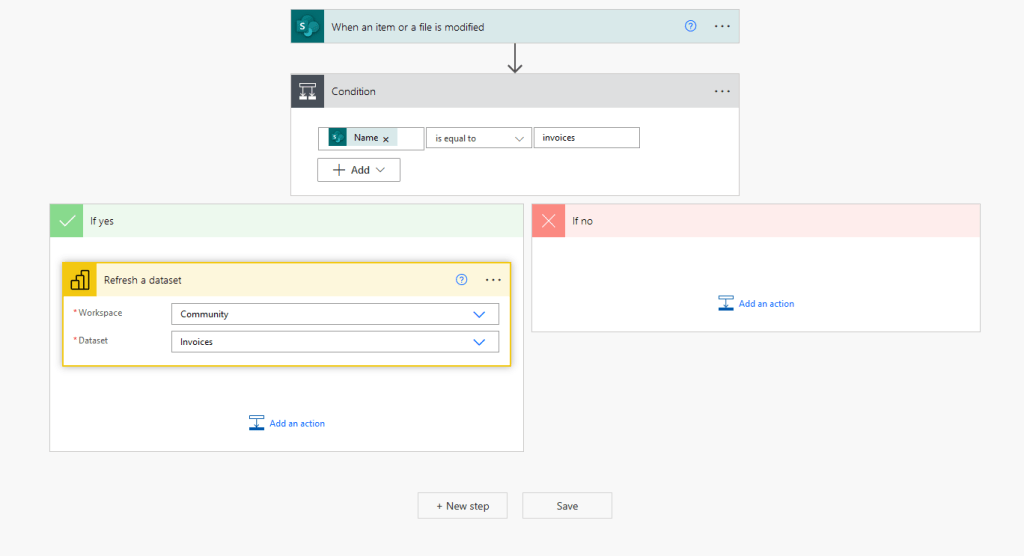
For this use case, we can use the same flow already created for the Scenario 1, by just removing its trigger (Power BI button clicked) and replacing it with the When an item or file is modified trigger (highlighted in red), from SharePoint connector:

Alternatively, you can create a new flow specifically for this scenario. In this case, choose Automated cloud flow when selecting the trigger type. Also, if your document is hosted on OneDrive, you can use the When a file is modified trigger.
After selecting the trigger, you need to configure it with the SharePoint Site, Document Library name and the folder where the Excel file is stored:

If you are using the SharePoint connector, the flow will monitor all modified files within the specified folder. As we need to focus on changes in a single file, we will need then to add a Condition (if you don’t know how to use conditions in Power Automate, check this article).
In the Condition, we will test if the modified file name matches to our specific Excel name (in this example, invoices.xlsx). To do this, select the Name dynamic content in the left input, set the dropdown to is equal to, and enter your Excel file name excluding the extension in the right input. As a last step, you just need to move the Refresh a dataset action to the If yes block of the Condition:
If you are working with a file hosted in OneDrive, you don’t need to add this condition, as the connector will capture only changes made to the specific file itself, rather than all files within a folder.
Let’s now test it by adding another row into the table:
After modifying the file, there may be a delay of some seconds or even a few minutes for the flow runs. In our case, it took around 10 seconds and the condition output was true, as the modified file name without extension matches invoices:

At the same time, the change was already visible in the Power BI report:

Conclusion
Integrating Power Automate with Power BI can significantly enhance how you manage and update your data. By leveraging Power Automate ability to trigger flows based on specific events, such as a button click in Power BI or modifications in an Excel file, you can ensure that your reports reflect the most current information with minimal manual intervention.
Also, understanding and implementing these automation strategies can greatly streamline your data management processes. Whether you are dealing with scheduled refreshes or event-driven triggers, Power Automate provides flexible solutions to keep your Power BI reports accurate and up-to-date.
