In general, the users are limited to working with tables when integrating Power Automate to Excel. However, in some cases, it’s necessary to write data to cells outside of tables, and Power Automate doesn’t have a built-in action to execute this task.
Fortunately, there is an action to run Office Scripts from Power Automate, which is a tool that brings a lot of flexibility when interacting with Excel spreadsheets. In this article, we will explore how to write data to specific cells and ranges in Excel using Power Automate.
There is also a video in our YouTube Channel about this same topic:
What is the Office Scripts?
Office Scripts is a feature in Excel that works similarly to a VBA for web, allowing users to automate tasks by writing scripts or recording actions. Differently from VBA, Office Scripts use TypeScript, a very popular programming language with a large and active online community.
Office Scripts also can be initialized from Power Automate, which allows the user to extend their automation capabilities for Excel spreadsheets beyond the default options. To learn more on how to get started with Office Scripts, refer to this article.
For real-world Office Scripts examples, you can also explore the templates available in the Office Scripts Gallery.
Use case overview
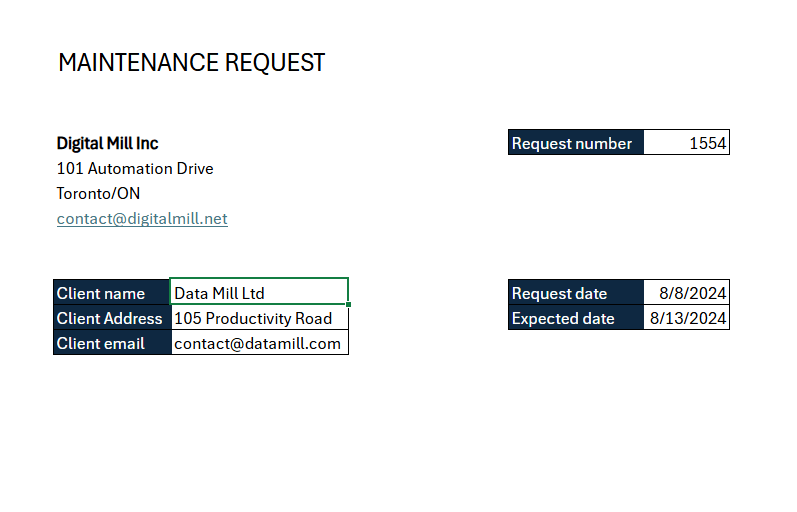
For this article, we will work with the header of a maintenance request Excel template, which looks like this:

The data to populate this template will be dynamically provided by Power Automate. Since none of the cells are formatted as a table, we will need to use Office Scripts to fill in the information.
Writing data into ranges
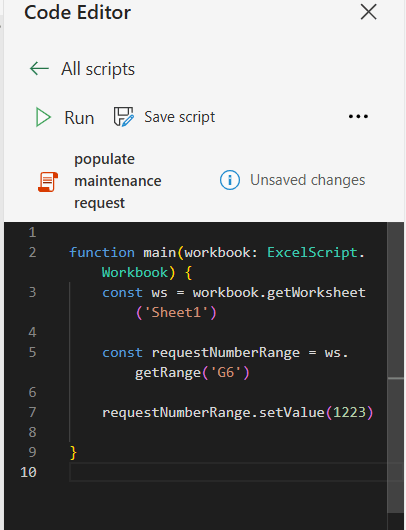
To get started, let’s open the Code Editor in Excel for Web (if you don’t know how to access the editor, refer to this article) and create an immutable variable to store the worksheet you’ll be working with by using the code const ws = workbook.getWorksheet(‘Sheet1’) inside the function main():

Make sure to insert the name of your worksheet between the parenthesis in getWorksheet(). Iin the example above, we are working with a worksheet named Sheet1. The ws variable will allow you to manipulate the worksheet and interact with any elements within it, like ranges, tables, charts and images. By just adding a dot after the ws variable, the autocompletion feature will provide examples of methods that can be executed for a worksheet:

To access a specific range, use the getRange() method and pass the range address within the parenthesis. For example, to access cell G6 and store its reference in a variable, we can use a code like const requestNumberRange = ws.getRange(‘G6’):

Similar to the worksheet, you can explore all methods and properties available for the requestNumberRange variable by just adding a dot after its name in a new line of code. One of the available options is the setValue() method, which writes to the cell any values that you pass between the parenthesis:
After executing the script, the value passed between the parenthesis will be inserted to the cell G6:

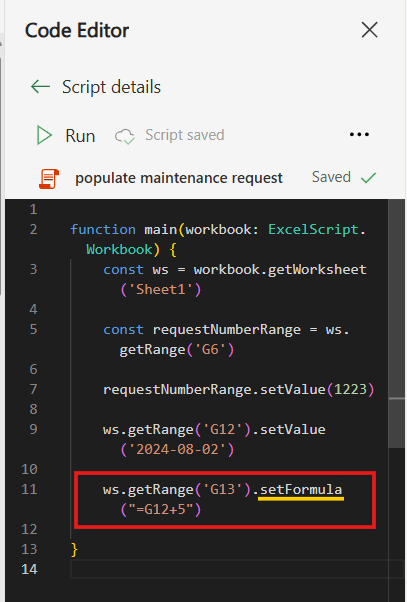
While using variables is a good practice in programming (you can learn more about variables in Office Scripts in this article), it’s also possible to add values directly to a cell from the worksheet reference by combining the getRange() and setValue() methods in the same command, like in the line 9 below, where we set a date value to the cell G12 (Request date):

Writing formulas into ranges
It’s also possible to set formulas to ranges with Office Scripts by using the setValue() method. For example, to set an Expected date, which value must be stored in cell G13 as 5 days after the Request date in G12, we can use the formula =G12+5:

Alternatively, you can also use the setFormula() method to achieve the same result:
Writing data to multiple cells
Another feature of Office Scripts is the ability to write data to several adjacent cells in a range. You can do it for ranges that contain cells from both different rows or columns, by adjusting the address passed as parameter to the getRange() method, like “A1:A3”, “B4:D6”, “A2:W50”, and so on.
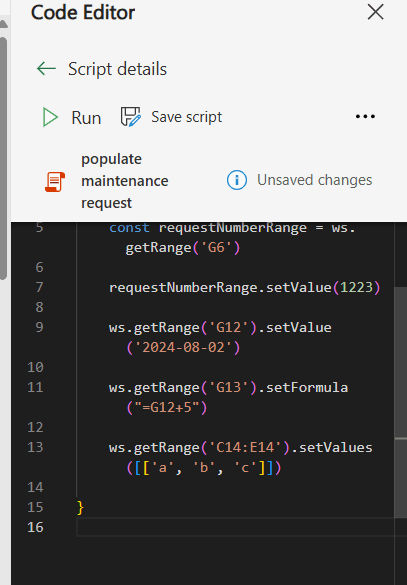
To achieve this, we will use the setValues() method (with the “s” at the end), passing an “array of arrays” as parameter. In this parameter, we will have an outer array representing the whole range, and each inner arrays representing a row in your spreadsheet. Ensure that the number of rows in your range matches the number of inner arrays (as each of them represents an individual row), and the number of columns matches the number of values inside each inner array.
For example, in the line code 13 below, we access the range C14:E14 and assigning the value of a, b and c to each cell in the range. As the range contains a single row, all values are allocated within a single inner array:
After running the code, this is the output:

For cells in different rows, we must allocate the values within separated inner arrays:

In the example above, since we are working only with cells in column C, each inner array contains only one element. This is the output after running the script:

Calling an Office Script from Power Automate
To send data from Power Automate to an Office Script, we first need to set up the parameters in the main() function (check this article for further reference on this process). For our use case, we will include one parameter for each field that needs to be filled, except for the Expected date, as this is a formula calculated on the Request date. We must also specify the data types from each argument, and all of them will be strings, except for the Request number, which will be a numeric value:

Next, replace the hardcoded values in the script for the function main() arguments:

Once you add the arguments to the function main(), the corresponding input fields will be generated in Power Automate Run script action:

You can either manually fill in the inputs or assign dynamic contents or expressions to it. After running the flow, the Excel file receives the data passed to the inputs in Power Automate:
Conclusion
In summary, integrating Power Automate with Office Scripts allows you to extend the Excel automation capabilities, even when dealing with ranges and cells outside of tables. Like VBA, Office Scripts can bring super-powers to your Excel spreadsheets, ensuring much more efficiency to your daily work.
