
Loops are a fundamental feature in programming languages that allow users to iterate over lists, arrays, and other data types. They are very useful for accessing individual items within these entities.
In Power Automate, loops play a vital role by enabling the efficient execution of repetitive tasks. In this blog post, we will delve into the power of loops in Power Automate and provide practical examples to help you harness their full potential.
Arrays in Power Automate
In Power Automate, arrays are data structures designed to store and manipulate multiple values of various data types. They serve as a way to group related data, simplifying the processing and execution of operations on the data as a cohesive unit.
New to Power Automate? Enroll now to our course at Udemy!
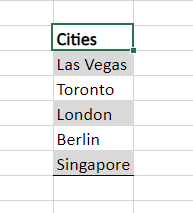
Think of an array as a “list” where you can store elements such as country names, location addresses, products, temperatures, and more. For instance, let’s consider the scenario of representing a list of cities in Power Automate:
One of the possible approaches is to assign this list to an array variable (if you want to learn more about how to work with variables, check this article):
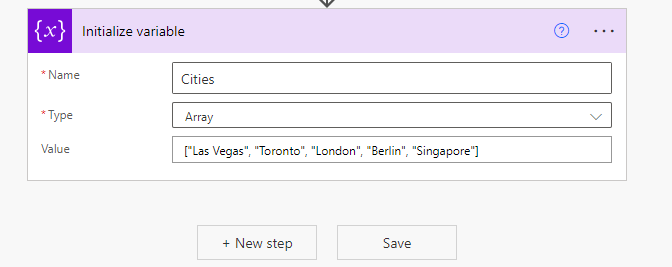
In Power Automate, arrays are denoted by square brackets at the beginning and end of the assigned value. Whenever you encounter values enclosed within “[]”, it indicates an array. Also, you may notice that we used quotes to delimit the name of each city: as these values are strings, we need to use the quotes to identify it.
One of the advantages of arrays is their ability to organize elements of different data types within the same list. In the example below, you can see a combination of string (highlighted in orange), integer (highlighted in yellow), Boolean (highlighted in green), float (highlighted in pink), and object (highlighted in blue) data types. This versatility allows for greater flexibility in handling and manipulating data within Power Automate:

You can even store other arrays inside an array! And arrays inside arrays that are inside (guess what..) other arrays. It is possible to have how many nested arrays you want:

By checking the raw inputs of this variable (if you don’t know how to access the raw inputs/outputs of an action, check this post), it is easier to identify how many nested arrays do we have:

In summary, arrays offer a wide range of possibilities, acting as lists with the valuable feature of accessing and performing actions on individual elements.
Accessing elements from array in Power Automate
In Power Automate, there are two methods to access array elements: expressions and loops. Expressions allow you to retrieve specific elements from the array, such as the first, second, last, or Nth ( specific positioned) element. This provides precise control over the data you want to work with.
On the other hand, loops allow you to iterate through multiple elements of an array and perform tasks on each of them. Whether it’s running through a subset or all the elements, loops provide a powerful mechanism to efficiently process and handle arrays. With these two approaches, you have the flexibility to access and manipulate array elements according to your specific requirements.
Accessing the first element of an array in Power Automate
In Power Automate, expressions play a significant role in performing tasks efficiently. When working with arrays, expressions come in handy for accessing specific elements based on their position. Taking our city list variable as an example (with elements: “Las Vegas,” “Toronto,” “London,” “Berlin,” and “Singapore”), we can utilize the first() expression to retrieve the first element, which, in this case, is “Las Vegas.”

Note : To reference the variable holding the city list (“variables(‘Cities’)”), named “Cities,” you can simply click on “Dynamic content” and select “Cities” from the available options (for more instructions on how to work with dynamic content in Power Automate, refer to this article). This way, you don’t need to manually type the reference for each expression, as the system will generate it automatically.
The expression is simple: you just need to pass the array inside the parenthesis, and it will return the first element of it:

Accessing the last element of an array in Power Automate
Very similarly to the first one, you can access the last item of an array by using the last() expression. The syntax is the same of first():

As expected, the value assigned to ‘last_city’ variable with the last() expression is ‘Singapore’:

Indexes and accessing the Nth element of an array in Power Automate
In Power Automate, accessing specific elements from an array is not limited to just the first and last elements. You can access any element by providing its index, which represents its position within the array.
To access an element by its index, simply use square brackets with the desired index after the array as an expression. However, you need to be very careful: Power Automate follows zero-indexing, meaning the counting of array elements starts at zero. For instance, to access the first element, you would use ‘[0]’ as the index. Similarly, to access the fifth element, you would use ‘[4]’ as the index. Take care to adjust the index accordingly to retrieve the desired element accurately.
To access “London”, the third element in the cities list, we will need to use the following expression (referencing the index ‘2’):

And the output:

As you may expect, we can dynamically insert the index of the expression by retrieving it from previous actions, as long as the value is an integer. For instance, we can include the value of ‘N’ from a variable, assuming it holds the integer value of 3 (as integer):


Note: the complete expression used in the image above is: variables(‘Cities’)[variables(‘index_integer’)].
As the variable ‘index_integer’ has a value of 3, the city assigned to ‘forth_ciyt_by_index’ will be ‘Berlin’ (the 4th item from the cities array).
Looping arrays in Power Automate with Apply to Each
In Power Automate, loops provide a way to access and perform tasks on each element of an array until a specific condition is met. There are two types of loops available: ‘Apply to each’ and ‘Do until’.
The ‘Apply to each’ loop is ideal when you need to iterate through all the array elements. It requires only one input: the array itself (highlighted in yellow). Within the loop, you can add actions that will be performed for each item individually. It’s important to note that only actions placed within the loop block will be executed during each iteration (highlighted in green), while any actions outside the loop block will be executed after the loop concludes (highlighted in blue).

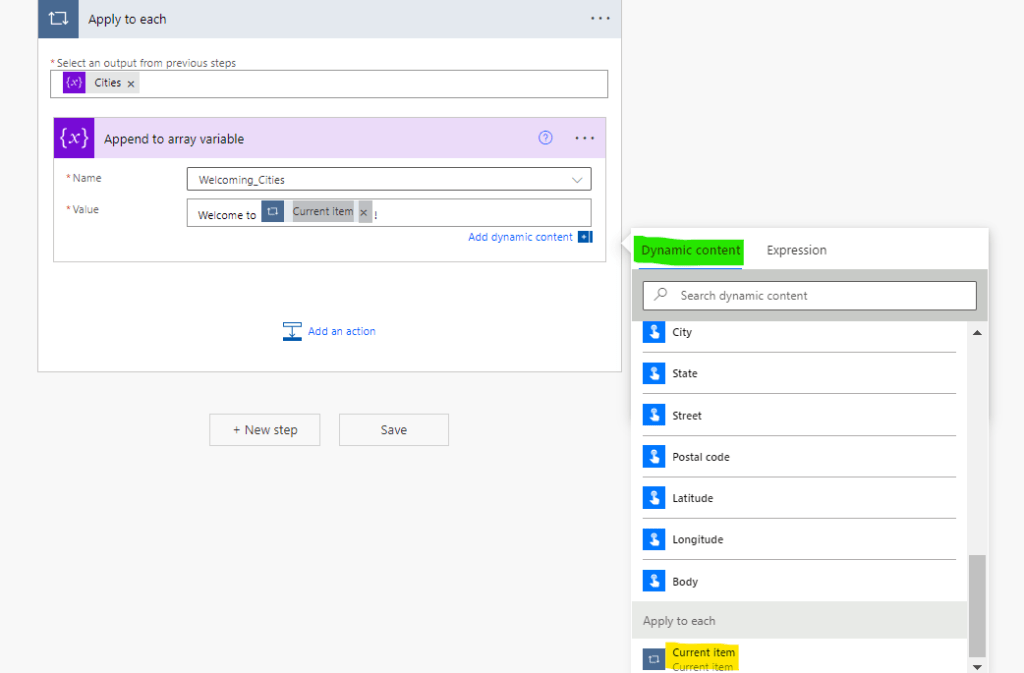
When working inside the loop, you can easily reference the current element of the array. To achieve this, you can dynamically select the ‘Current item’ from the available options in the dynamic content box:
Or you can just use the expression item():

In our example, we will iterate through all the elements of the ‘Cities’ variable (highlighted in yellow), utilize them in a template text (highlighted in green), and append them to another array named ‘Welcoming_Cities’ (highlighted in blue), which starts off empty:

We are using the ‘Append to array variable’ action to insert new items to ‘Welcoming_Cities’ array: if you don’t know how to use this action, check our article about how to work with variables in Power Automate.
The text structure follows a pattern of ‘Welcome to [city name]’ where [city name] represents each element from our ‘Cities’ array. As a result, the output in the ‘Welcoming_Cities’ array will consist of strings such as ‘Welcome to Las Vegas!’, ‘Welcome to Toronto!’, and so on. This list will contain welcoming messages specific to each city within the array:

Note: we have included a ‘Compose’ action solely to explicitly display the output of the ‘Welcoming_Cities’ variable. It is important to note that using this action is not necessary for array manipulation. Its purpose in this context is solely to showcase the result of our loop operation.
Looping arrays in Power Automate with Do Until
The ‘Do until’ action serves a distinct purpose compared to the ‘Apply to each’ loop. It allows the loop actions to be executed repeatedly as long as a specified condition (or a set of conditions) remains false. Once the condition becomes true, the loop terminates. This loop is not limited to arrays and can be utilized for other tasks that require repetitive execution for an unknown number of iterations.
A common approach for iterating arrays using the ‘Do until’ loop involves creating a numeric variable to act as a ‘counter.’ The loop continues to run until this counter reaches a specific value. We will replicate this strategy here:

In the provided image, the ‘counter’ variable is initialized with a value of 1 (highlighted in pink). Inside the ‘Do until’ loop, you specify the condition that needs to be tracked. The loop will continue until this condition evaluates to true. In our example, the condition is defined as the ‘counter’ variable (highlighted in green) being greater or equal than the length of the ‘Cities’ array (highlighted in yellow). Once the ‘counter’ value becomes equal to or greater than the length of the array, the condition is satisfied, and the loop terminates. The length of the ‘Cities’ array (highlighted in blue) is obtained using the expression: length(variables(‘Cities’)).
Within the ‘Do until’ block, we will again append a text as element to the ‘Welcoming_Cities’ variable. However, this time, we won’t use the current item as a dynamic value. Instead, we will use an expression (highlighted in blue), combining the ‘Cities’ variable (highlighted in green) with a dynamic index represented by the ‘counter’ variable (highlighted in yellow), enclosed in square brackets. The expression will be variables(‘Cities’)[variables(‘counter’)]. The objective is to access the items from the ‘Cities’ variable by utilizing the ‘counter’ variable, which changes in each iteration of the loop. Initially, it represents variables(‘Cities’)[1], then variables(‘Cities’)[2], and so on.
To ensure that each loop iteration accesses a different array element, we need to increment the ‘counter’ variable within the loop (highlighted in pink). Without this increment, we would continuously access the same array item. By dynamically changing the ‘counter’ variable, we can systematically access and manipulate each element of the ‘Cities’ array, making our loop operation more effective and versatile.

The outputs will look like this:

What’s happening here? The ‘Do until’ loop began mapping all elements starting from index 1 because that value was initially assigned to the ‘counter’ variable. Since arrays in Power Automate are zero-indexed, the loop started from the second element, which corresponds to variables(‘Cities’)[1], representing Toronto.
To control the loop, we set the ‘stop condition’ as the ‘counter’ variable being equal to or greater than the length of the ‘Cities’ variable, which is 5. Consequently, all cities except for Las Vegas (the first one, with index corresponding to 0) were added to the ‘Welcoming_Cities’ variable during the loop iterations.
Conclusion
Arrays play a crucial role in Power Automate as they enable the handling of data returned by various connectors. When working with SharePoint Lists, Excel tables, and other data storage tools, arrays become essential for reading records and extracting valuable information.
Moreover, leveraging arrays enhances workflow efficiency. Power Automate can seamlessly perform tasks on all items within an array, enabling actions such as populating documents, conducting calculations, updating records, and much more. This capability empowers users to automate repetitive processes and streamline their operations, ultimately boosting productivity and effectiveness in Power Automate workflows.
